Harbor is a multi-user docker registry with a web UI available at hub.cerit.io. The main advantage of having our own registry as opposed to using e.g. hub.docker.io is that we can offer unlimited private repositories to our users and thus they can create as many docker images as they want without publicly exposing them to the world.
Each user has their personal project with a 100 GB limit for artifact storage and an unlimited number of artifacts. Harbor can be used to store Docker images and Helm charts. The web UI allows users to delete artifacts and repositories to reclaim space (deletion can take up to 24 hours).
If needed, an administrator can create a shared project for a group of users that need to work together.
‼️ WARNING ‼️
Even though you have your own project and no one else can see your images, the Kubernetes cluster can access all images in all projects!
Your images are therefore accessible by all users of Kubernetes (if they know or correctly guess your image name). So do NOT include any passwords or sensitive information in your image, it can still be accessed by other users.
Logging in
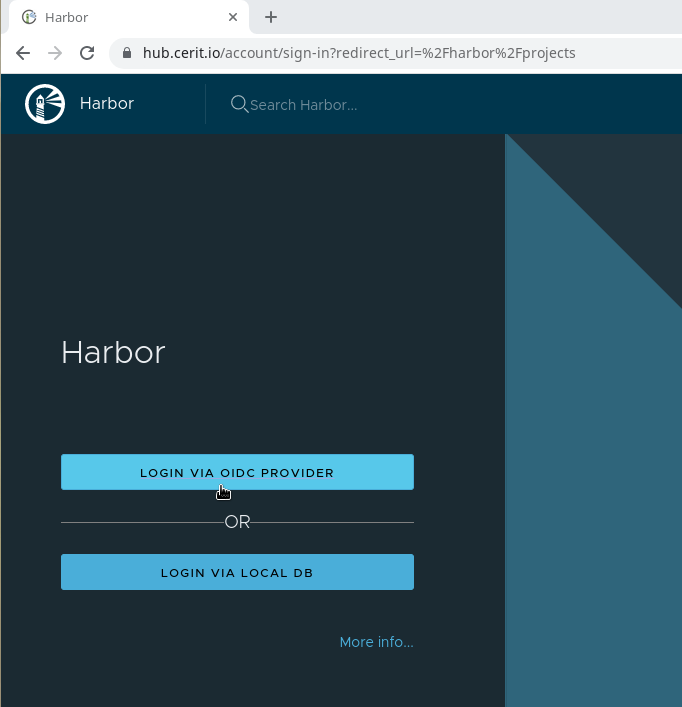
Harbor uses e-infra single sign-on functionality, so you can easily log into this service with your Masaryk University account with the depicted log-in button.
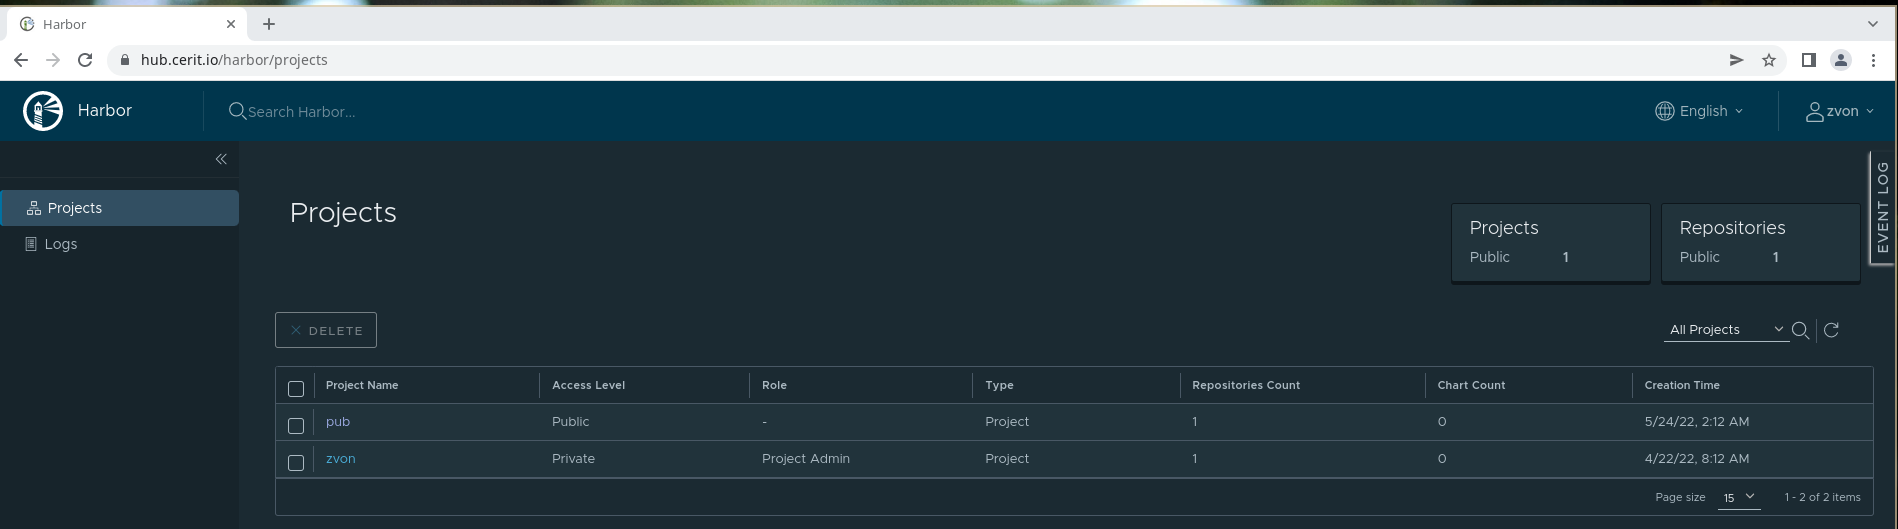
Once logged in, you will see all projects that you are a part of or are public. By default each user gets a single project that named using the user’s username.
Logging in through command line
To push Docker images (or Helm charts) into Harbor, you will need to use command line. Since single sign-on cannot be accessed through the terminal, you will need to log in using a secret which was generated at your first log-in.
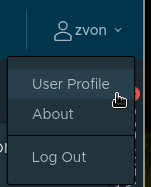
You can find this secret inside your User Profile which can be accessed by clicking on your username in the upper right corner.
In your user profile you will see an entry called “CLI secret”, this is the password you will use to log into your account via command line. You can copy this password by clicking the copy icon next to it.
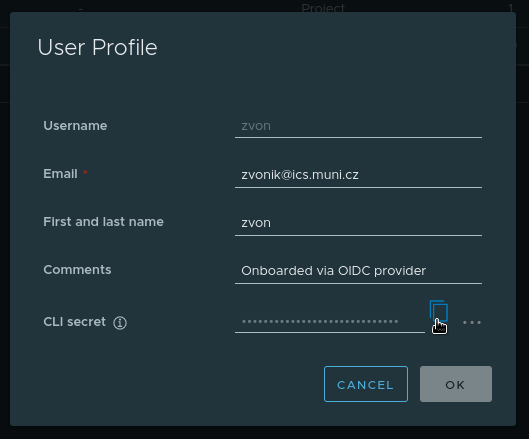
If you wish, you can also regenerate your password or set a custom one by clicking the 3 dots next to the copy icon.
Now that you have your password, you can log into your account. Our Harbor
instance is available through 2 URLs - hub.cerit.io and cerit.io you
can choose which one you want to log into (or you can log into both). Run
the following command, enter your username (also seen in your User Profile) and password and that is all.
docker login cerit.io
Pushing image to Harbor
Creating Docker images is a complex topic beyond the scope of this article.
To test push functionality we will use a very simple image that doesn’t do
much. If you don’t have an existing image, you can save the following text
into a file called Dockerfile.
FROM ubuntu
RUN apt update && apt install -y wget \
    && wget 'https://raw.githubusercontent.com/dylanaraps/pfetch/master/pfetch' \
    && chmod +x pfetch && mv pfetch /usr/bin
CMD /usr/bin/pfetch
In the same directory that you have your Dockerfile, run the following
command: docker build -t cerit.io/$USER/tutorial:v0.1 . (replace $USER
with your Harbor username, without any capital letters) (choose cerit.io or hub.cerit.io at the
start of the image name based on which name you used in docker login
step)
Now you have an image called cerit.io/$USER/tutorial:v0.1 on your
computer and can push it into Harbor with the following command:
docker push cerit.io/$USER/tutorial:v0.1
To present what it looks like when multiple tags are present for an image, we will modify the Dockerfile slightly:
FROM ubuntu
RUN apt update && apt install -y wget \
    && wget 'https://raw.githubusercontent.com/dylanaraps/pfetch/master/pfetch' \
    && chmod +x pfetch && mv pfetch /usr/bin
CMD PF_ASCII="opensuse" /usr/bin/pfetch
Now build and push the image, only change the :v0.1 to :v0.2 at the end of the image.
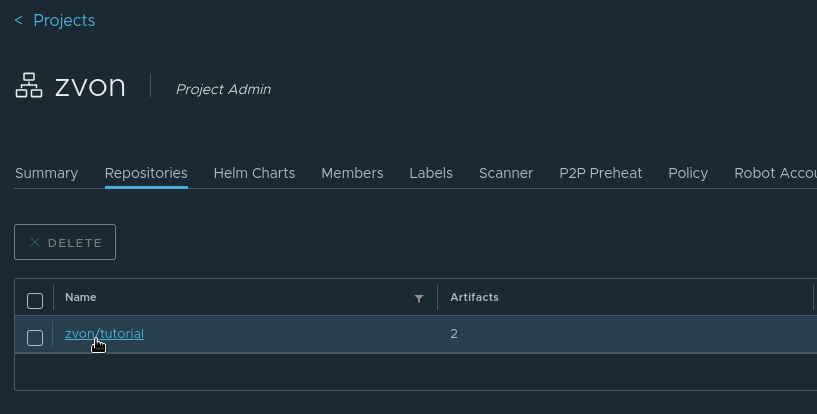
If you pushed your image successfully, you should see it in your project like so:
Managing your repository (Docker image)
When you click on your repository’s name, you will see all artifacts associated with the repository (these represent the different builds of your image)
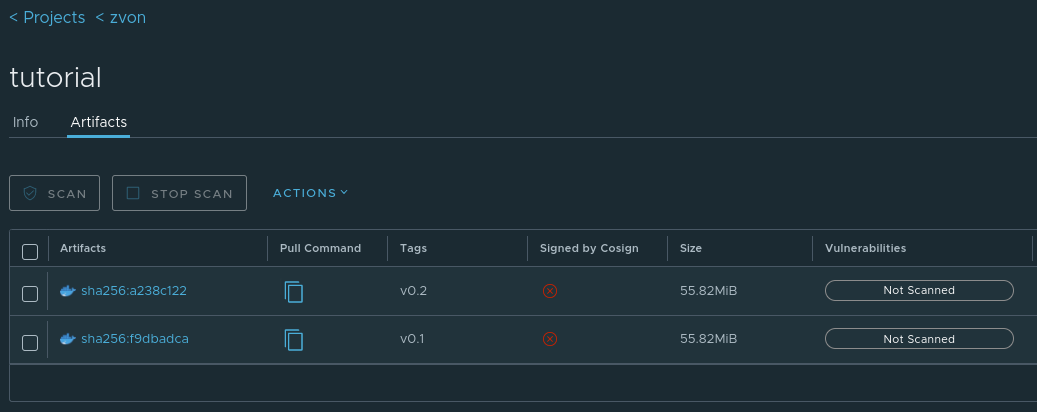
On this page you can select an artifact and e.g. copy it to a different
repository or delete it to free up some space (both of these operations
are available through the ACTIONS button).
Please note that by deleting an artifact you won’t necessarily free up all
the space it reports in Size, artifacts can share so called layers. In our case we have made 2 image builds that only differ in the last command
of the Dockerfile. Everything done before the last command is shared
between the 2 artifacts, so by deleting one or the other we will only free
up a few kilobytes of space.
Please also note, that deleting an artifact won’t free up space immediately,
determining whether a layer is referenced by some artifact is an
expensive operation and is run only once per day at midnight.
By clicking on an artifact’s name we can see more detailed information (e.g. architecture, config and Build History). In this overview we can also scan for vulnerabilities.
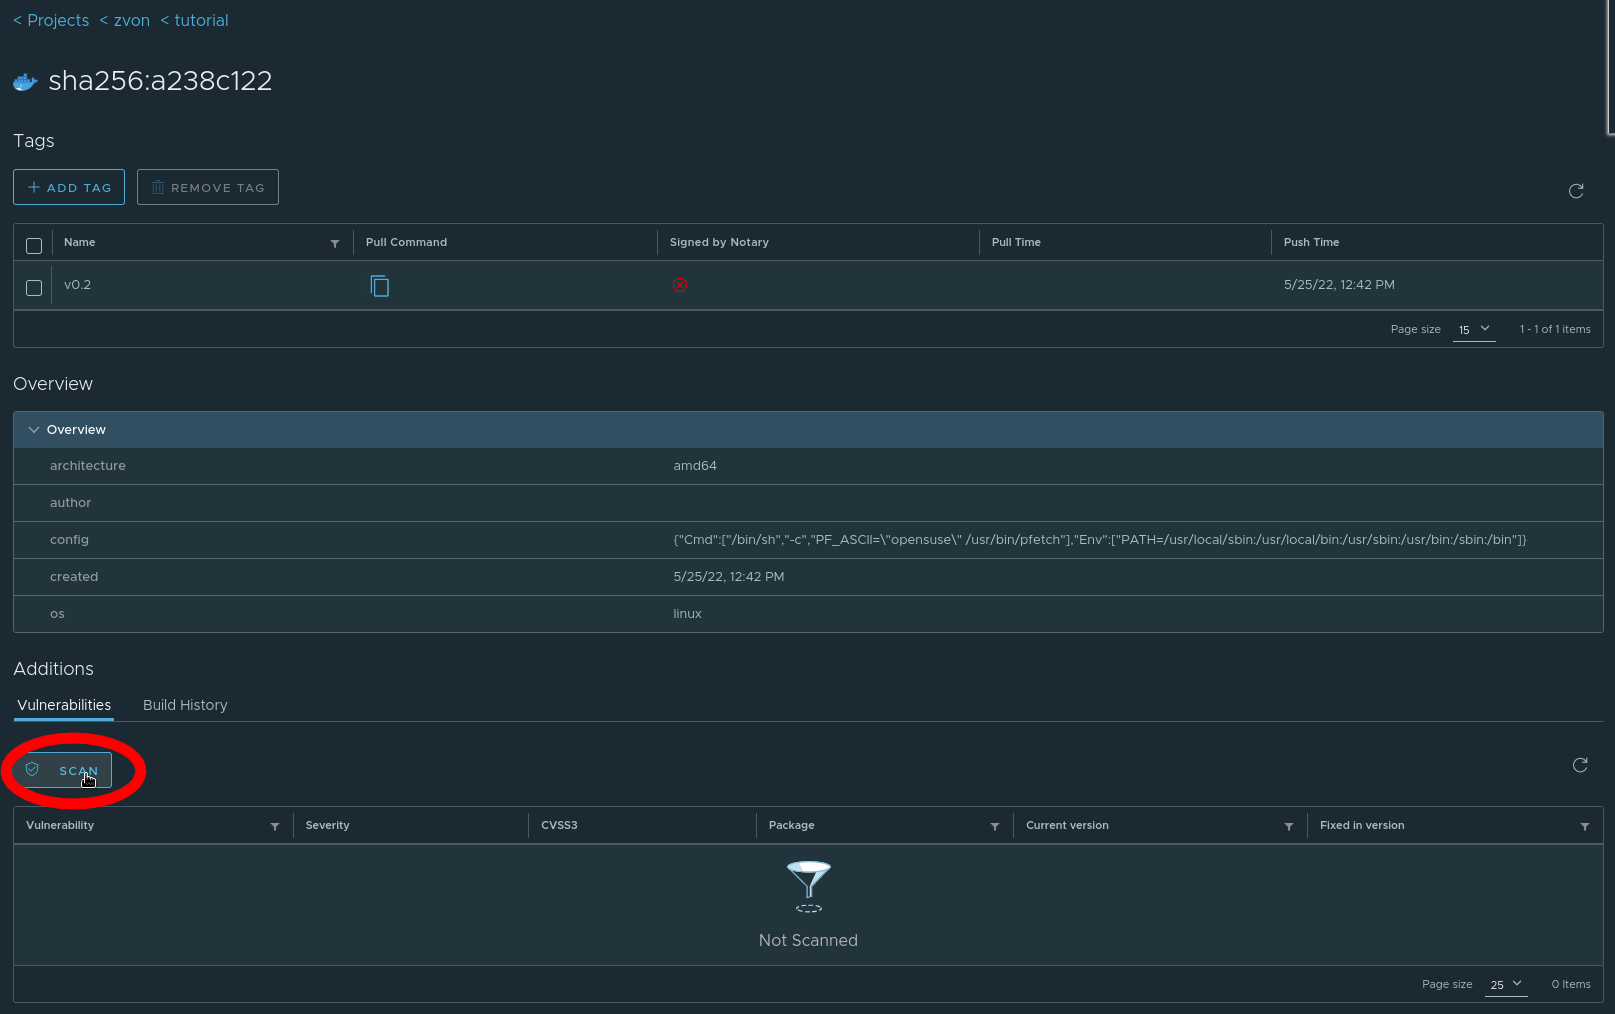
Vulnerability scan will determine whether our image contains any known
vulnerabilities and if we can fix them by changing our base image (the image in the FROM command in Dockerfile). My vulnerability scan produced the following results:
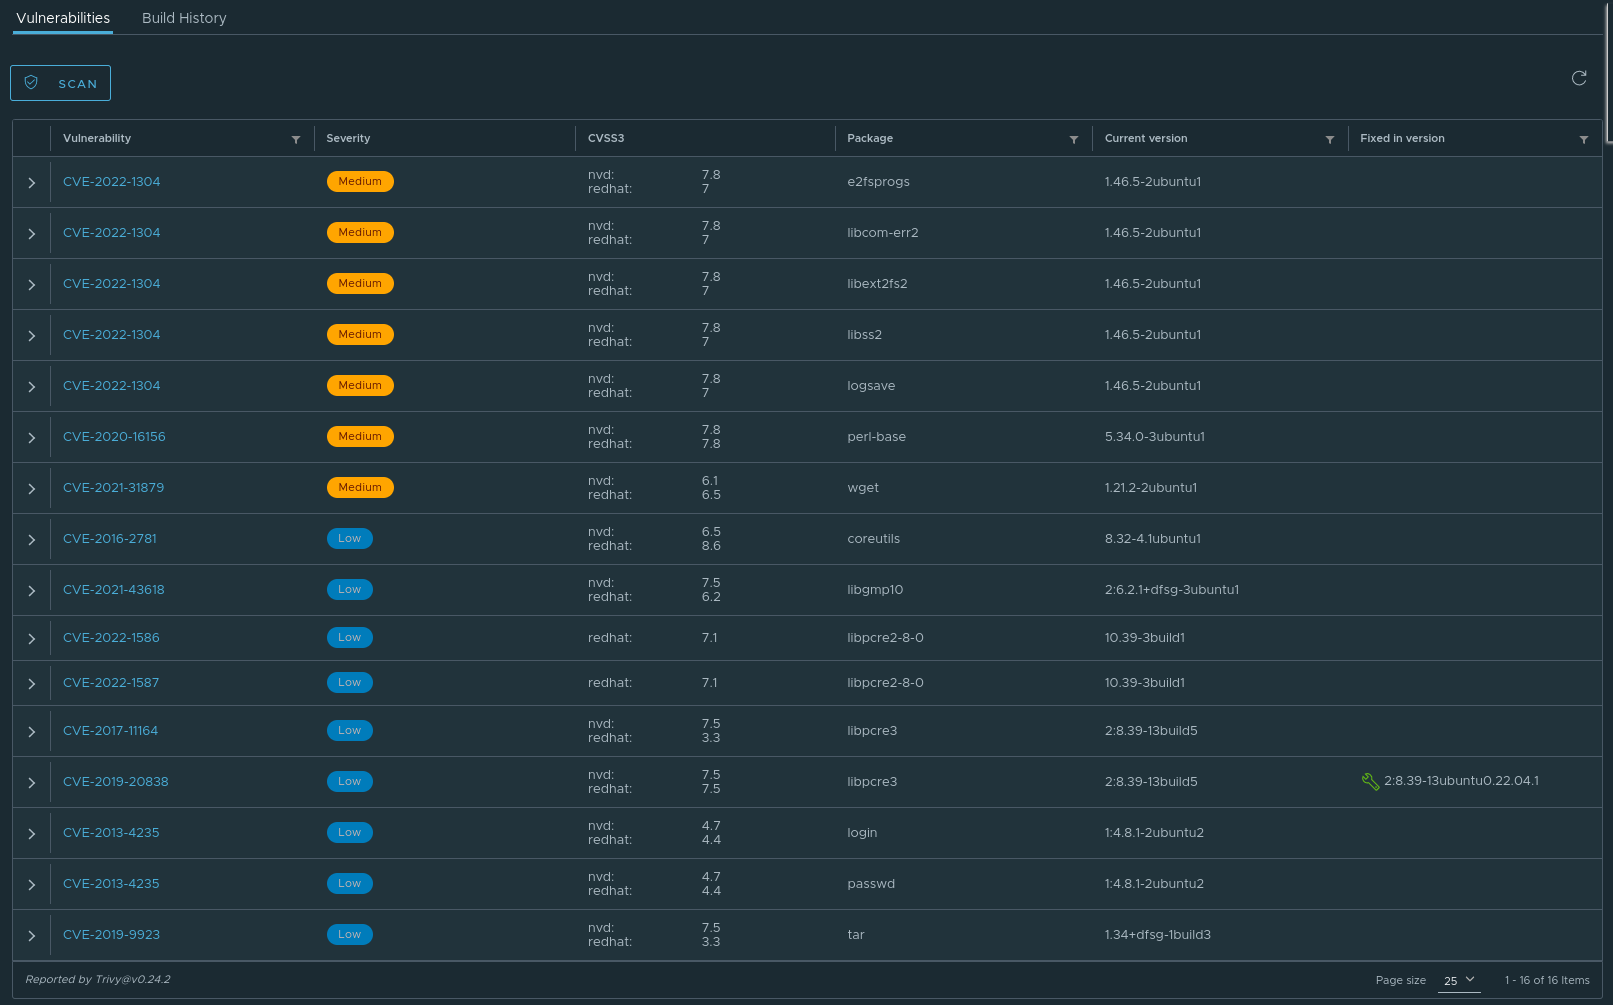
We can see that in my image there are some vulnerabilities with low and medium severity. I could also fix one of the vulnerabilities by using a newer version of the ubuntu image. By clicking on the vulnerabilities we can see their description and determine whether they will have an effect on our image. Since all our image does is print some system information, the vulnerabilities aren’t really a concern.
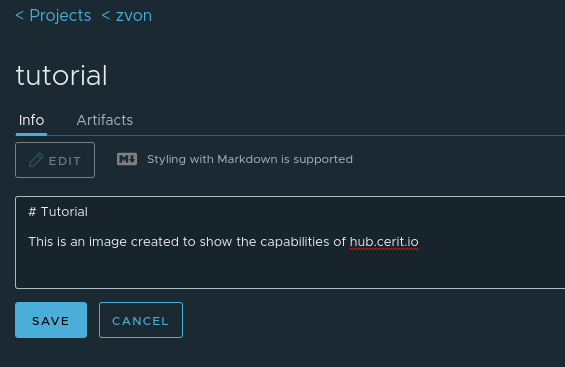
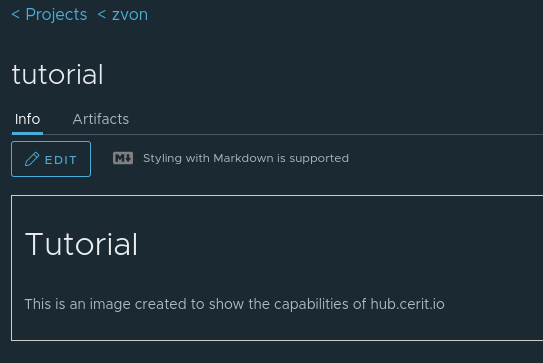
Repository Info
Back in the repository overview we can see a tab called Info, if we
wish we can add some information about the image. This can be useful in
a public project so people can tell what the image actually does. The
information is formatted using the markdown language.