Running personal Minio Server
If not already logged, log to rancher.cloud.e-infra.cz, see Rancher section.
Following the steps below, you can run personal Minio server application. This application is meant to expose or upload data to another running application that using persistent volume claim. Data transfer can be done via Web interface – using only a web browser or via S3 protocol (this is not related to Amazon AWS, it is just their protocol to access our data).
Notes
- Important prerequisite: application pod needs to use PVC in order to Minio server can access data from the pod. If no PVC is used, no data access is possible.
- For most applications here it is possible to select persistent home which implies using PVC.
Check your Application
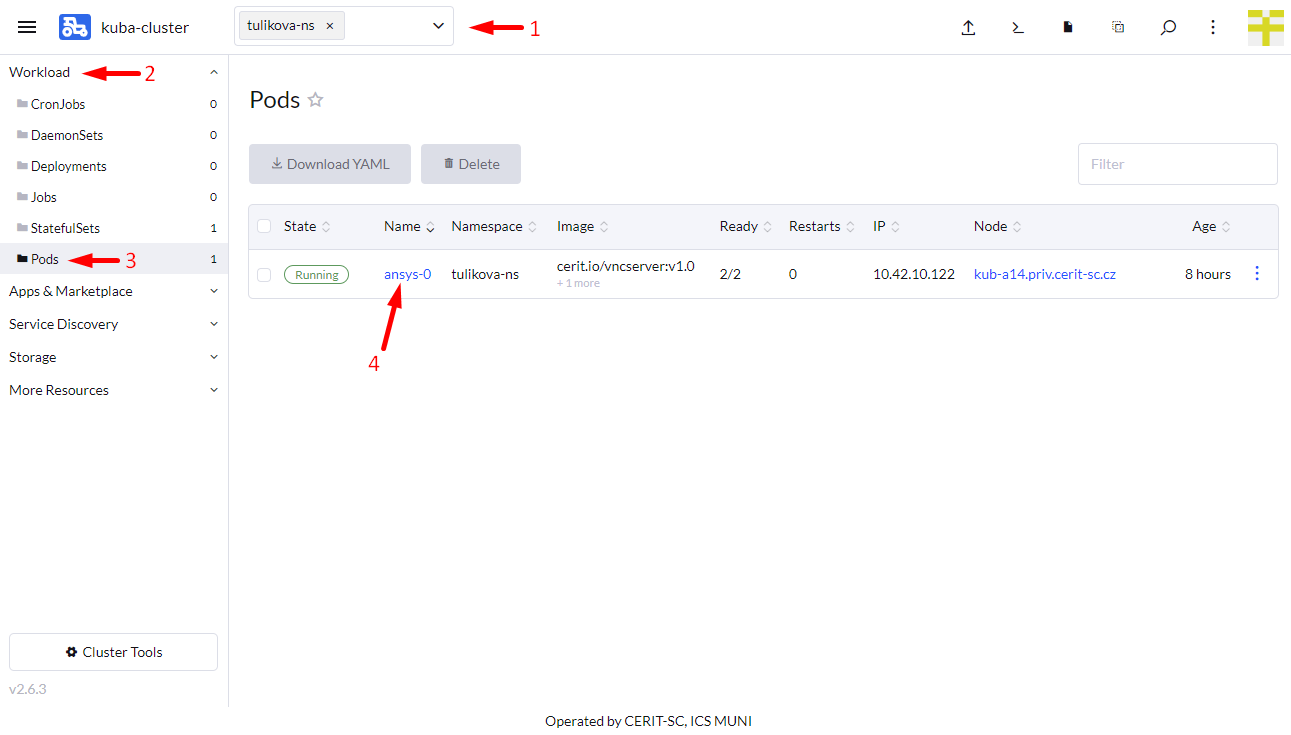
Select your Namespace (1) (remember this Namespace, you must select the same Namespace when installing Minio below), navigate through Workload (2), Pods (3), and name of the application (4), e.g., ansys-0 – click on the name. See screenshot below.
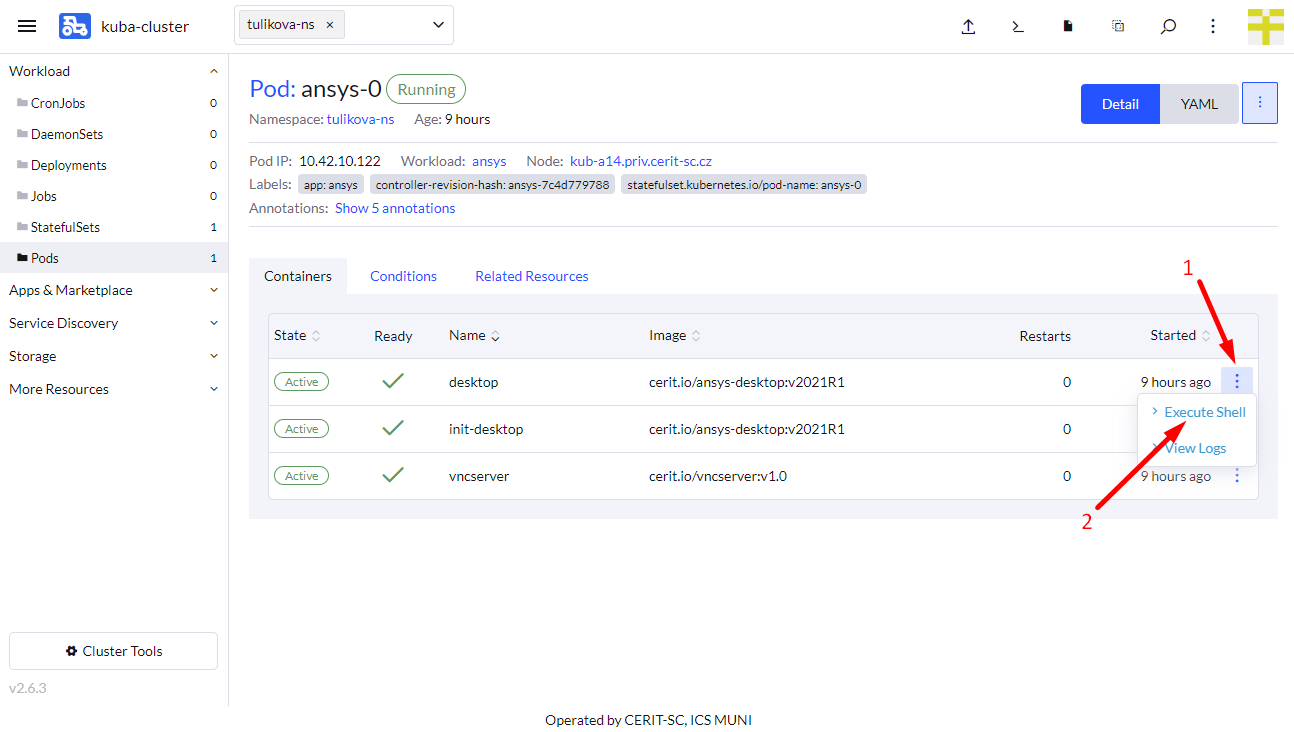
Click on vertical dots (1) and select Execute Shell (2).
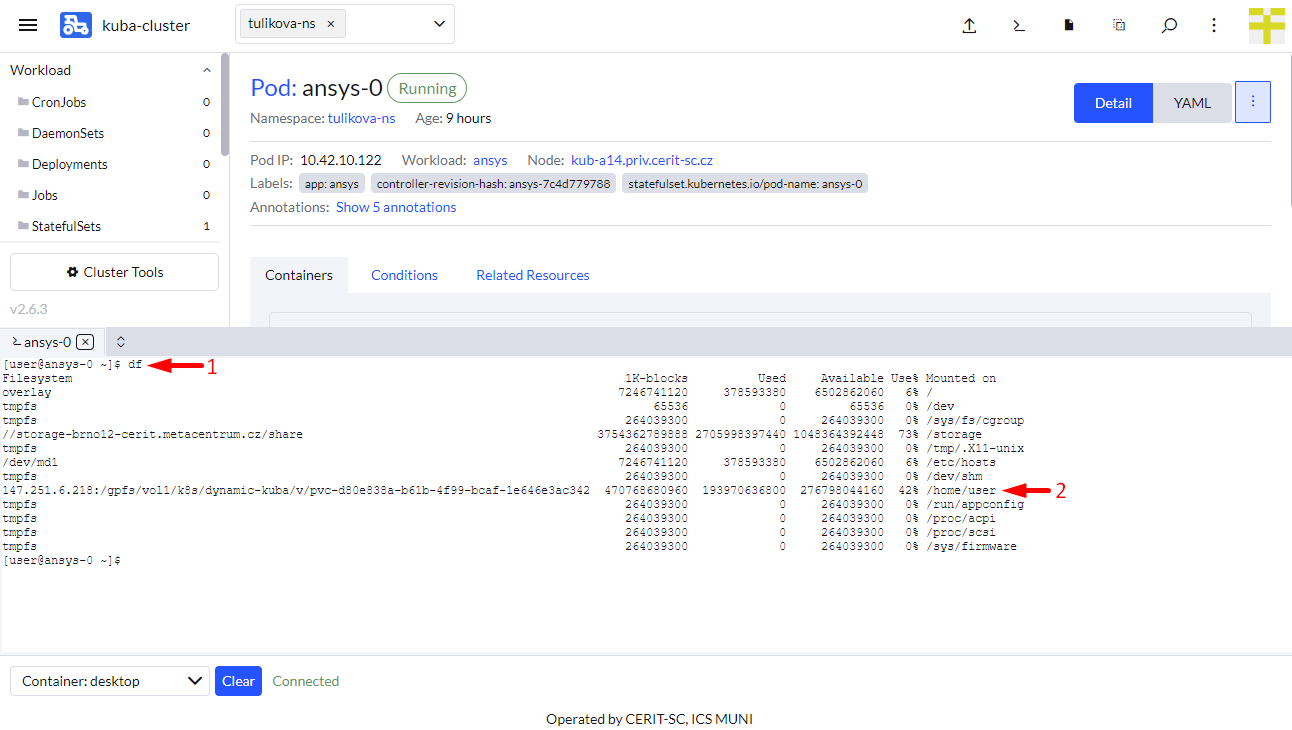
Issue df command in the new terminal area (1) and check you see some remote file system connected to home (2) or somewhere else.
Select Application to Run
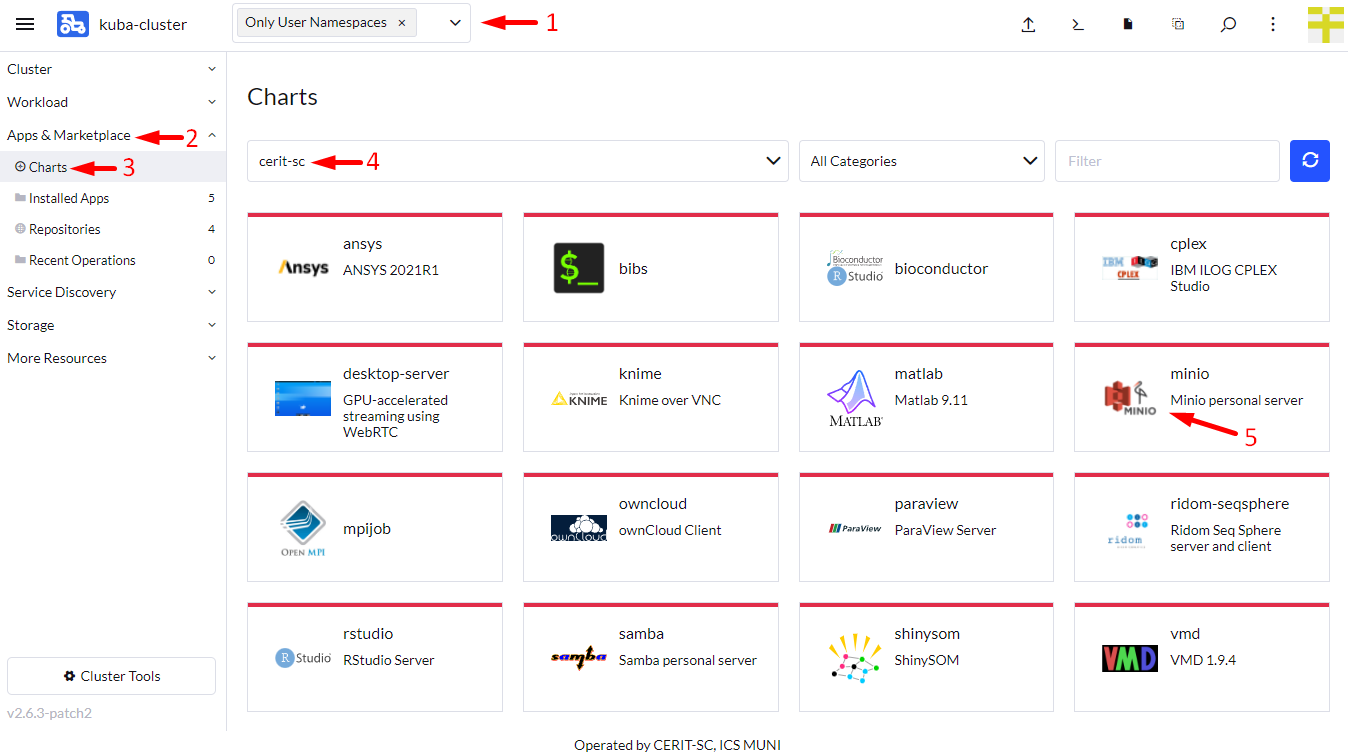
Ensure, you did not select any namespace and see Only User Namespaces (1) at the top of the Rancher page.
Navigate through App & Marketplace (2), Charts (3), limit charts only to cerit-sc (4) and select ownCloud (5). See screenshot below.
Select Version of the Application
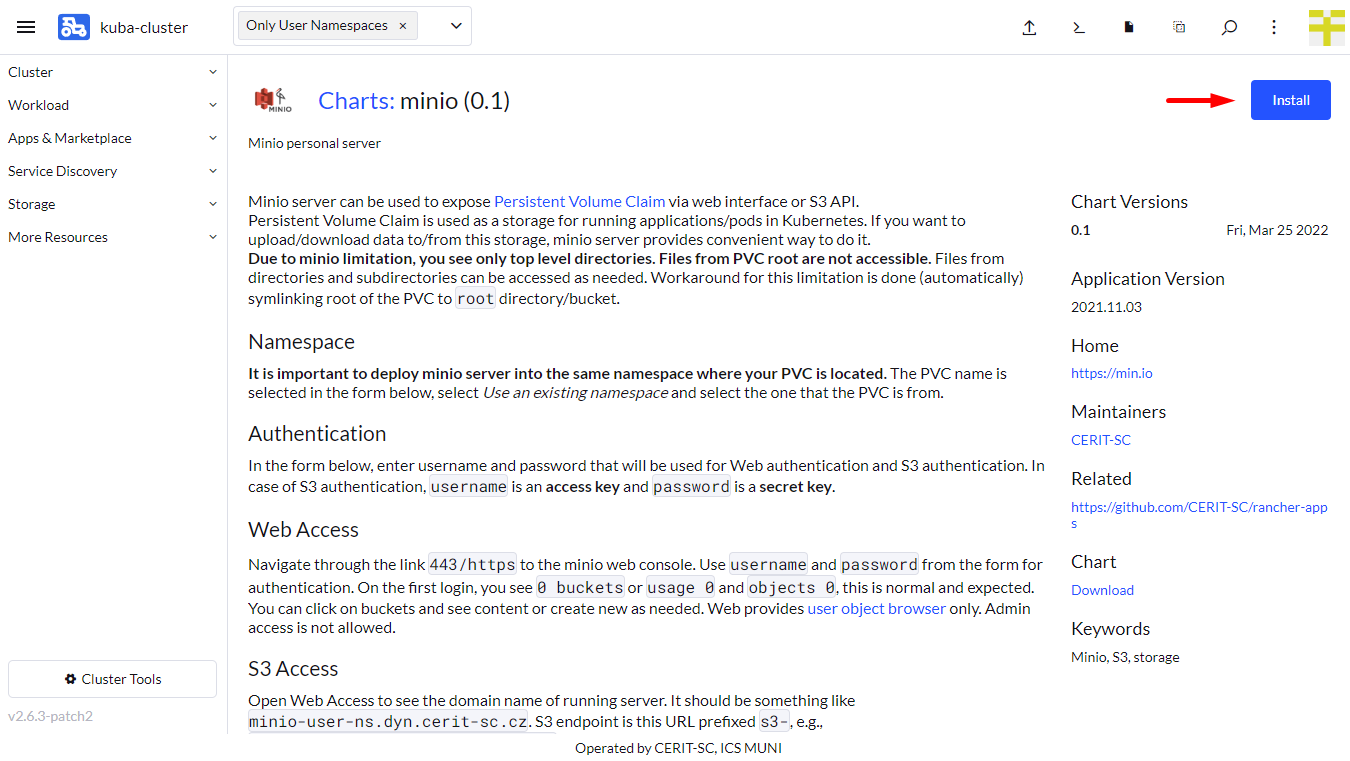
When you click on the chart, hit Install to continue.
Install the Application
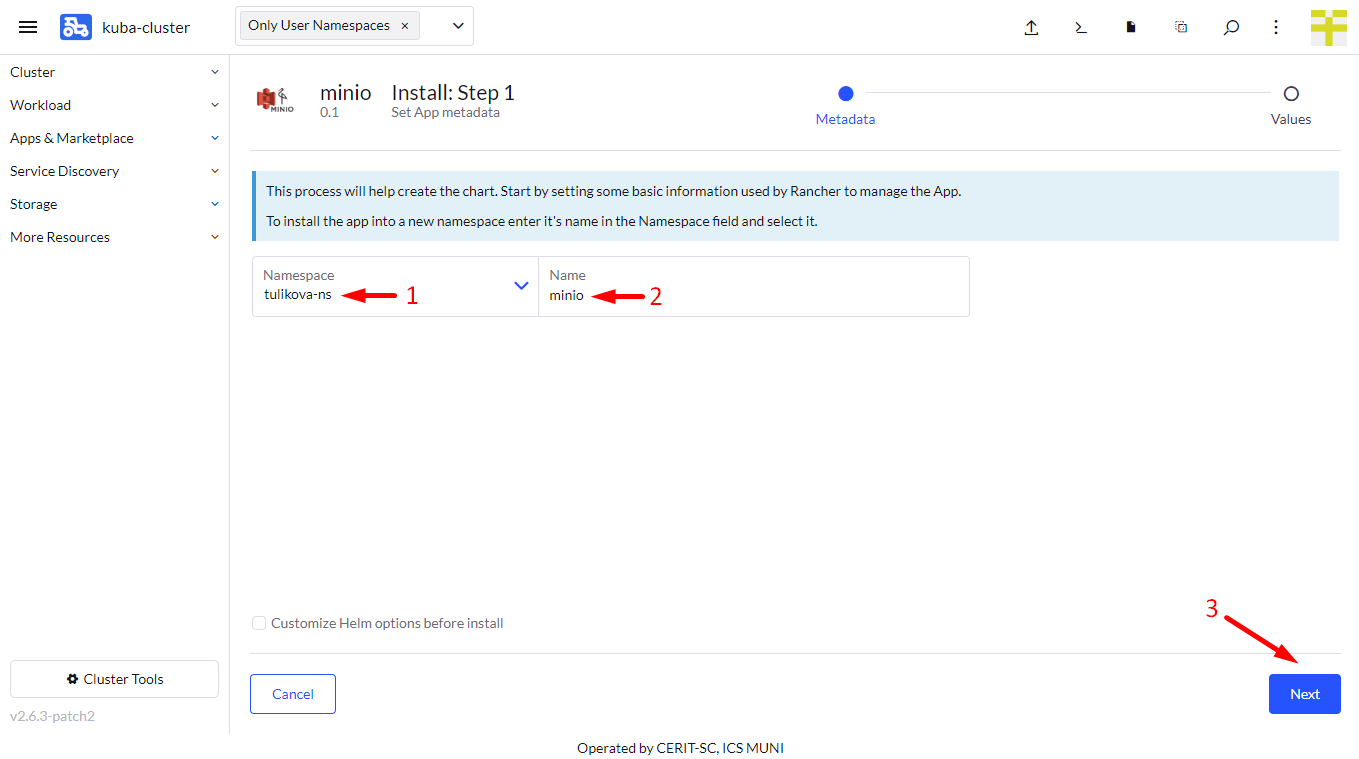
Now you can install the Minio application. In most cases, keep both Namespace (1) and Name (2) intact, however, you must select the same Namespace where the pod for data transfer is running. The Name will be in URL to access the application. The Name must be unique in the Namespace, i.e., you cannot run two or more instances with the same Name in the same Namespace.
In the first part of the form, you set Minio username and password. These credentials are used for both Web access and S3 access.

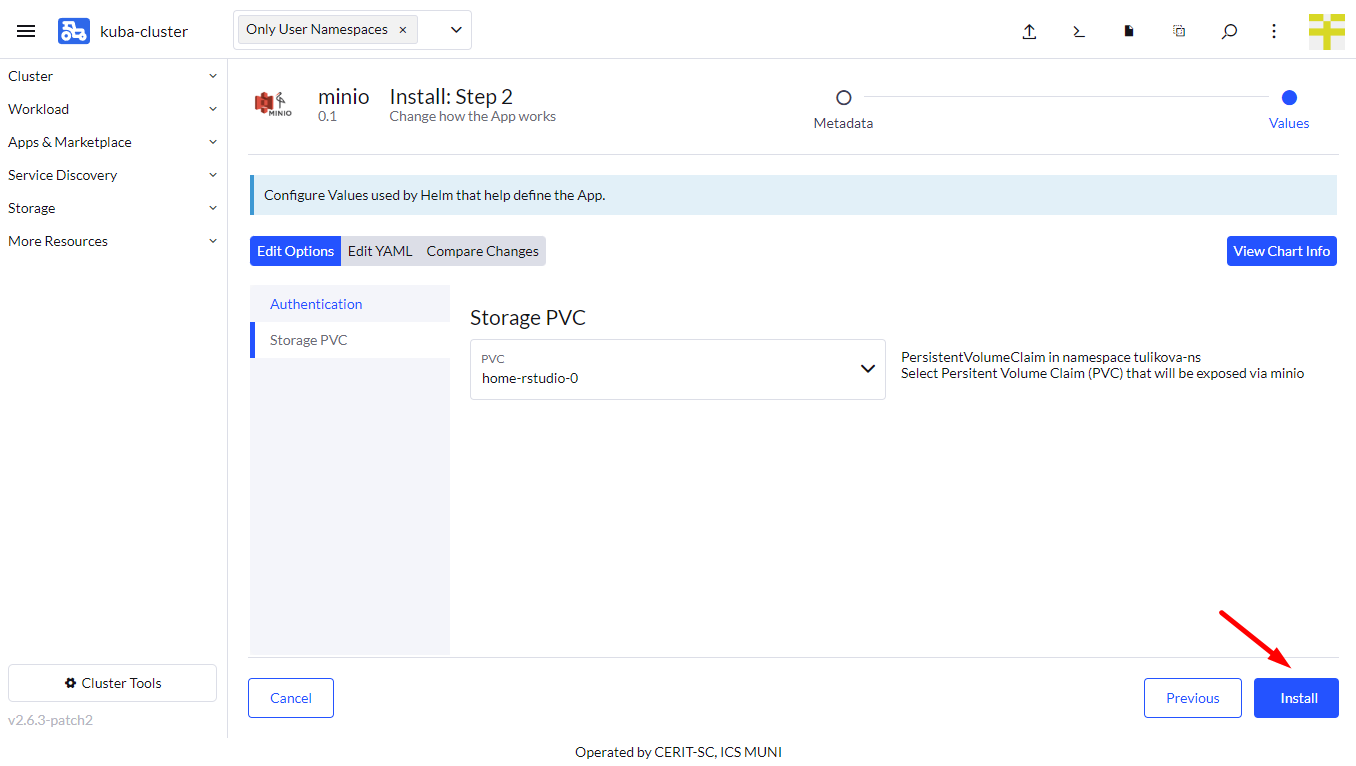
In the second part of the form, you select PVC (Persistent Volume Claim), i.e., persistent volume you want to expose or upload to using Minio personal server. It is meant to be existing volume from another application already running in the same Namespace and using e.g., Persistent Home.
Once you selected proper PVC, hit Install.
Wait for Application to Start
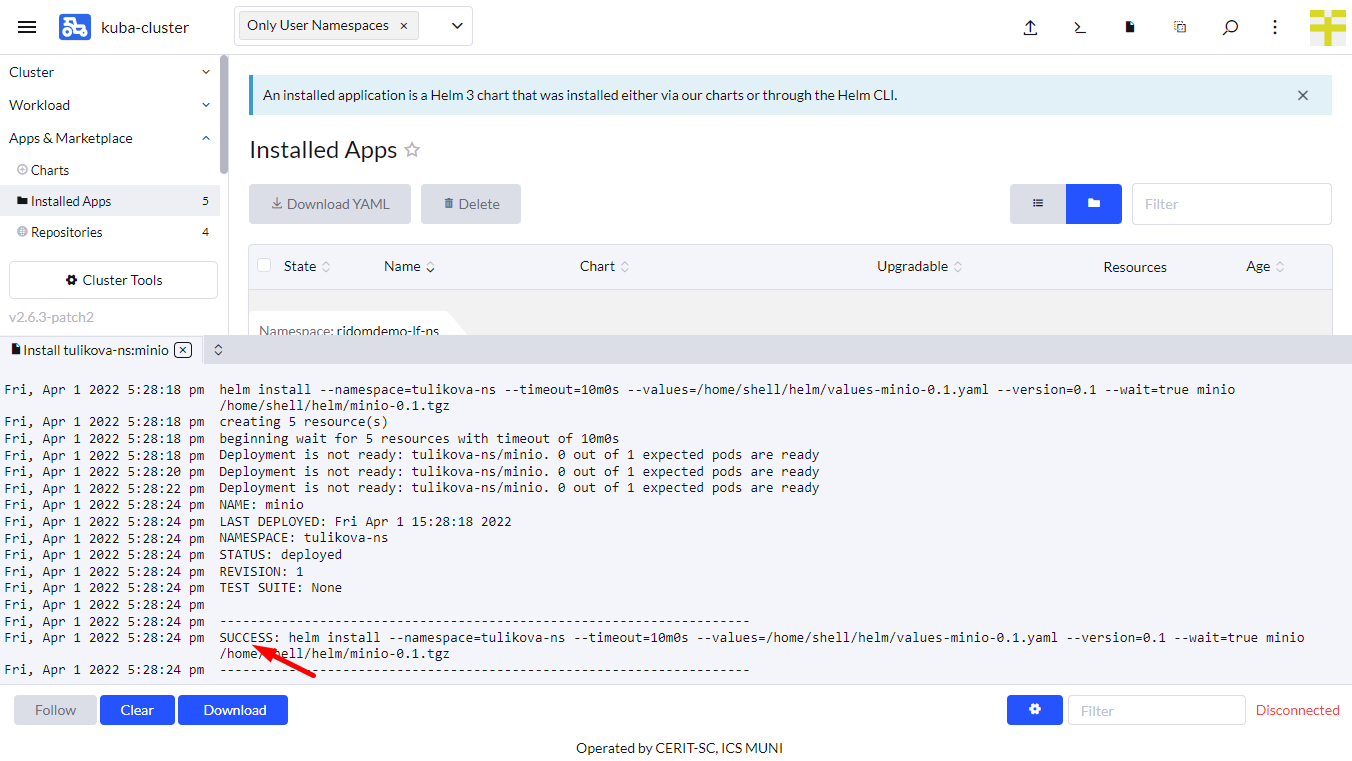
When you hit Install, you will see installation log. Once you see SUCCESS (see screenshot below), the application is running.
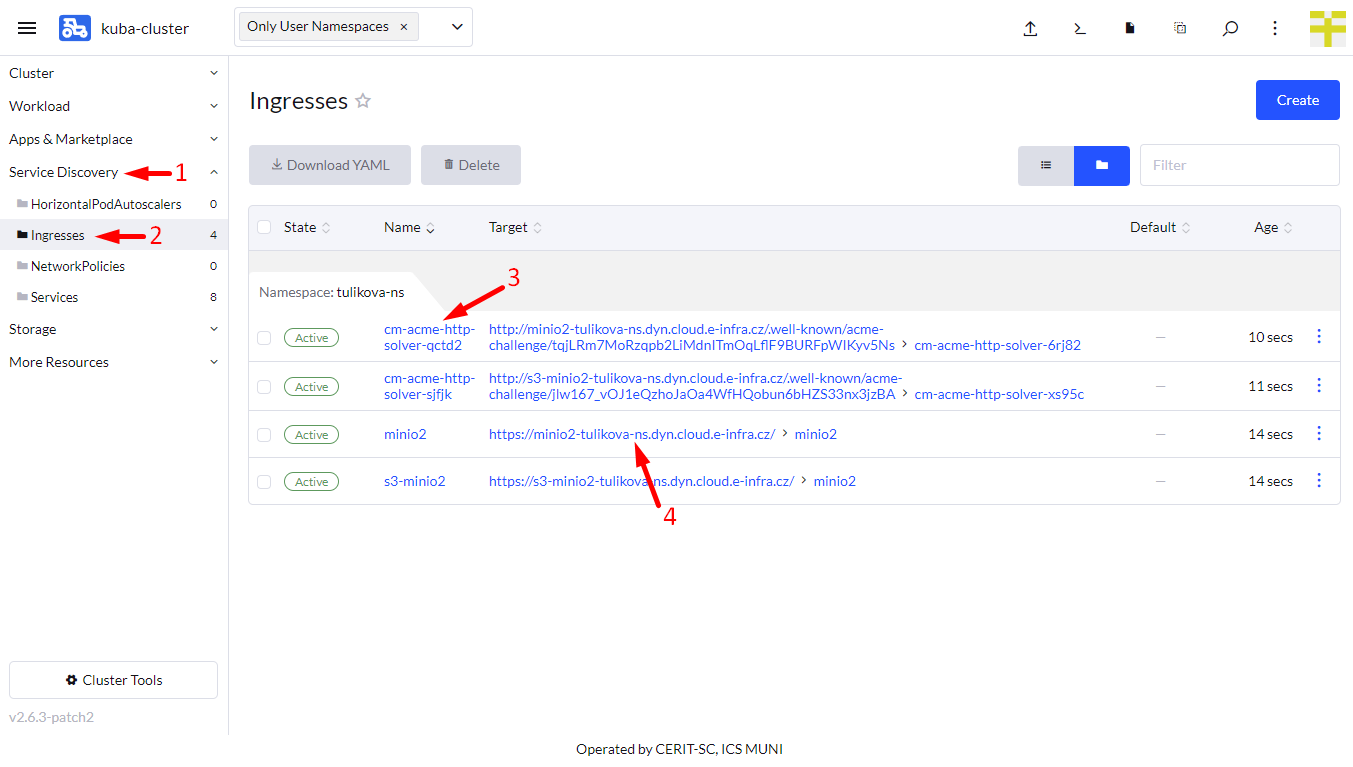
Once this application is running, navigate through Service Discovery (1) and Ingresses (2). You will see Ingresses. If you see cm-acme-http-solver... (3), wait until it disappears. Once you see minio or whatever Name you used in the previous steps, you can click on Target (4) to log in to the application. There are two targets for Minio. One Target (4) name is beginning with the application name, e.g., minio. This Target is for Web access. The second Target starts with s3- and is meant as S3 API endpoint, i.e., this URL is passed to the s3cmd or s4cmd. Username and password are called Access key and secret key for S3 API and they are the same as for the Web access.
Example usage of s4cmd to list data via S3 API:
s4cmd --access-key=$USER --secret-key=$PASSWORD --endpoint-url=https://s3-minio-nextflow-ns.dyn.cerit-sc.cz ls
Just replace $USER and $PASSWORD and endpoint-url with your values.
Delete Running Instance
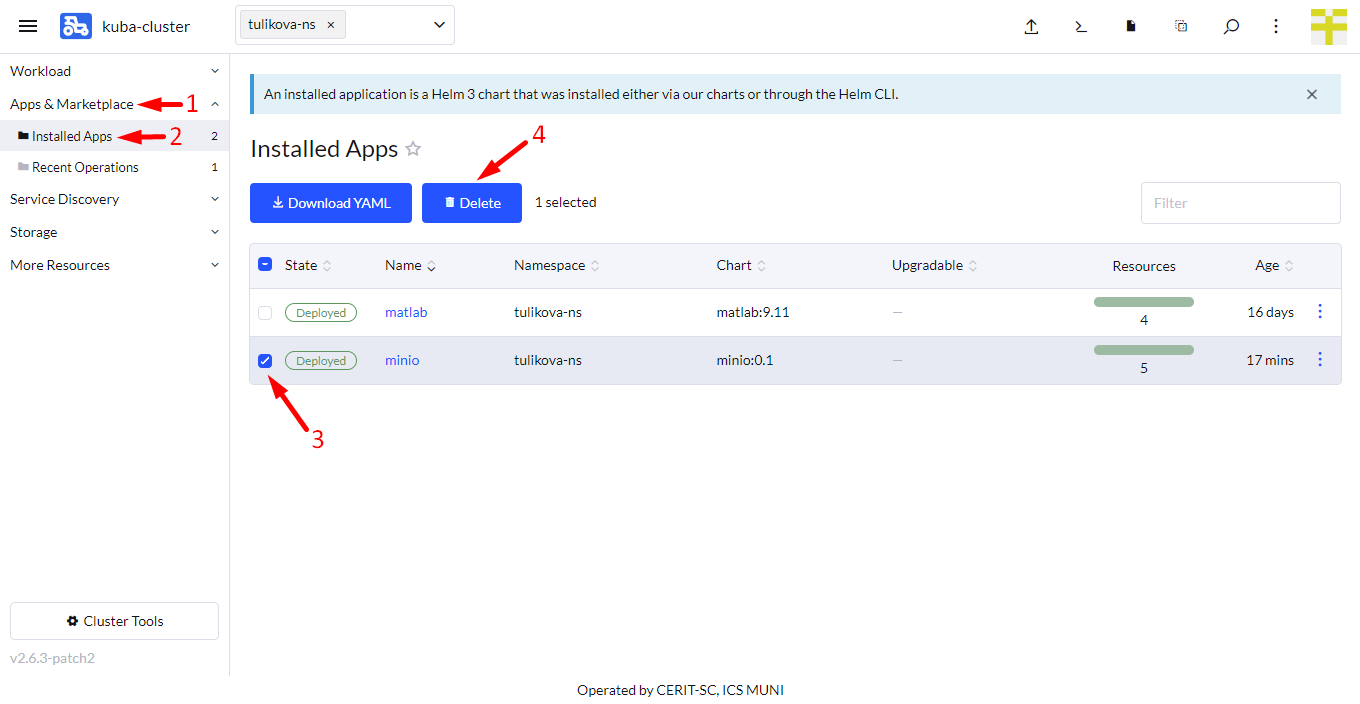
If you feel you do not need the application anymore, you can delete it. Just navigate to App & Marketplace (1), Installed Apps (2), select the application (3) and hit Delete (4). The data in home directory is not deleted in case you check persistent home. Running the application again with the same Name restores access to the home directory folder.