Running Moodle
If not already logged, log to rancher.cloud.e-infra.cz, see Rancher section.
By following steps described in this article you will be able to install Moodle web application, a learning platform designed to provide educators, administrators and learners with a single robust, secure and integrated system to create personalised learning environments. This app enables you to create your own moodle site under your hostname.
Select Application to Run
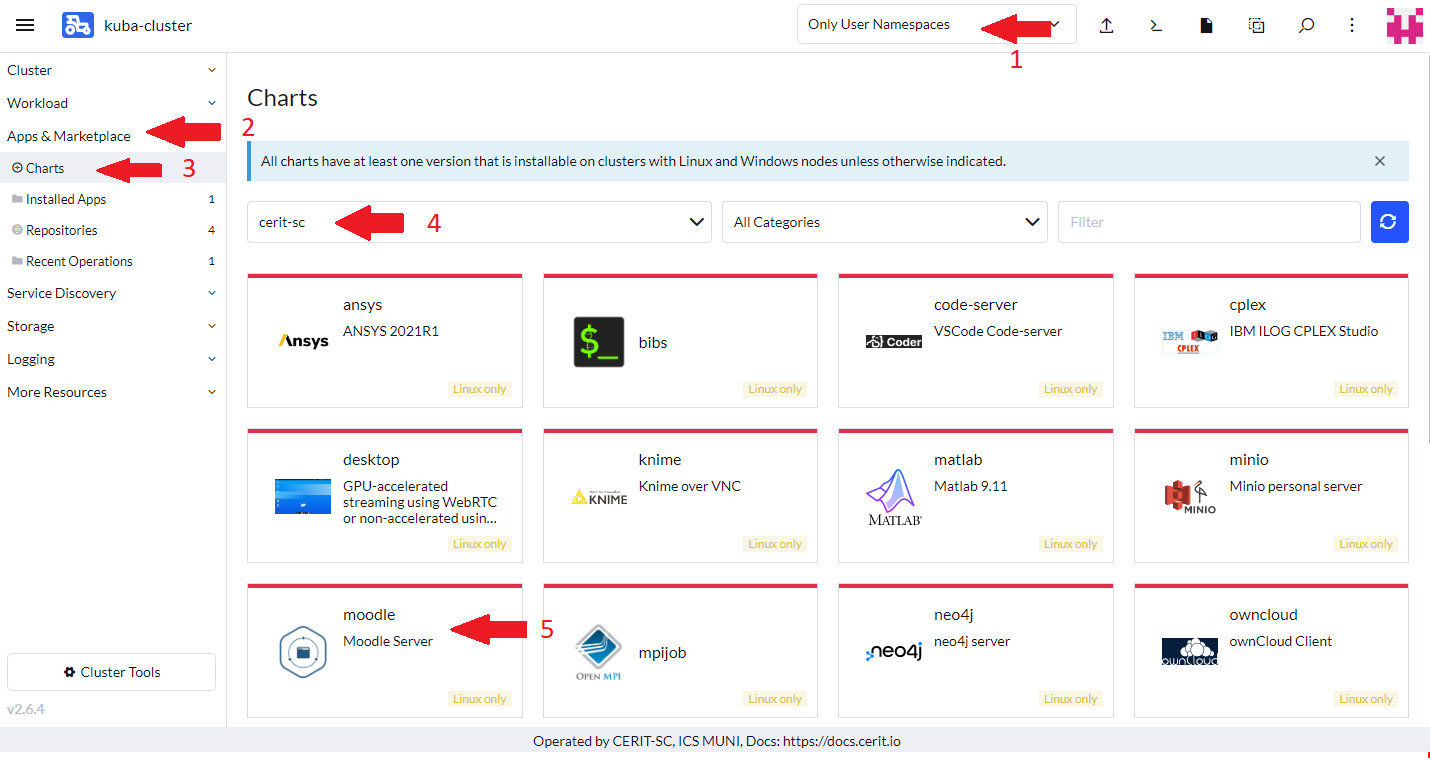
Navigate through Only User Namespaces (1), App & Marketplace (2), Charts (3), cerit-sc (4), and select moodle (5). See screenshot below.
Install the Application
When you click on the chart, hit Install to continue.

Select your namespace and name for your moodle application, then click Next

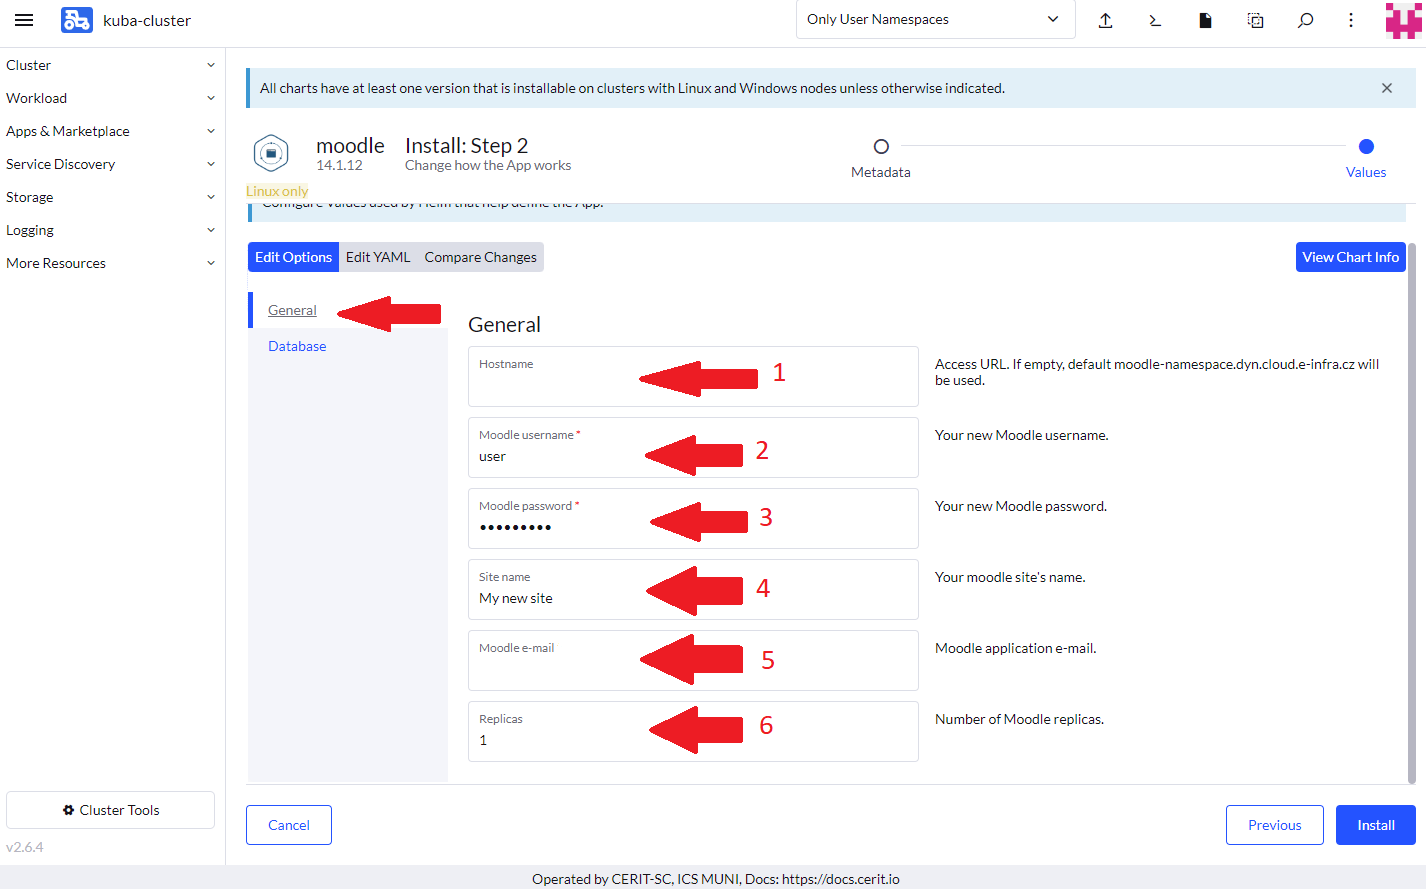
You will see multiple options to customize your app. Now we will focus on section General. Hostname (1) is your access URL, when left empty, it defaults to moodle-namespace.dyn.cloud.e-infra.cz
Moodle username (2) and Moodle password (3) are your login credentials, fill in whatever you like. Site name (4) is name of your site, if left empty, the name will be “New Site”. Moodle e-mail (5) is your new e-mail for moodle. and Replicas (6) is number of replicas you want.
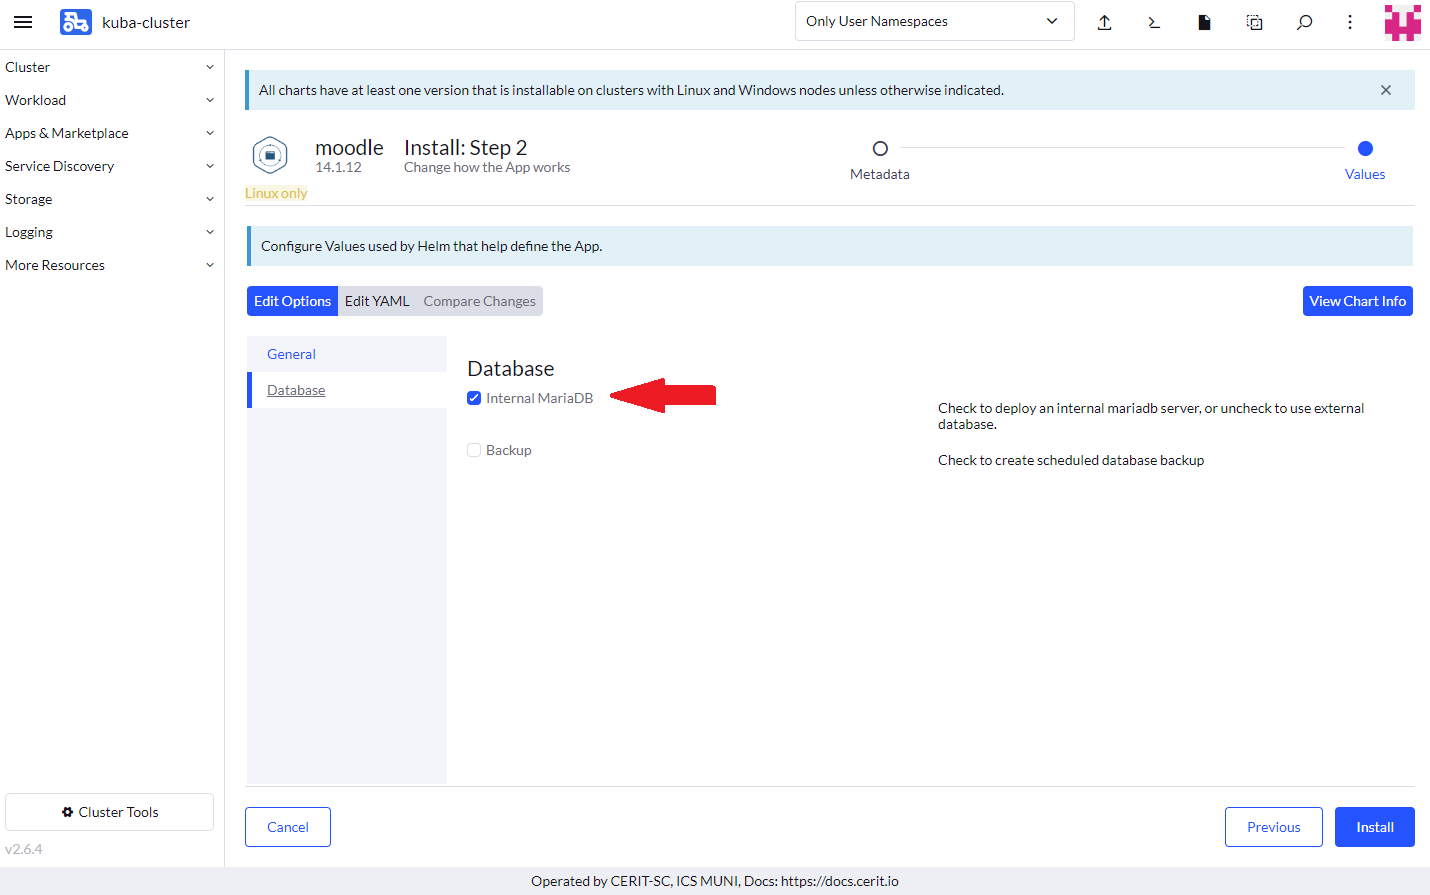
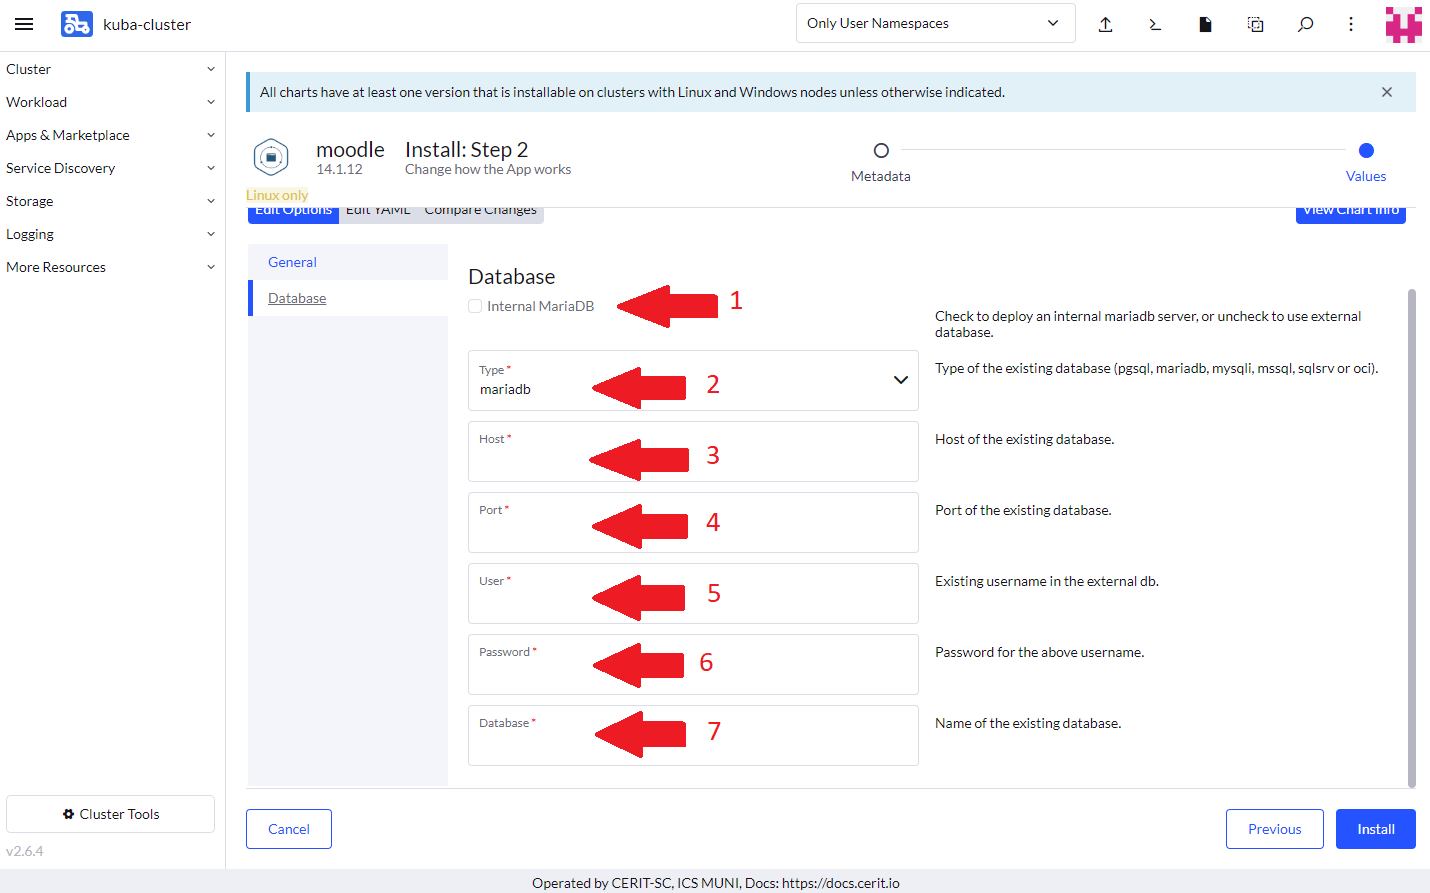
Next we will configure our database. If field Internal MariaDB is checked, you will be given MariaDB database.
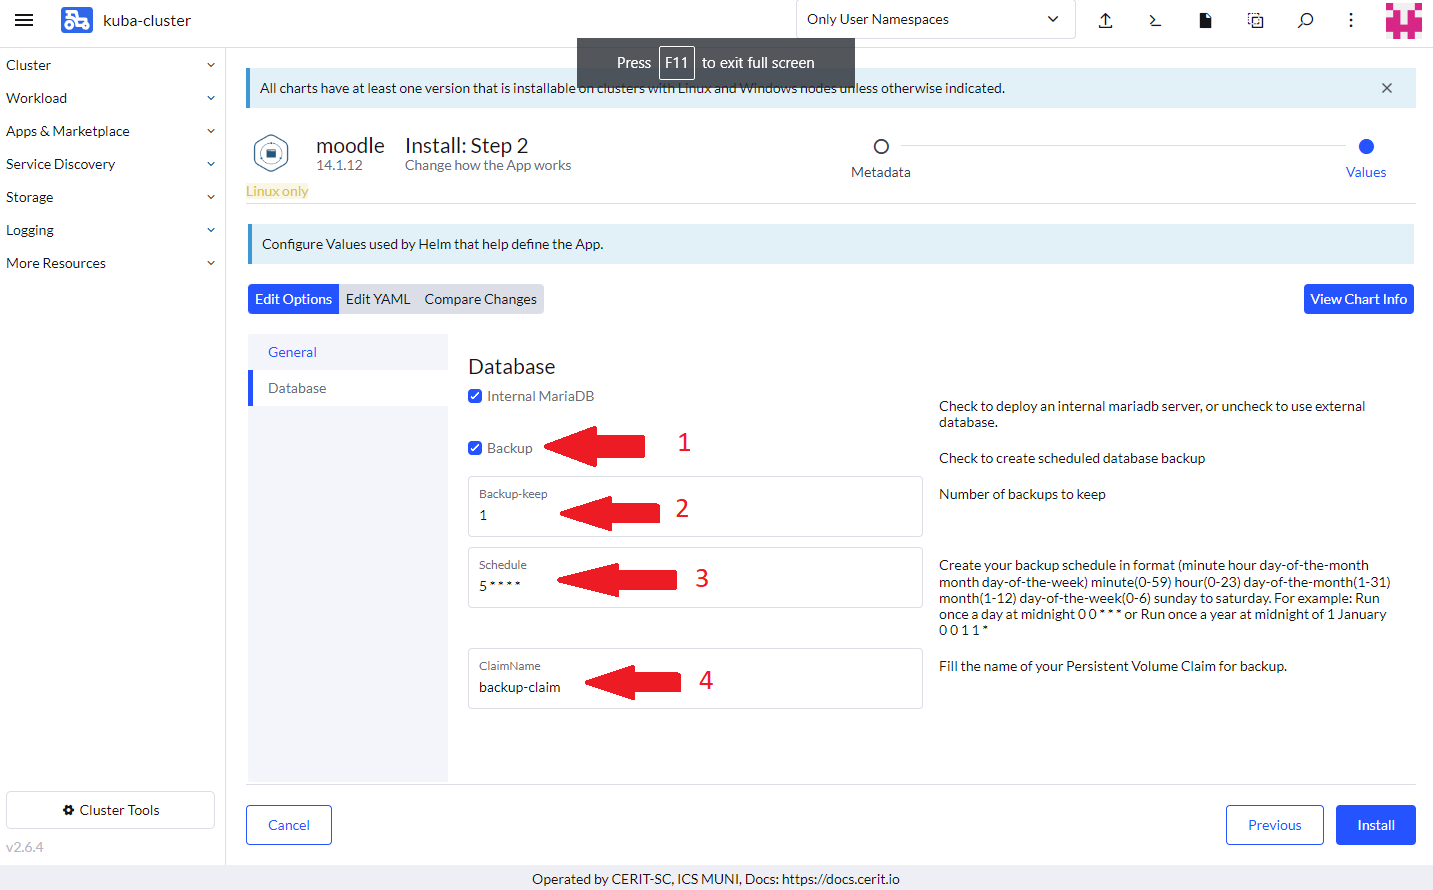
If you want to create backup, check the field Backup (1). Backup-keep (2) is number of backups you want to keep and Schedule (3) defines how frequently you want you database to be backed up and ClaimName (4) is name of Persistent Volume Claim with backup.
In case you want to use existing external database, uncheck field Internal MariaDB (1) and few options will pop-up. Type (2) is a dropdown menu with types of supported databases. In the field Host (3) you have to fill Host of the existing database, same applies to port (4). Fields User (5) and Password (6) are credentials user for database and Database (7) is the name of the existing database.
Once you are content with configuration, hit the Install button and wait a few minutes untill you see this message.
Login to the Running Instance
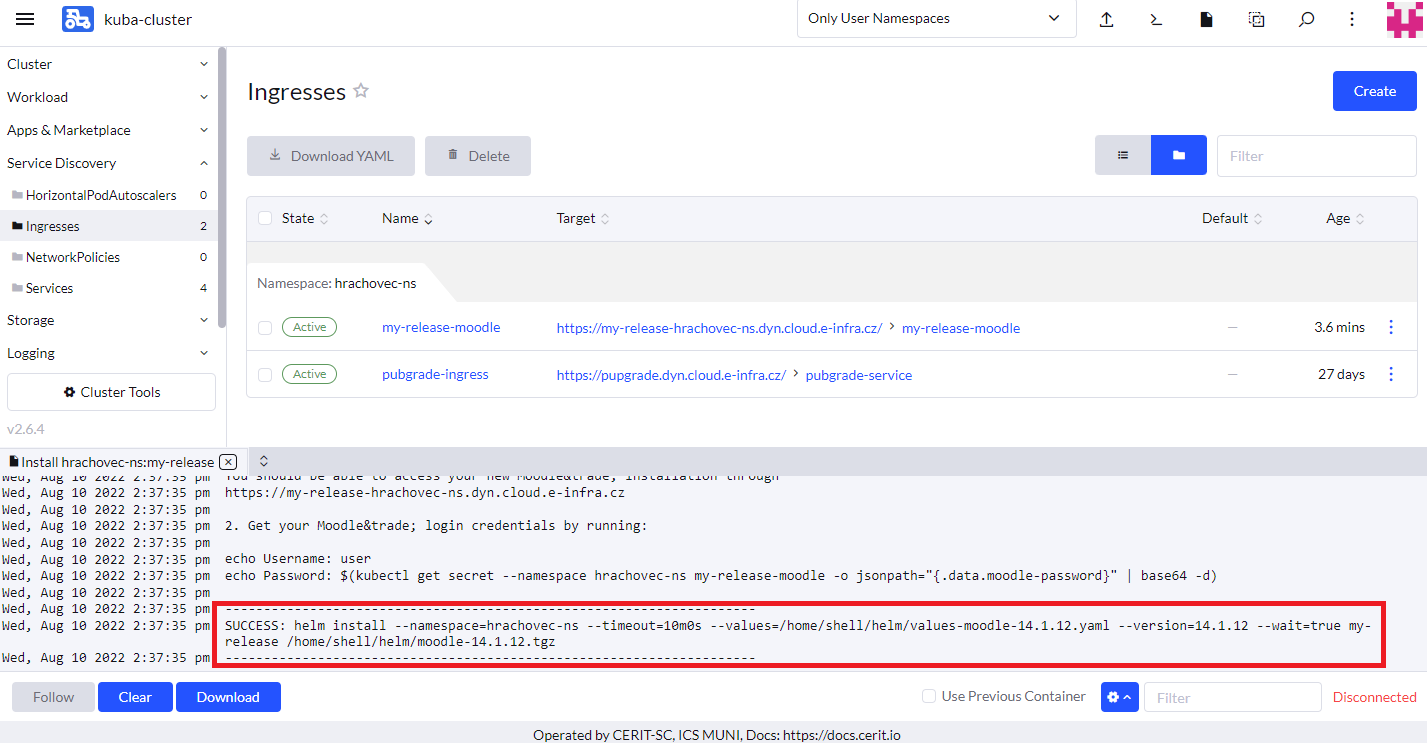
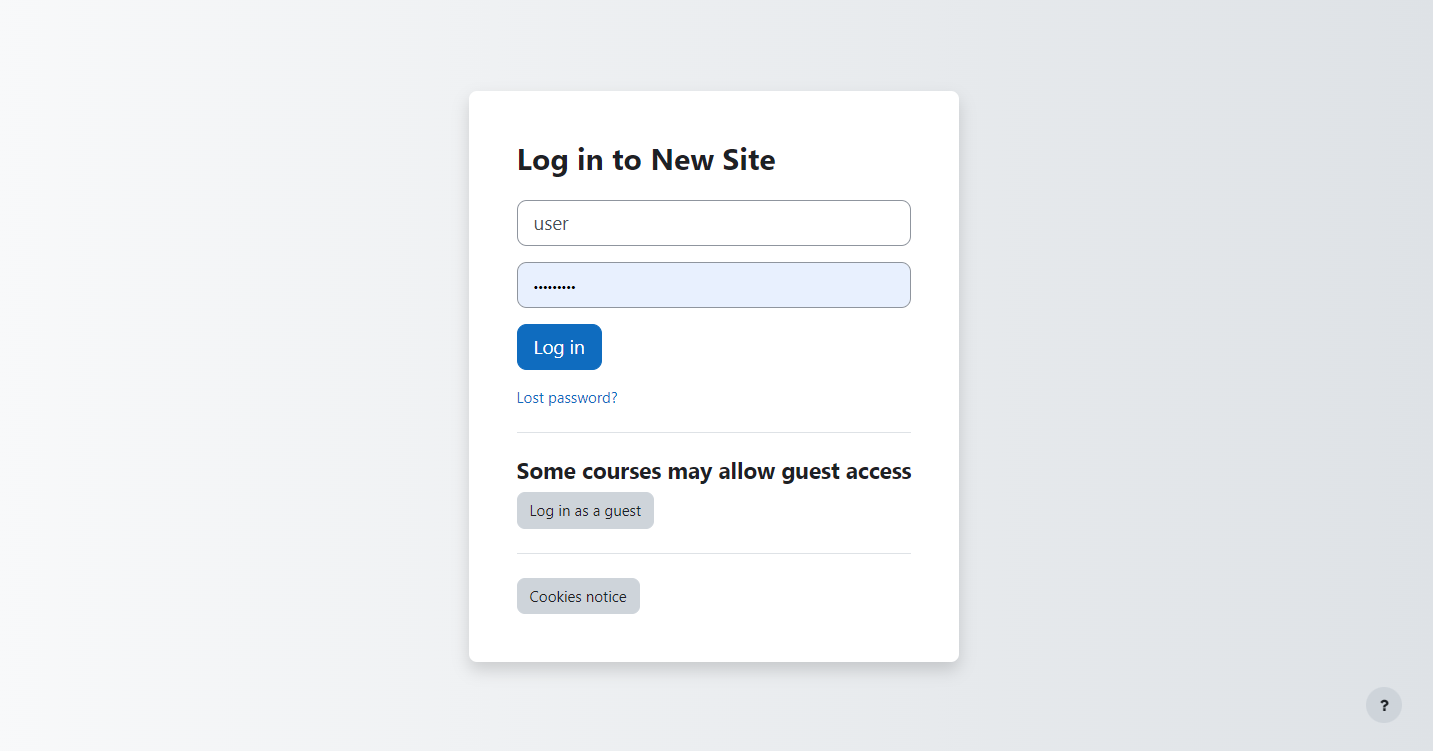
Once the application is running, navigate through Service Discovery (1) and Ingresses (2). You will see Ingresses. Once you see whatever Name you used in the previous steps, you can click on Target (4) to log in to the application. Once it’s running, click Log in and fill in you username and password from previous steps.
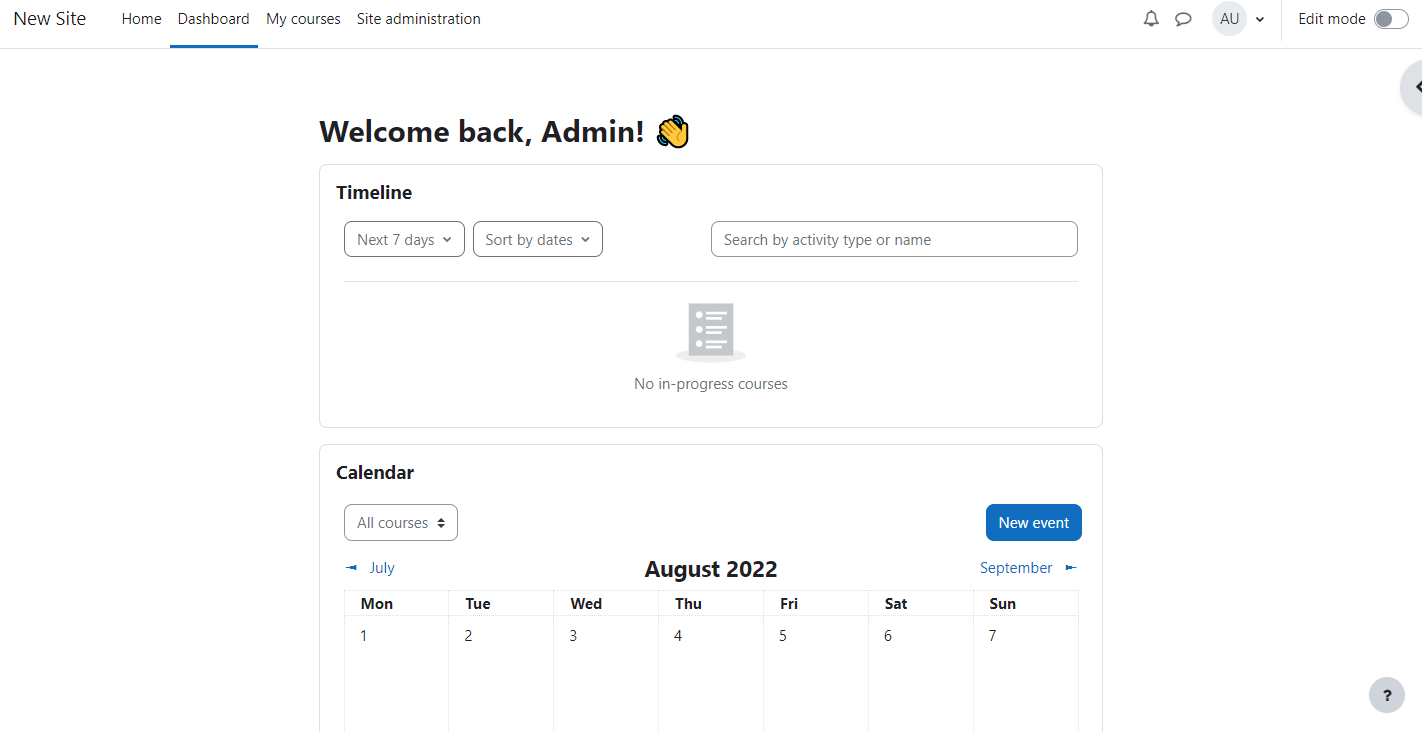
And you will see your new site.
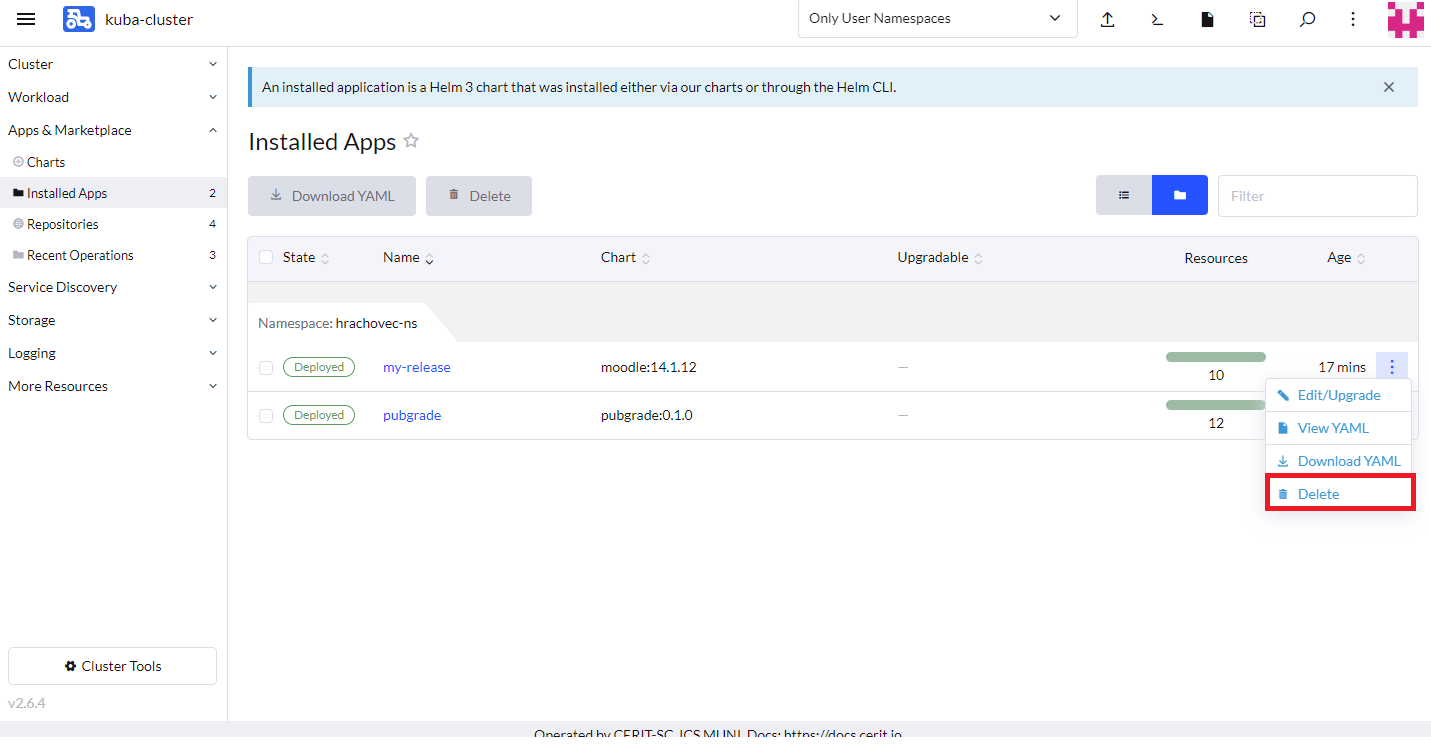
Delete running instance
Once you feel like you don’t need the app anymore, you can delete it. Just navigate to App & Marketplace (1), Installed Apps (2), select the application (3) and hit Delete (4). The data in home directory is not deleted. Running the application again with the same Name restores access to the home directory folder.
And wait for the following message.
