Running RStudio
We offer two ways of running RStudio:
-
Run RStudio in web JupyterHub - this option ❗️requires a valid MetaCentrum account❗️. JupyterHub provides easy way of creating RStudio and straightforward integration with MetaCentrum home. Only R 4.2.1 is supported.
-
Run RStudio as a Rancher application - this option is ❗️for anyone, who does not have MetaCentrum account❗️. It offers multiple R versions but is slighly more complicated to set up.
JupyterHub RStudio
JupyterHub is a web application that has a simple input form where you choose various settings of your deployment. To learn more, see JupyterHub introduction where you can find other necessary information.
Rancher RStudio
If not already logged, log to rancher.cloud.e-infra.cz, see Rancher section.
Following the steps below, you can install RStudio web application. This application has persistent home directory, it means, that if you delete the application and later install the application again with the same name, content of home directory will be preserved.
Notes
- Default project has quota limit for 12 guaranteed CPUs and quota for 16 CPUs limit. Do not select more than 10 guaranteed CPUs and more than 14 CPUs limit. If needed more just ask. This may be increased in future so request for more CPUs can be made.
Select Application to Run
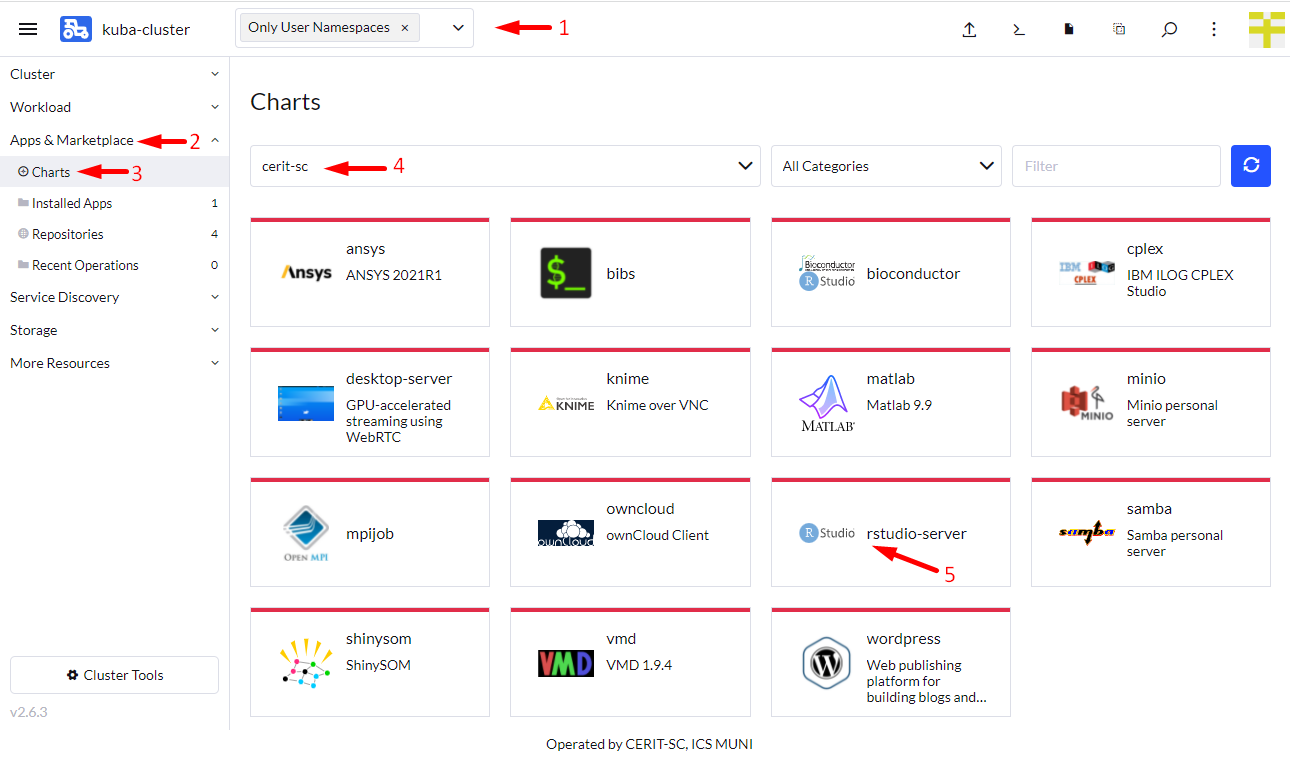
Navigate through Only User Namespaces (1), App & Marketplace (2), Charts (3), cerit-sc (4), and select RStudio (5). See screenshot below.
Install the Application
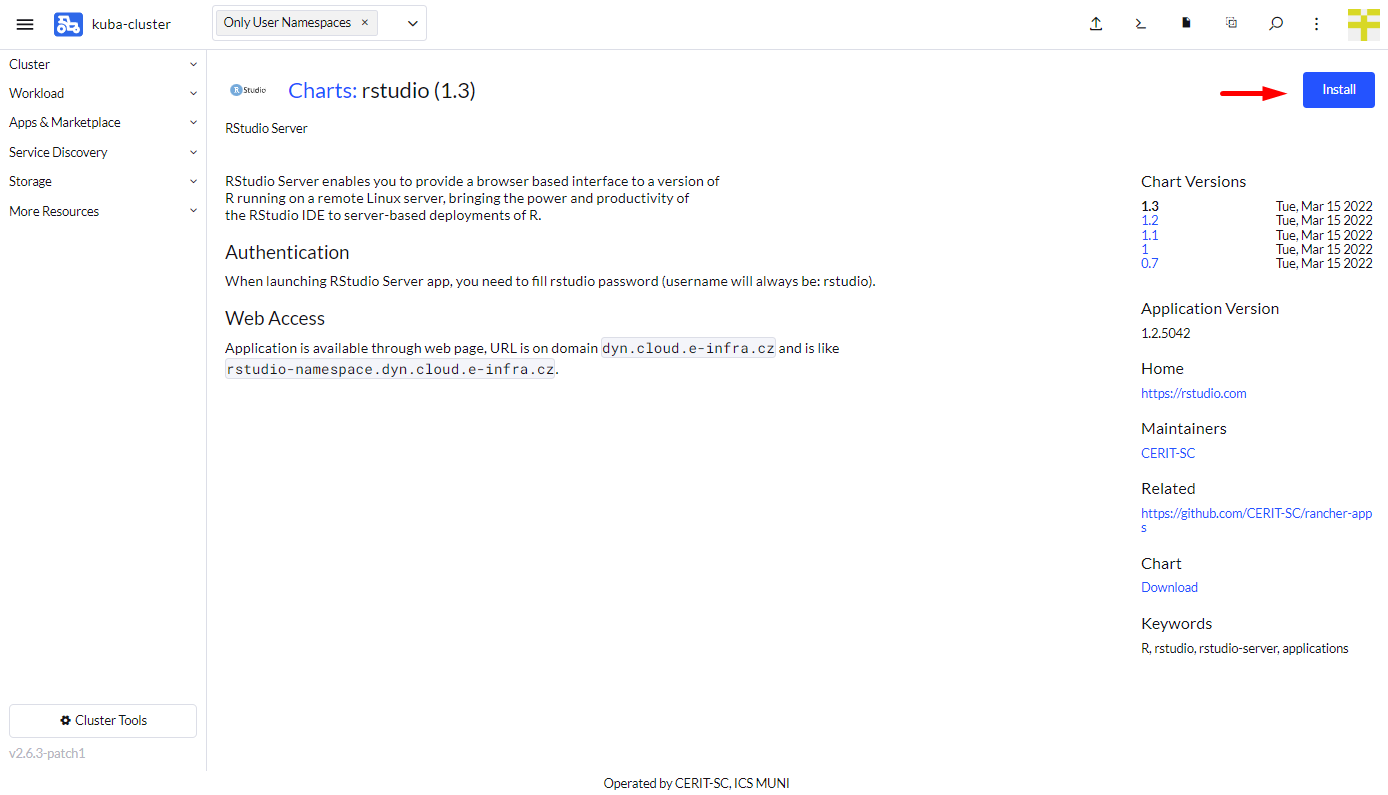
When you click on the chart, hit Install to continue.
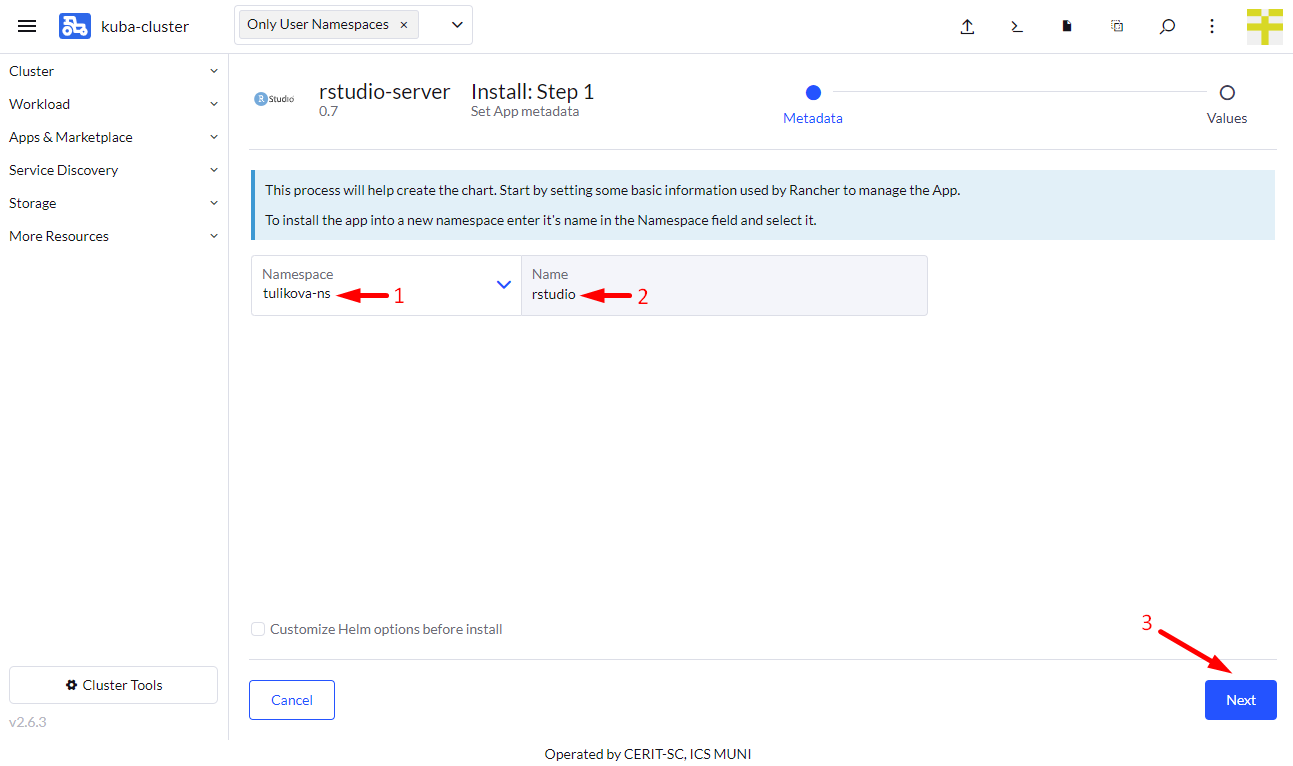
Now you can install the RStudio application. In most cases, keep both Namespace (1) and Name (2) intact, however, you can select namespace as desired except default. The default namespace is available but it is not meant to be used. The Name will be in URL to access the application. The Name must be unique in the Namespace, i.e., you cannot run two or more instances with the same Name in the same Namespace. If you delete the application and later install the application again preserving its Name, content of home directory will be preserved.
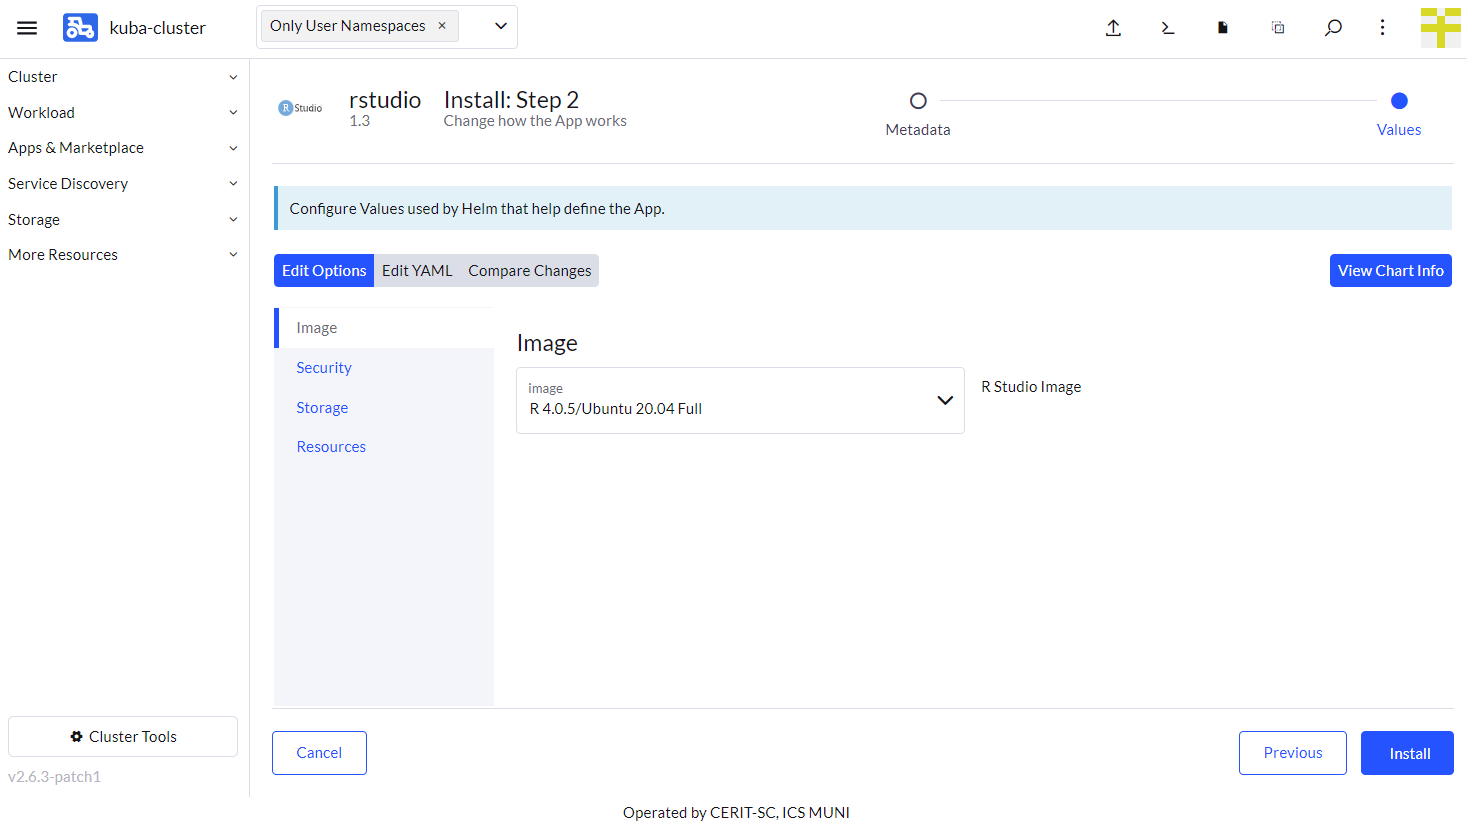
In the first part of the form, you choose R image, using it you select R version. Image with Full tag contains most of system libraries and also allows to install additional system packages using fakeroot command like fakeroot apt-get install libssl-dev. However, if application is restarted or reinstalled, all installs using fakeroot are lost and has to be installed again.
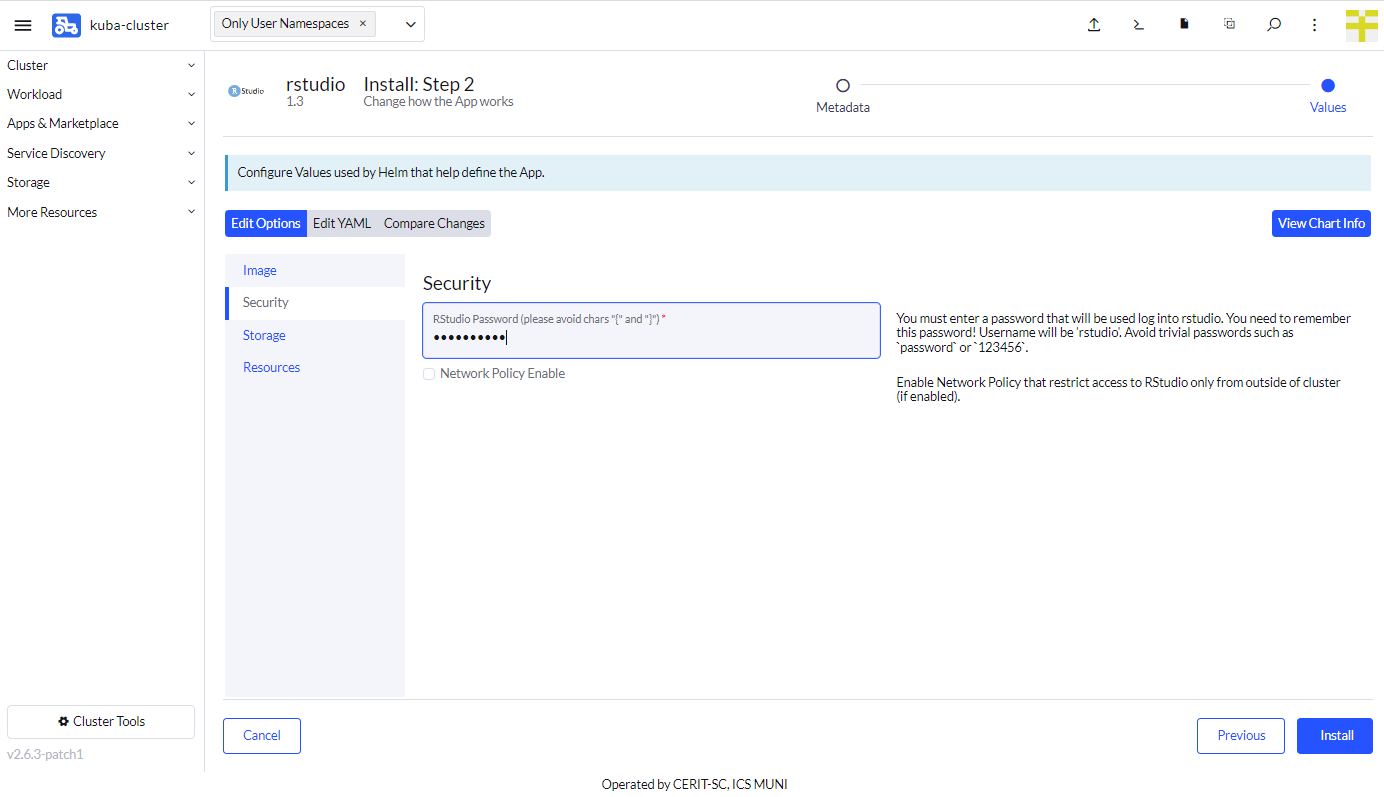
In the second part of the form, you select access password, please avoid chars like {, }, non trivial password is strongly recommended, however, it is also strongly recommended not to use a password you already use somewhere else. Username will be just rstudio.
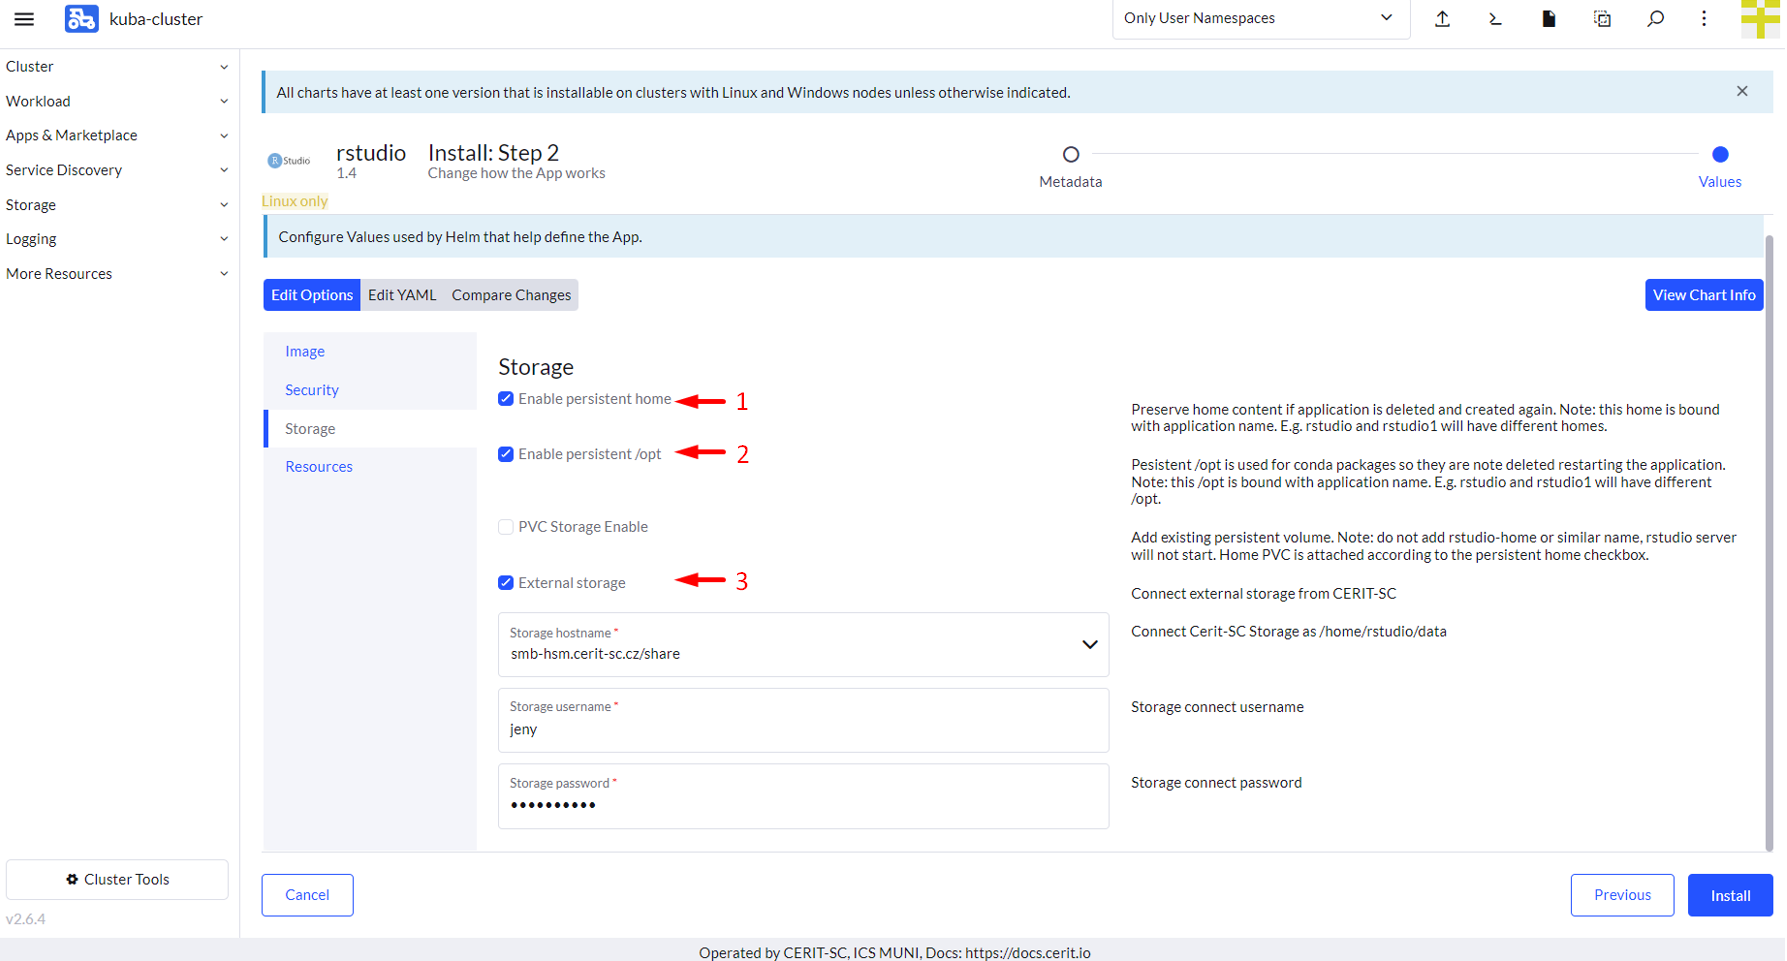
In the third part of the form, you can select e-infra storage (3) to connect to the application. If you check External Storage, only storage-brno12-cerit.metacentrum.cz is supported. If you want to connect this storage, follow the tutorial on creating the storage. On the storage secrets site you will click the first option Create Samba password for storage-brno12-cerit.metacentrum.cz This storage is mounted to /home/rstudio/data directory.
You can also select persistent /opt volume (2) that is used for installed packages via conda installer, see below. Persistent /opt preservers installed packages across rstudio restart.
Persistent home (1) enables preserving content of the home directory across rstudio restart.
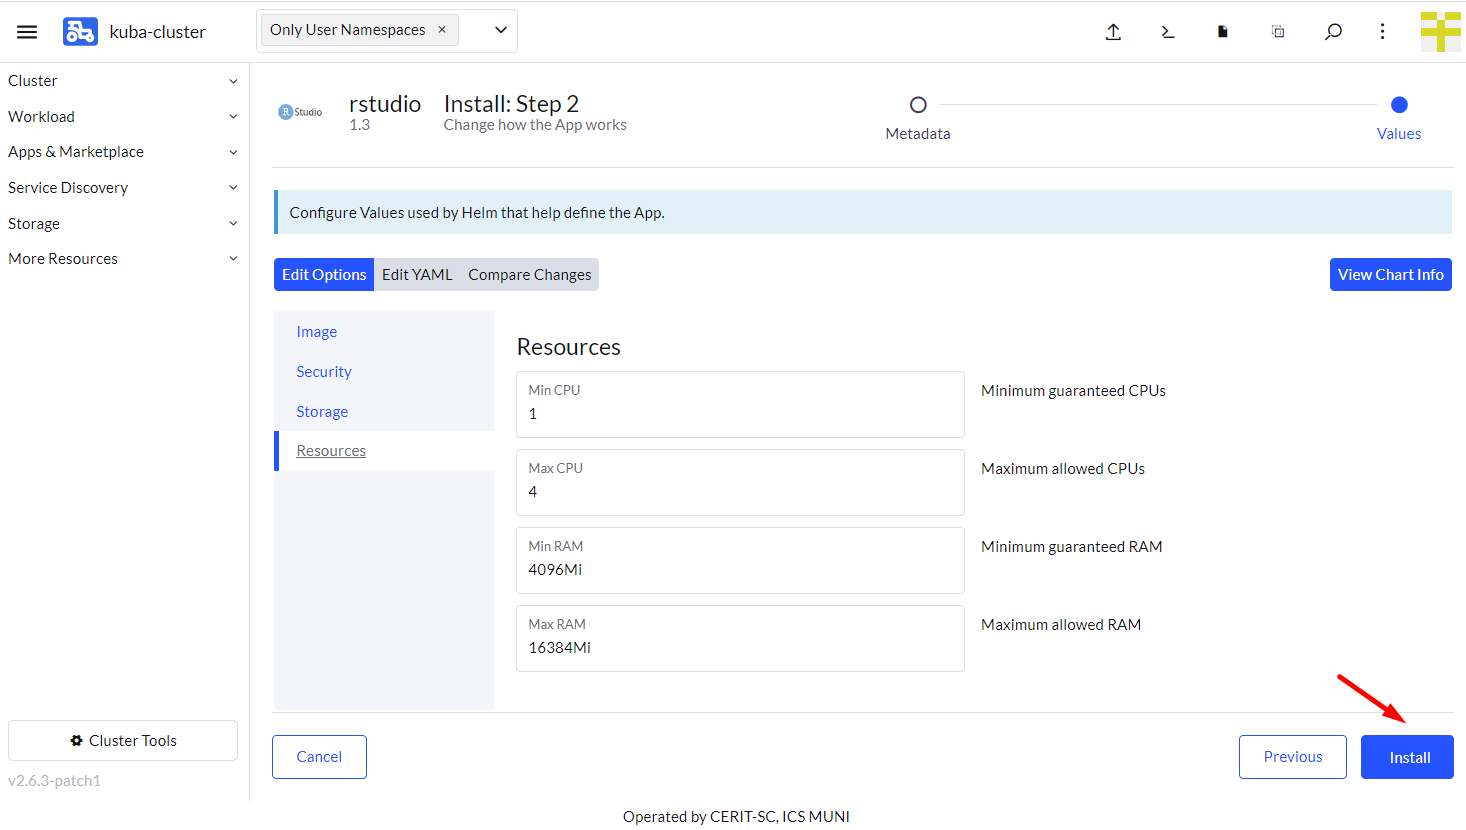
In the fourth part of the form, you can select requested resources. This step is optional. Minimum CPU or RAM is guaranteed amount of CPU and RAM, system reserves these resources for the application. However, the application can exceed guaranteed resources up to Maximum. However, in this case, resources are not exclusive and can be shared among other applications. If the application exceeds Maximum CPU, it gets limited, if it exceeds Maximum RAM, it gets terminated (you will see OOMKill report) and restarted. See note above about maximum values.
Wait for Application to Start
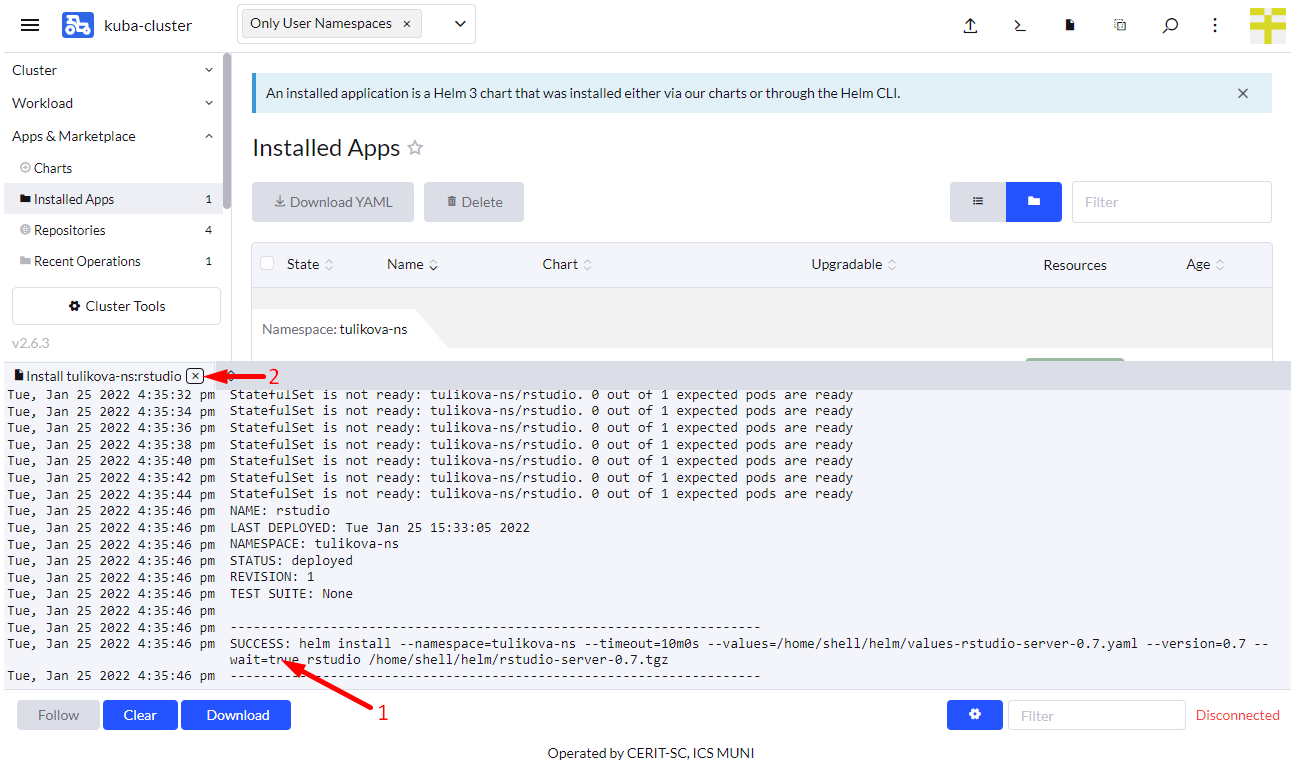
When you hit Install, you will see installation log. Once you see SUCCESS (see screenshot below), the application is running.
Login to the Running Instance
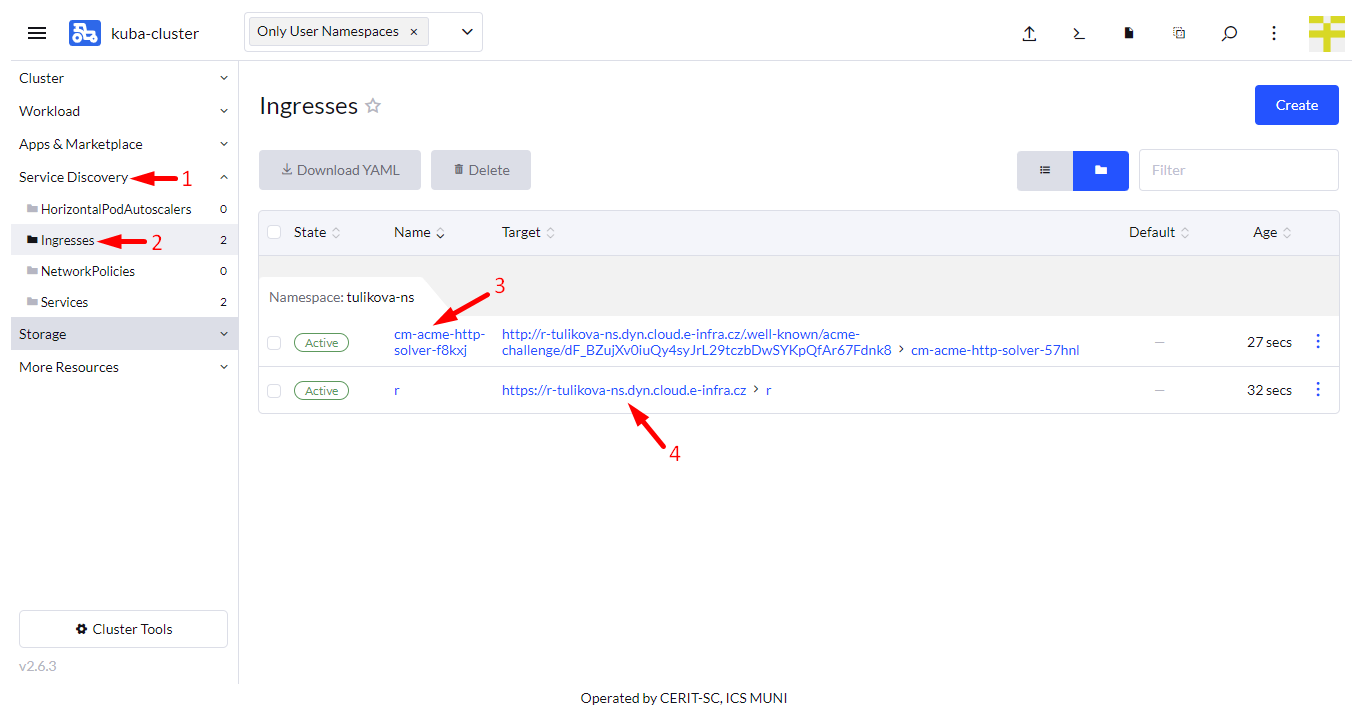
Once the application is running, navigate through Service Discovery (1) and Ingresses (2). You will see Ingresses. If you see cm-acme-http-solver... (3), wait until it disappears. Once you see rstudio or whatever Name you used in the previous steps, you can click on Target (4) to log in to the application.
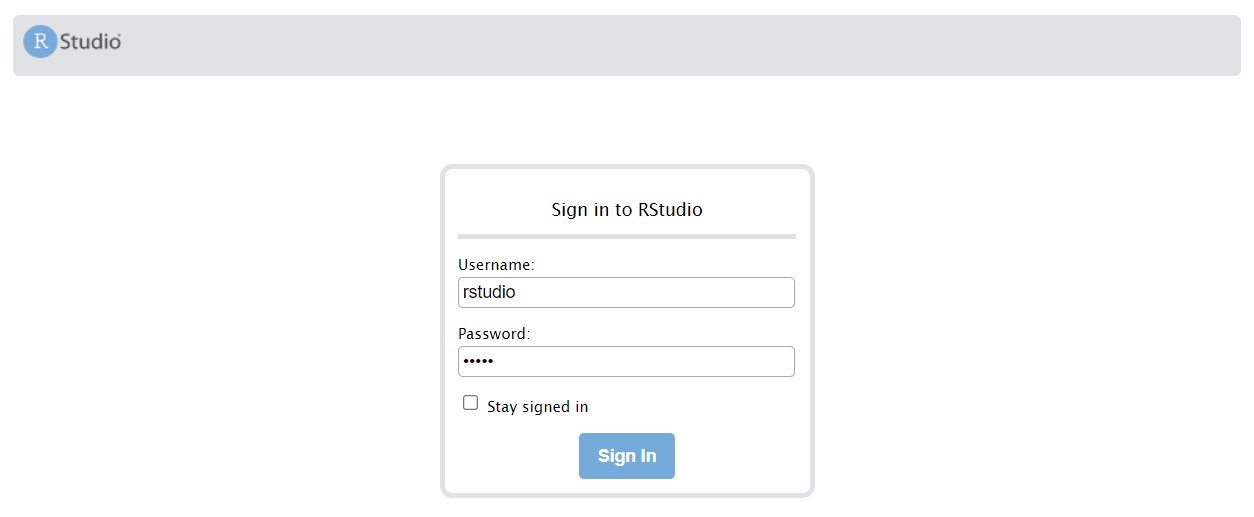
You will see log in window, use rstudio as login name and the selected password from the from.
Delete Running Instance
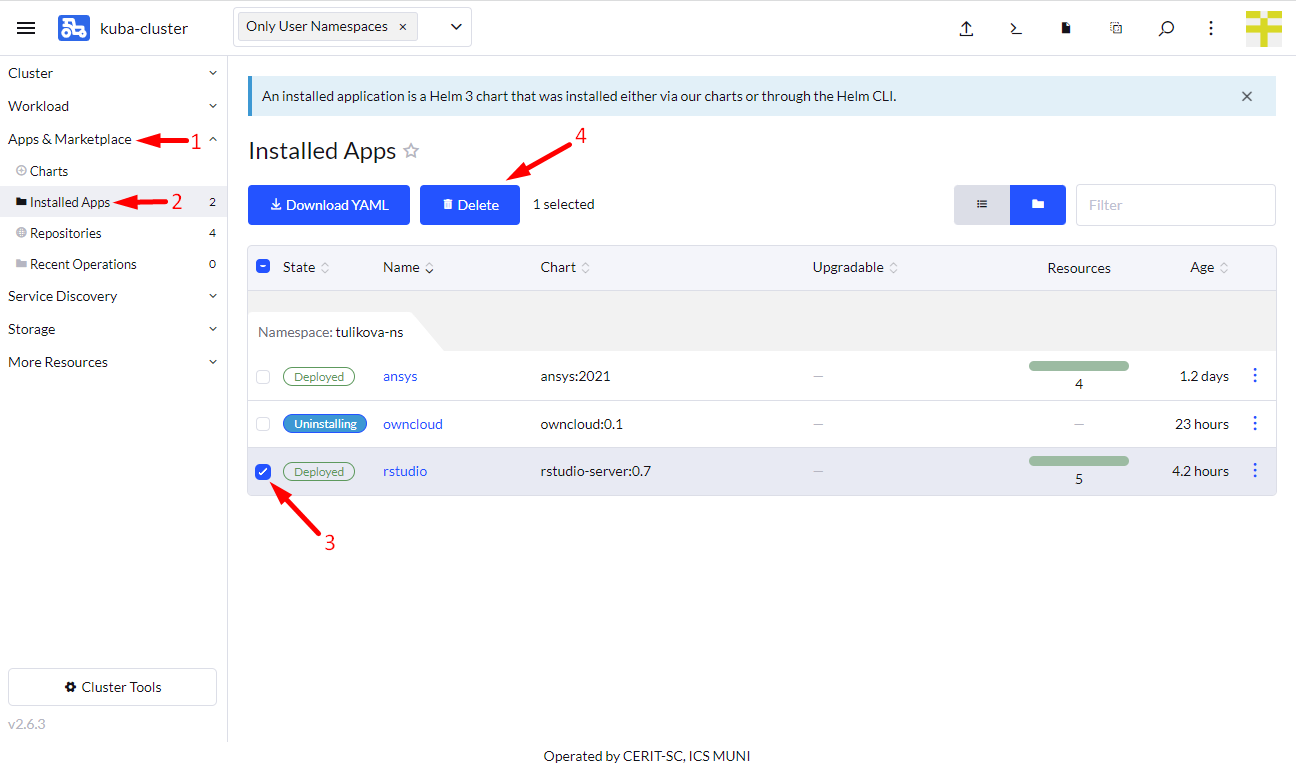
If you feel you do not need the application anymore, you can delete it. Just navigate to App & Marketplace (1), Installed Apps (2), select the application (3) and hit Delete (4). The data in home directory is not deleted. Running the application again with the same Name restores access to the home directory folder.
Install Additional Packages
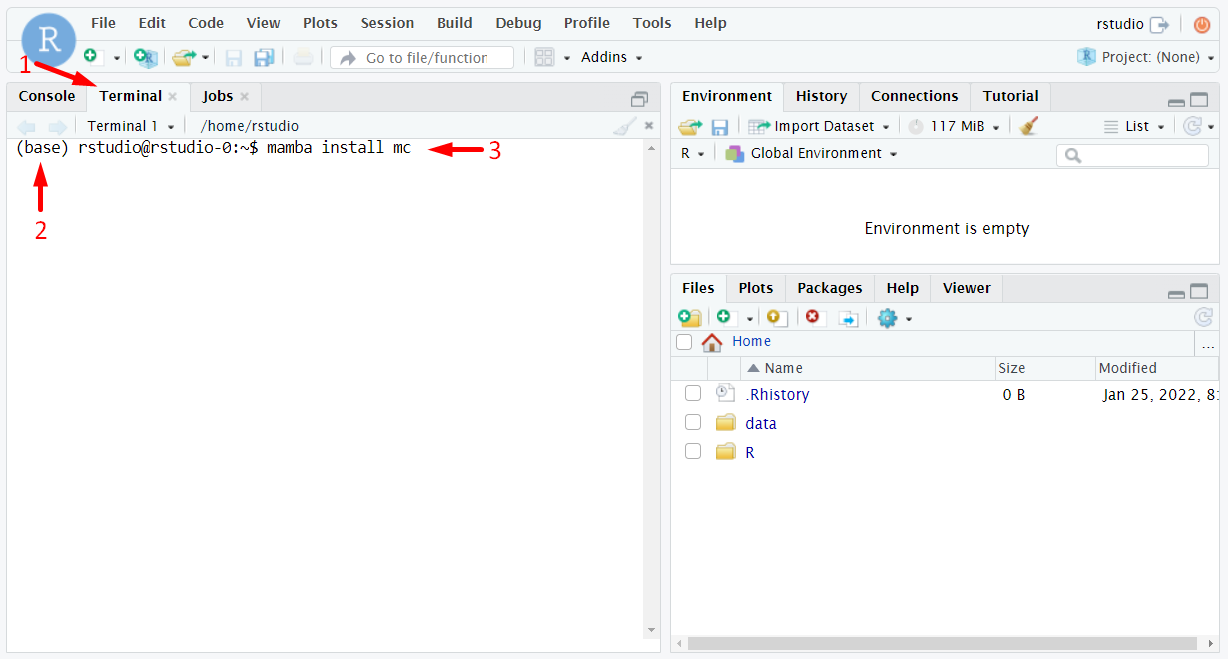
As of chart version 1.4, it is possible to use conda or mamba tool to install additional packages. They are instaled into /opt/conda directory. E.g., in rstudio terminal (1), type: mamba install mc (3) to install the mc package. If you see (base) (2) in the beginning of prompt, all paths are set correctly to use conda installed packages. If you do not see the (base), type: /opt/conda/bin/conda init, close the terminal and run a new one. This action is required once only.