Running Scipion
If you are not already logged in, log in to rancher.cloud.e-infra.cz, see Rancher section.
Following the steps below, you can run Scipion application. While installing the application you will be prompt to enter information to mount Onedata. This application has not persistent data, except mounted Onedata storages. It means, that if you delete the application and later install the application again, the data you saved outside the Onedata mounts will be lost. Behaviour behind the Onedata mounts is described bellow.
Notes
-
The default project had a quota limit for 12 guaranteed CPUs and a quota for 16 CPUs limit. Do not select more than 10 guaranteed CPUs and more than 14 CPUs limit. If needed more just ask. This may be increased in future so request for more CPUs can be made.
-
If you do not select
Customize Helm options before installin Install the Application step, installation appears to fail but actually it works after some longer time.
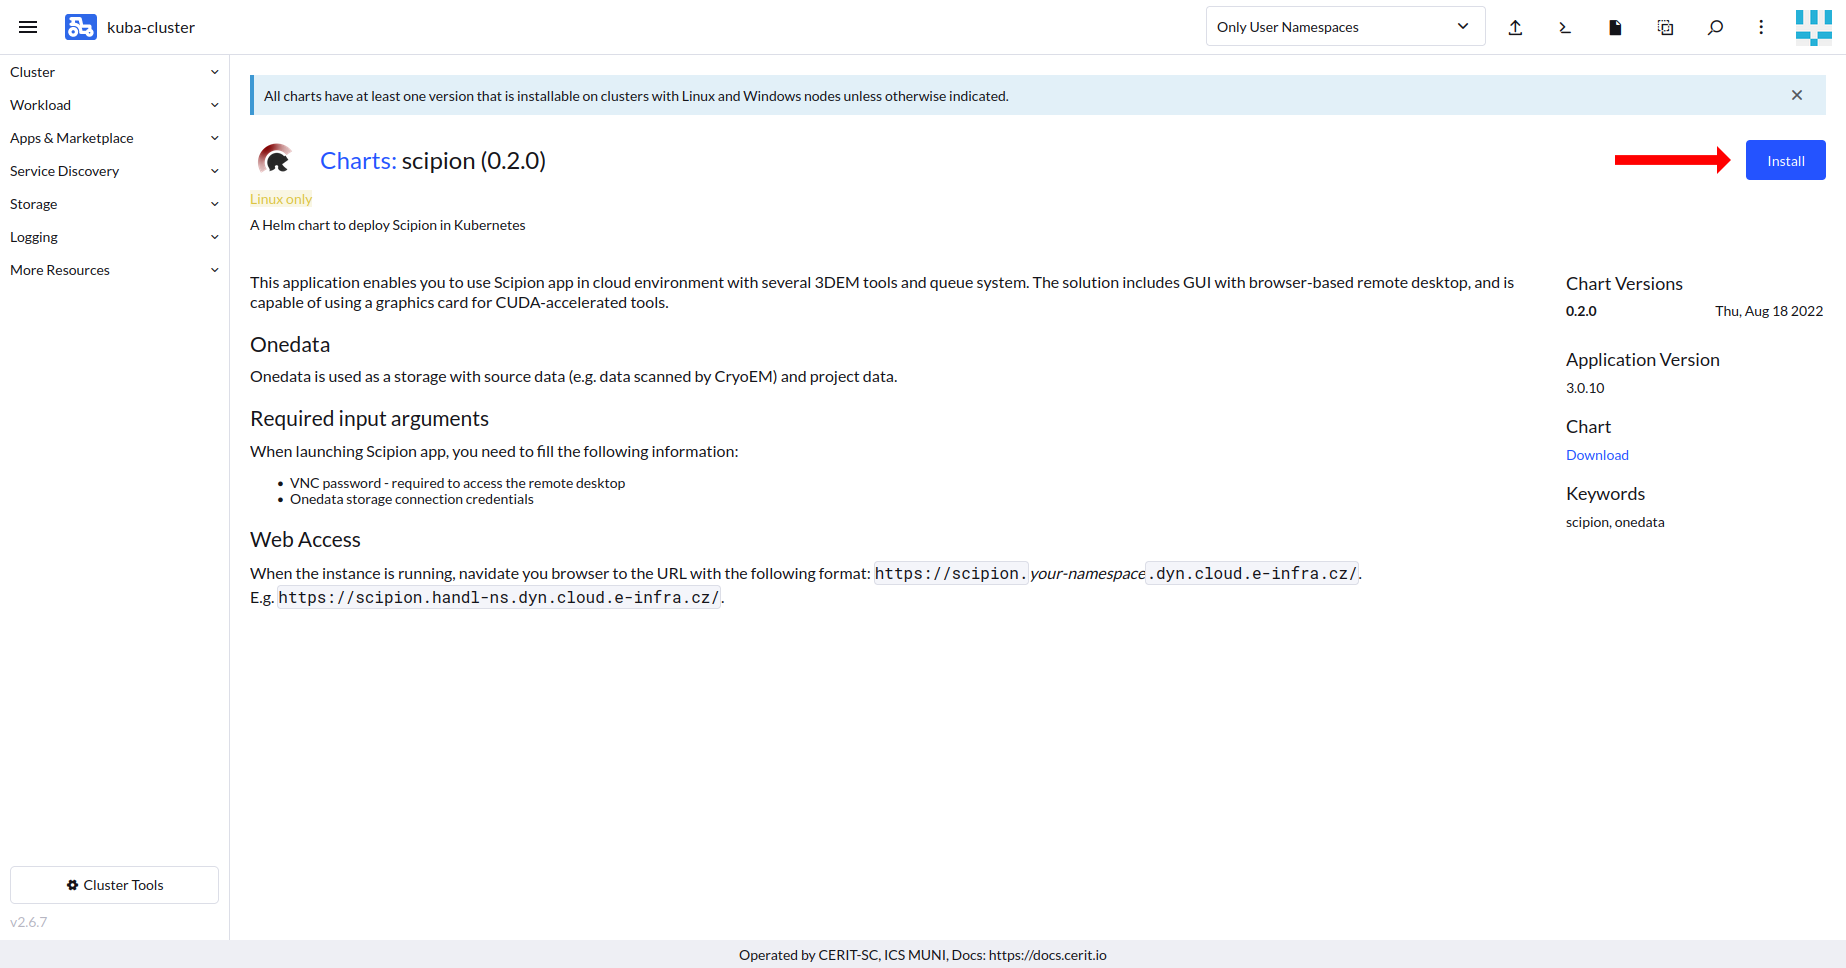
Select Application to Run
Ensure, you did not select any namespace and see Only User Namespaces (1) at the top of the Rancher page.
Navigate through App & Marketplace (2), Charts (3) and select Scipion (4). See screenshot below.

Select Version of the Application
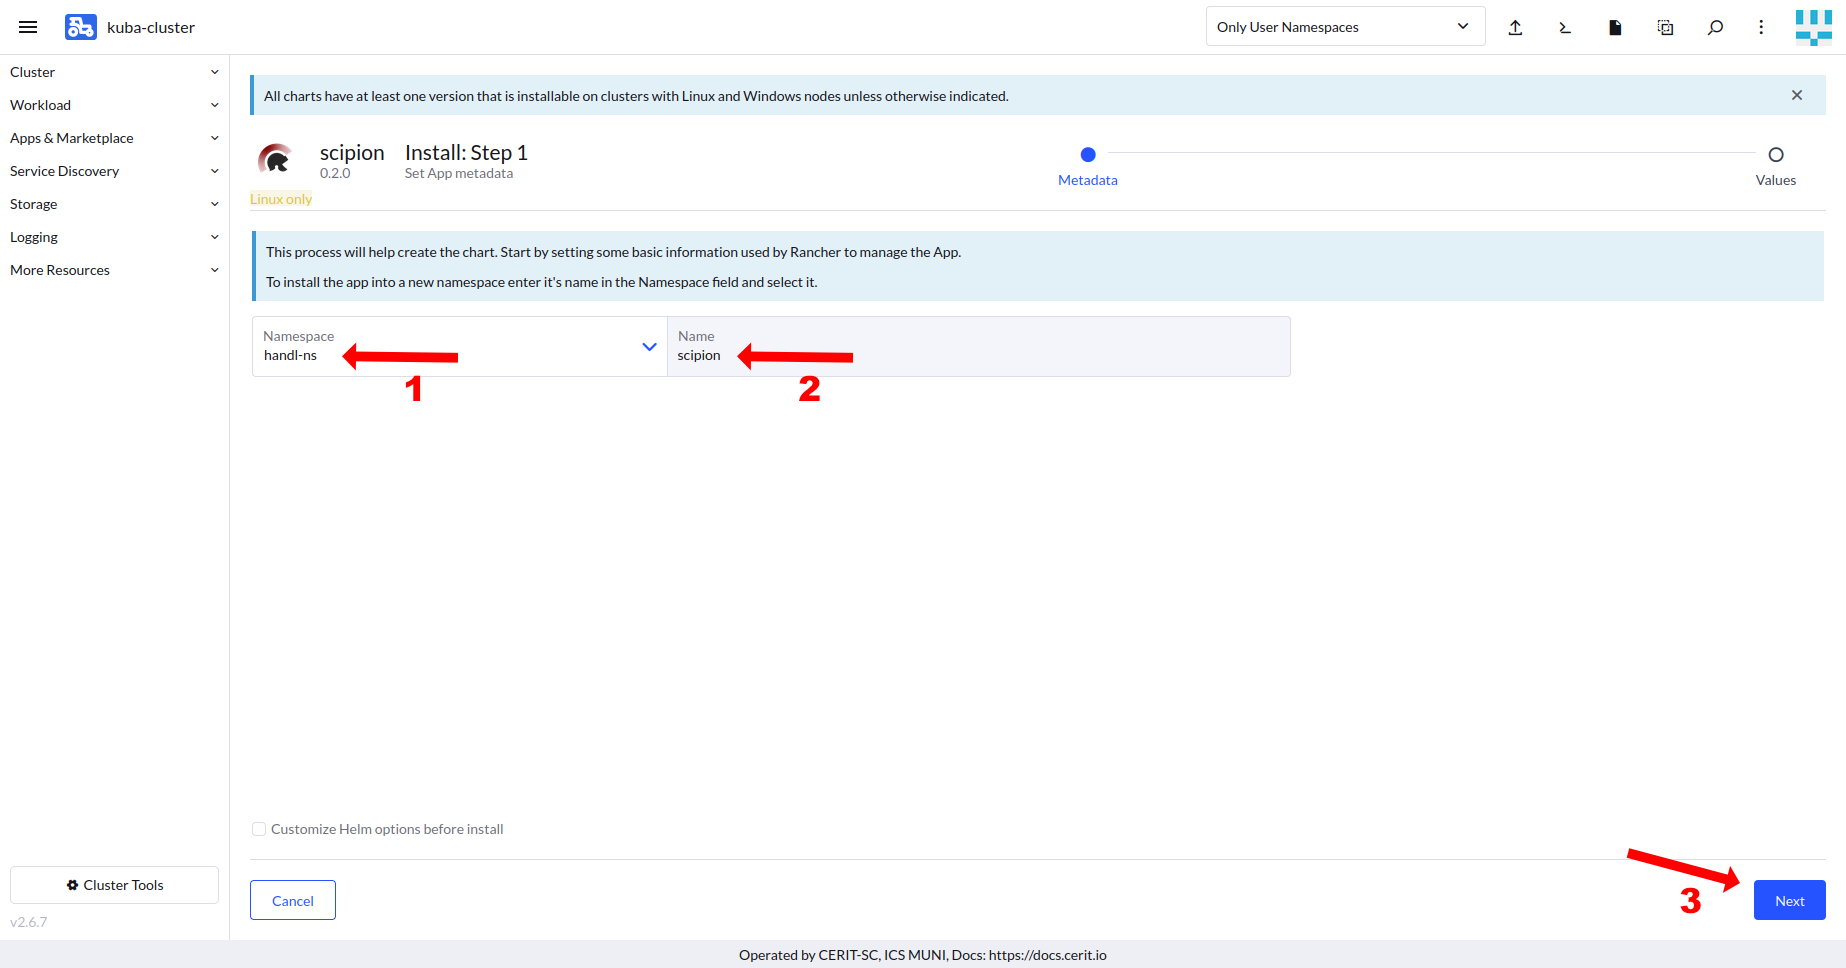
When you click on the chart, you can select version of application as shown below. Select Chart Version, you find exact Scipion version under Application Version. Versions can vary in time. Hit Install to continue.
Install the Application
Now you can install the Scipion application. Select Namespace (1) except default, fill the Name (2) of your instance, and hit the Next (3) button to continue. The default namespace is available but it is not meant to be used. Keep in mind, that you should not run two or more instances in the same Namespace for now. Information about creating a new Namespace is available here. If you delete the application and later install the application again, any data stored outside Onedata storages will be lost.
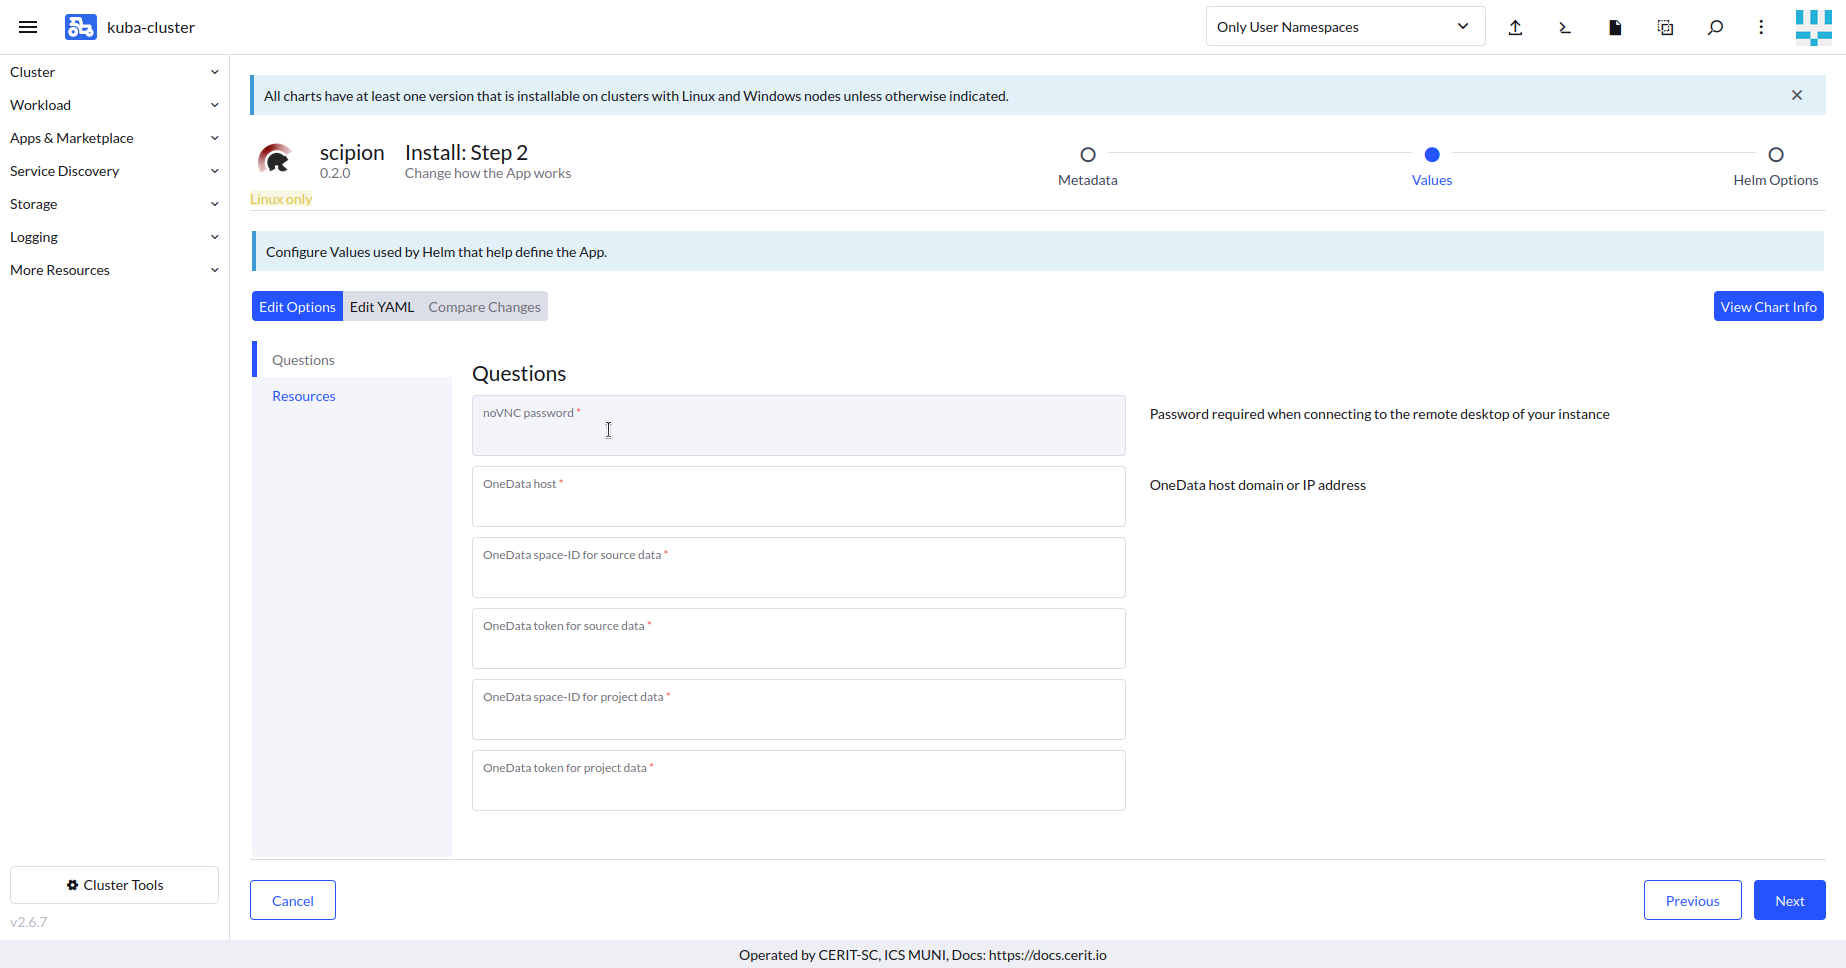
The first intem to fill in the form is the noVNC password, which you will need to access remote desktop of the Scipion application. Onedata related items in the form are described below.
Onedata
The Scipion-in-kubernetes application requires access credentails to the Onedata spaces that will be mounted. Two different Onedata spaces are required:
source- thisspaceshould contain a source data to be processed (e.g. data scanned by CryoEM).project- thisspaceshould be empty or contain an existing project, you want to work with.
Further info about technical details of the Onedata mount is described at the end of this document.
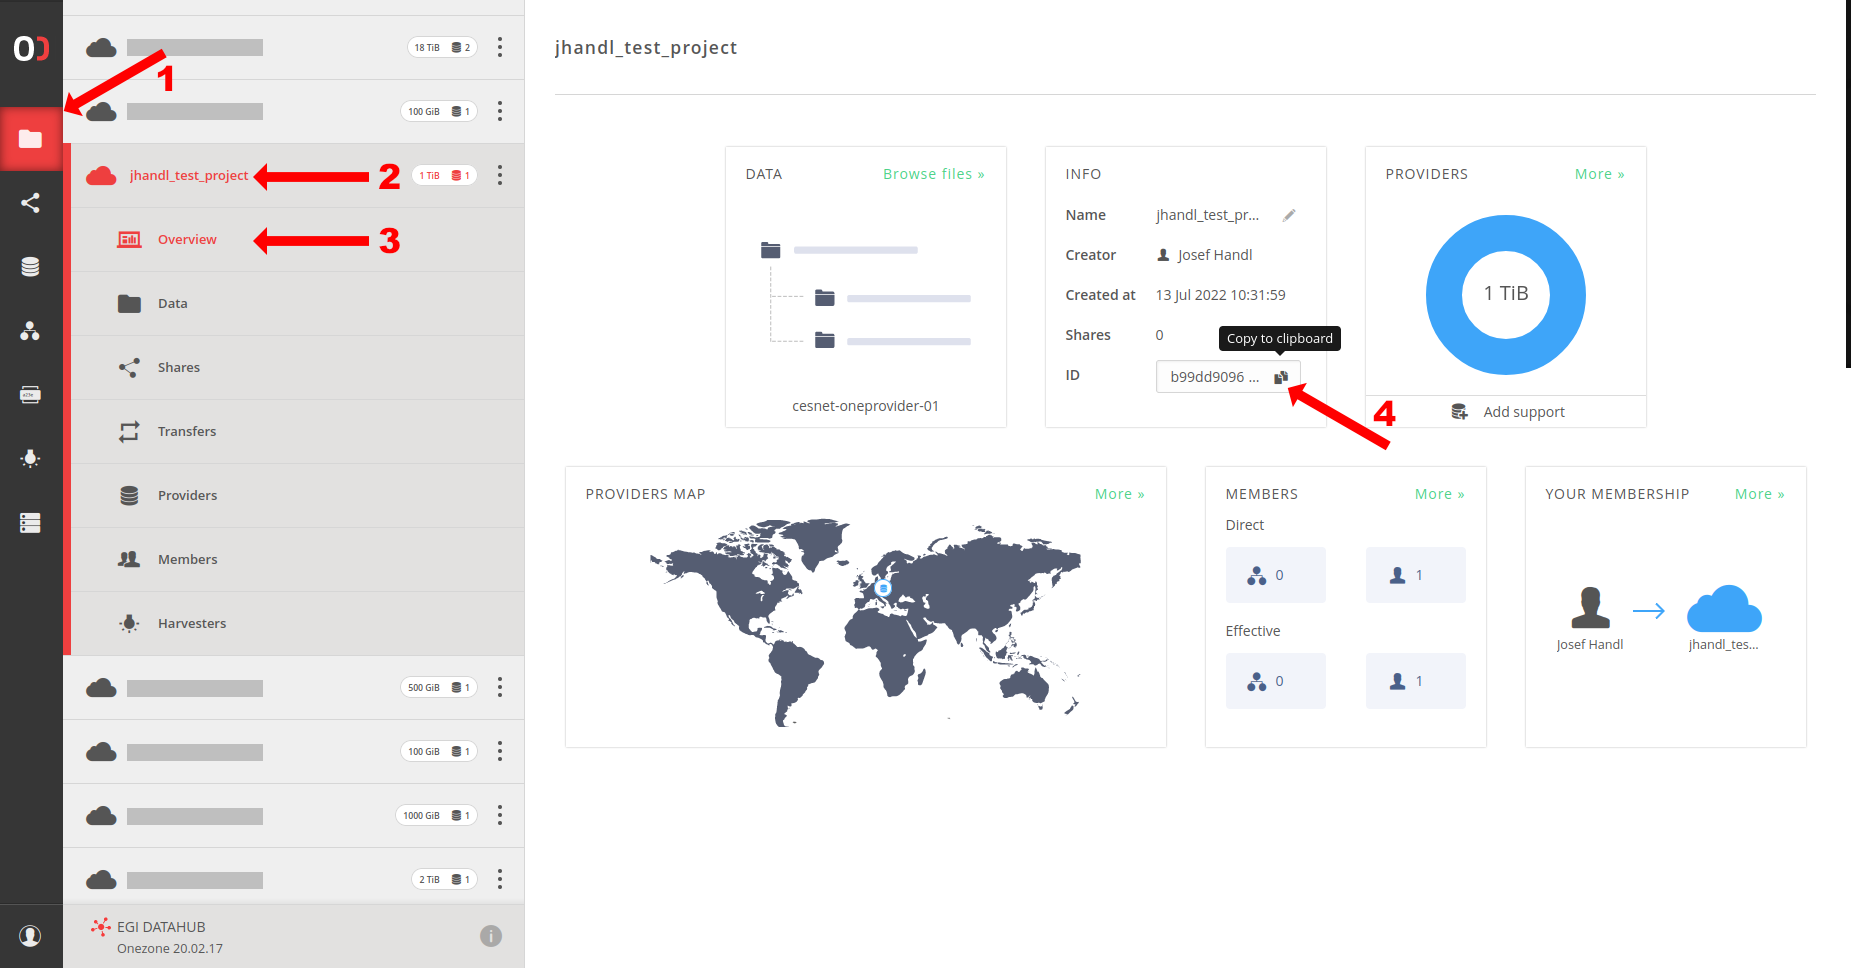
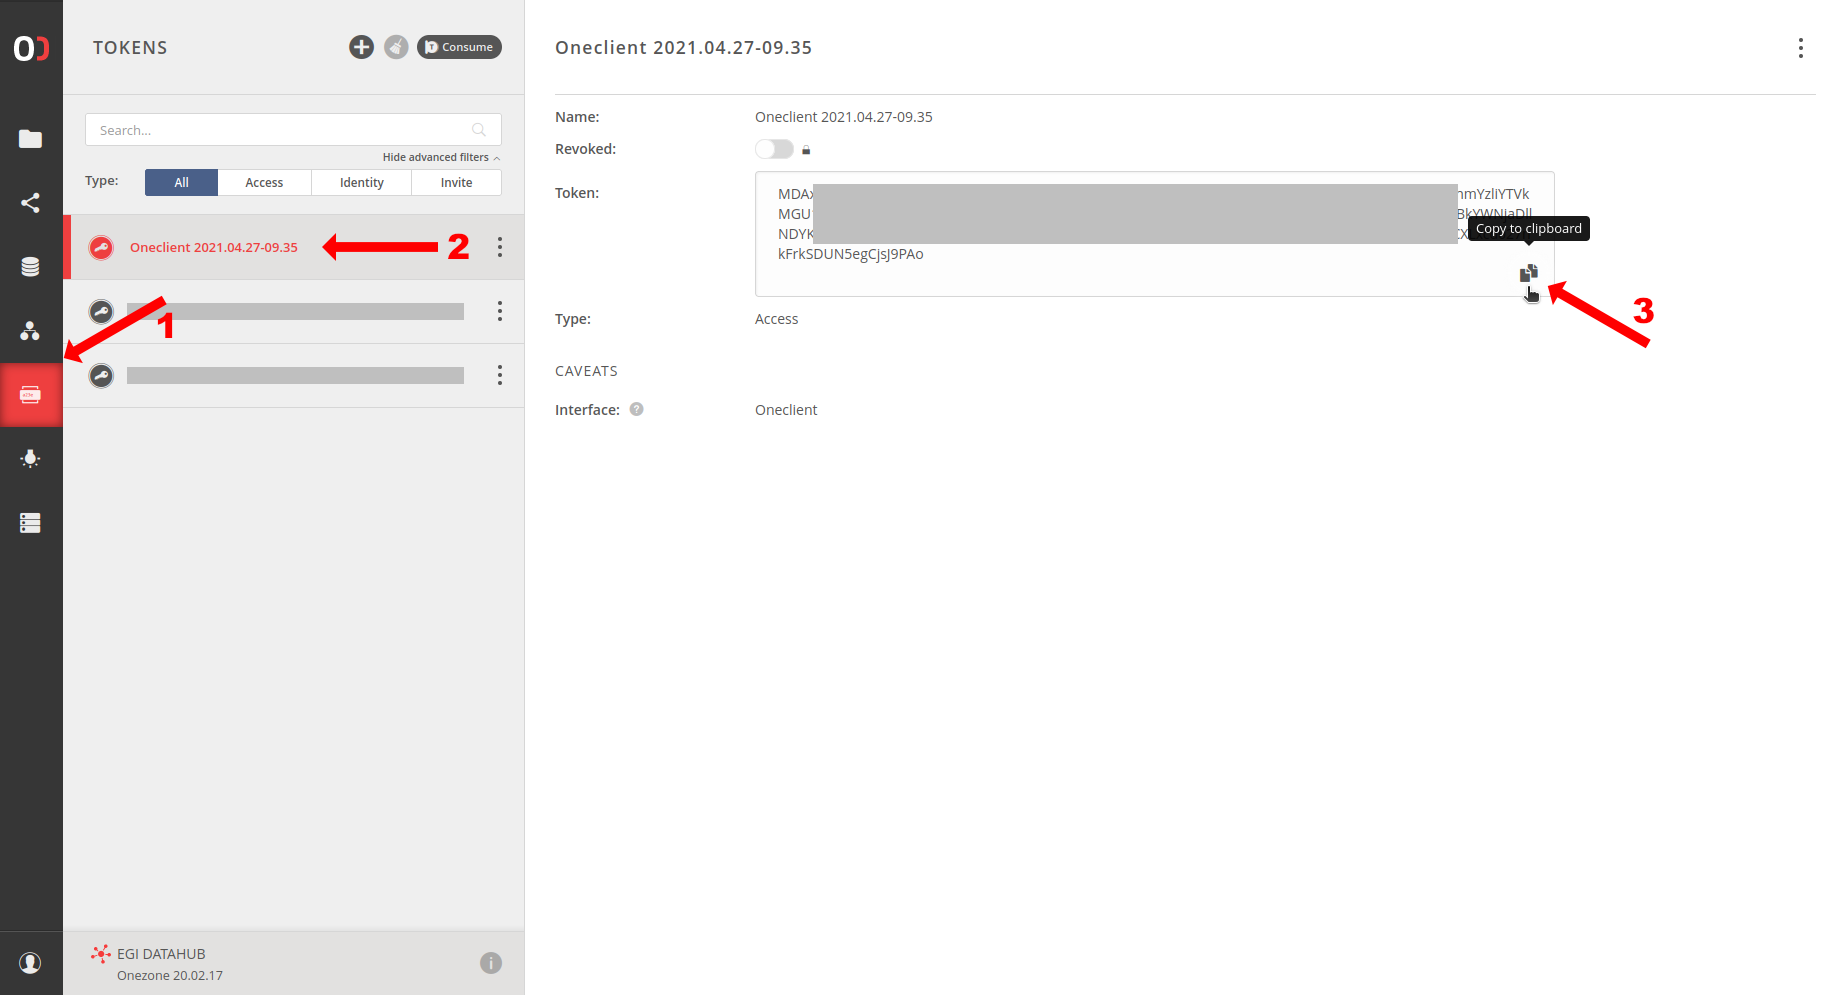
The Onedata items you need to fill to the form are following:
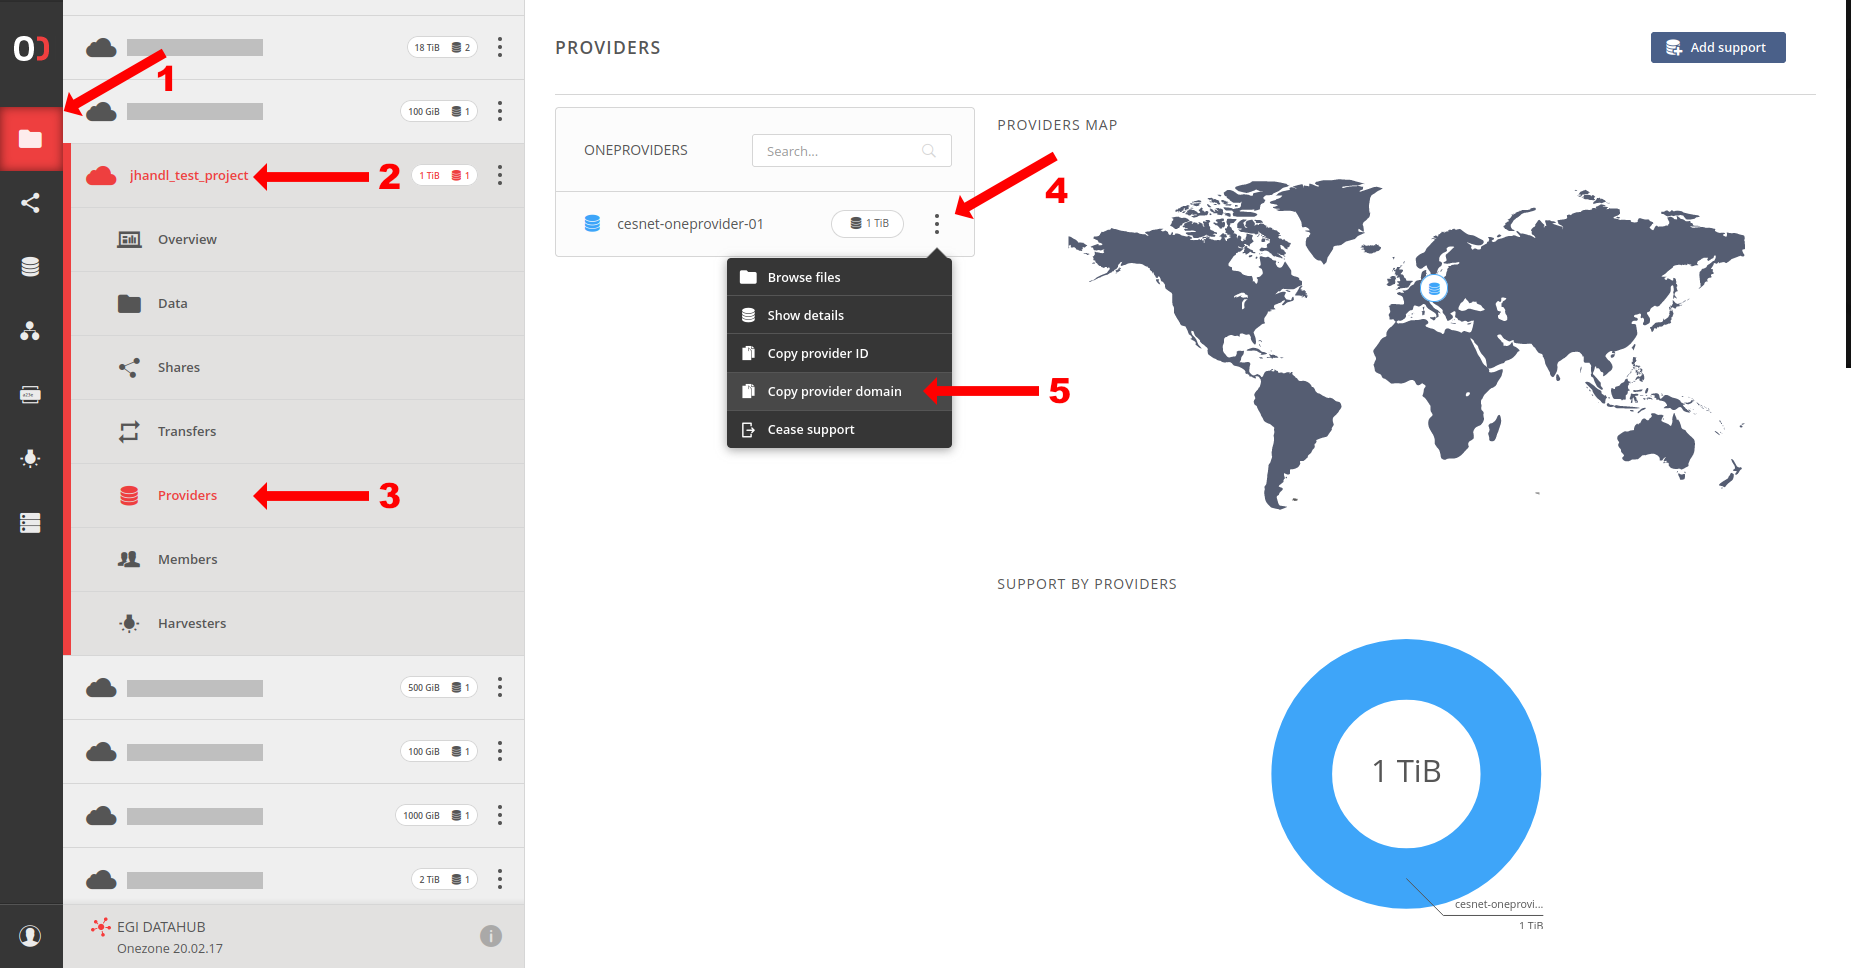
Onedata host(Img. 1) - Domain of theprovidersupporting yourspaces(The application assumes the sameproviderfor bothspaces).Onedata space-ID for source data(Img. 2) - ID of yoursourcespace.Onedata token for source data(Img. 3) - Token to access thesourcespace.Onedata space-ID for project data(Img. 2) - ID of yourprojectspace.Onedata token for project data(Img. 3) - Token to access theprojectspace.
Wait for Application to Start
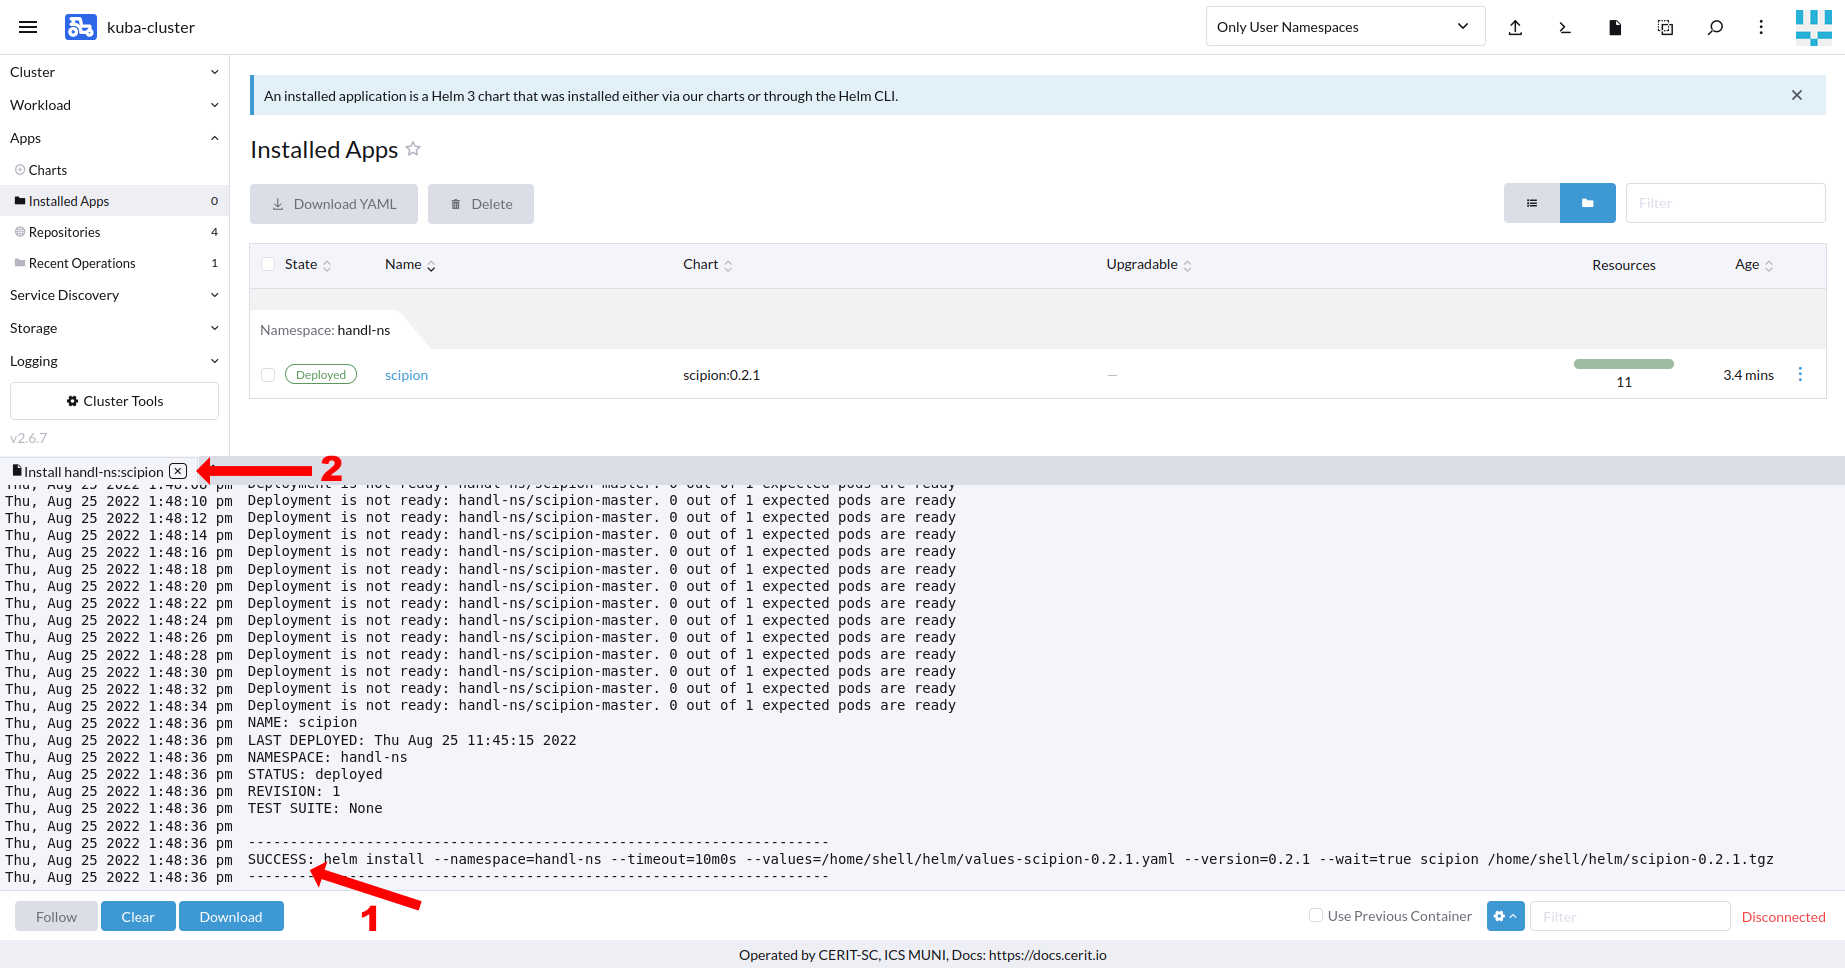
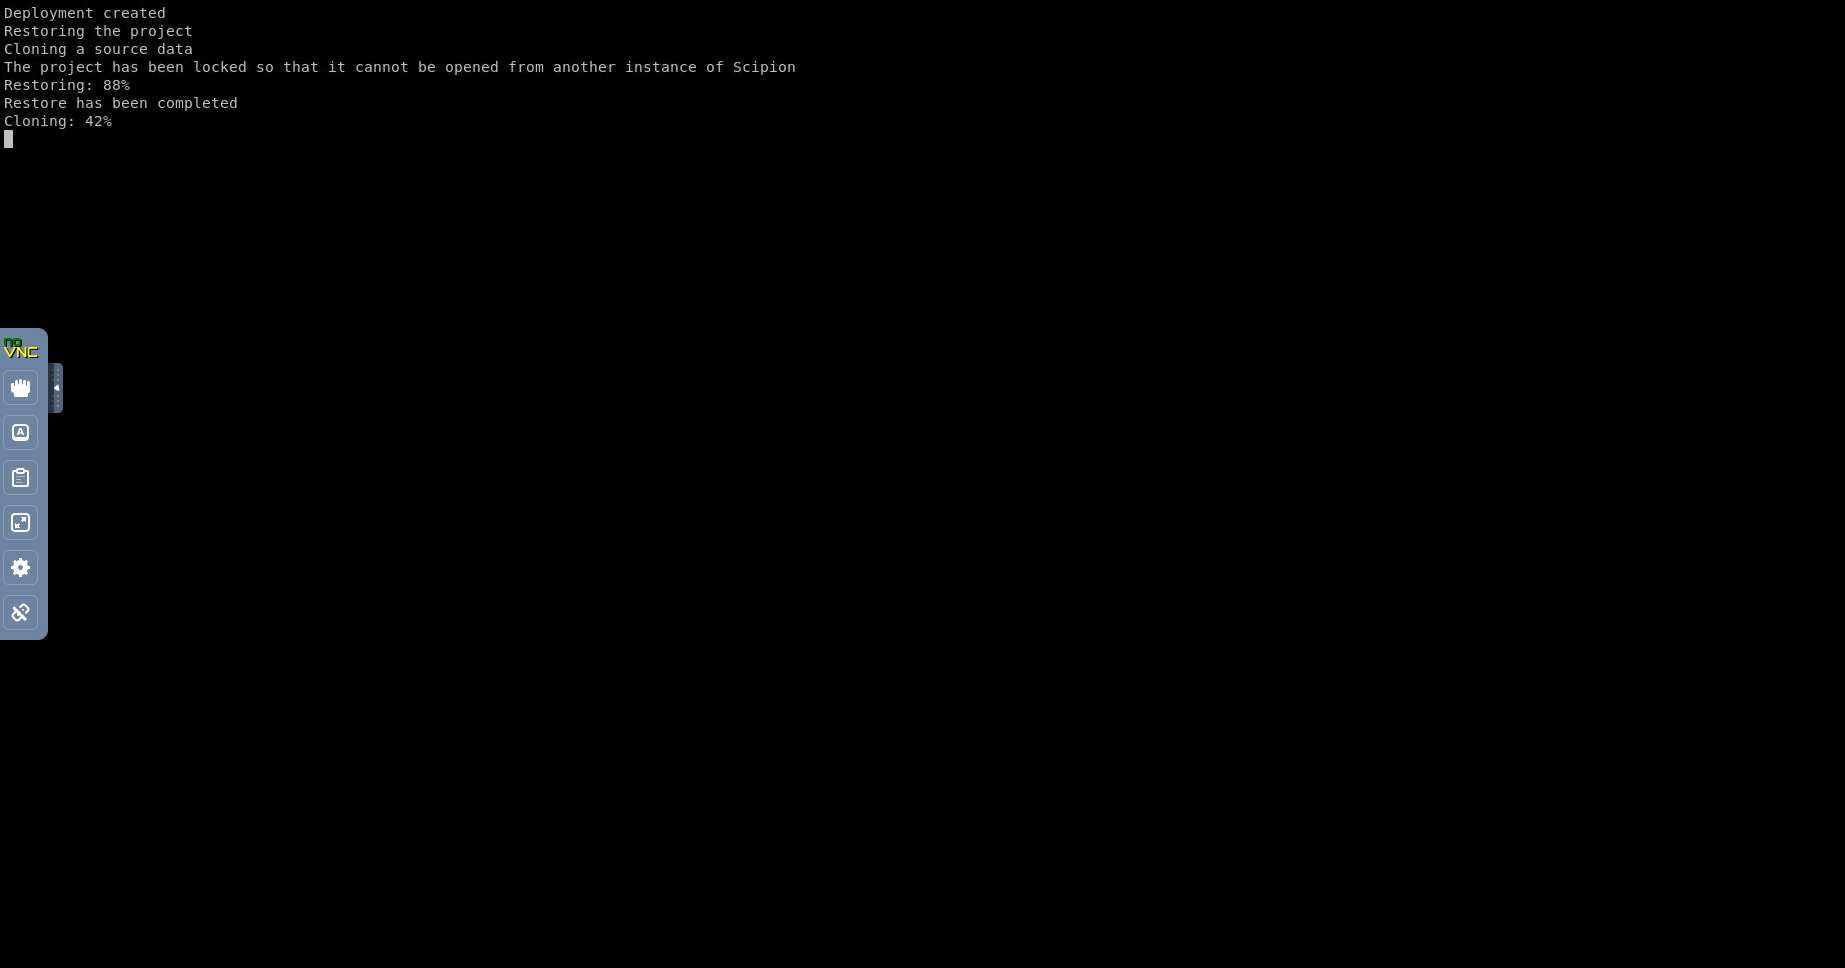
When you hit Install, you will see installation log. Once you see SUCCESS (see screenshot below), the application is running.
Notes
- It can take some time before application is ready, as a large docker image is being downloaded. This action should be completed within 5 minutes.
Connect to the Running Instance
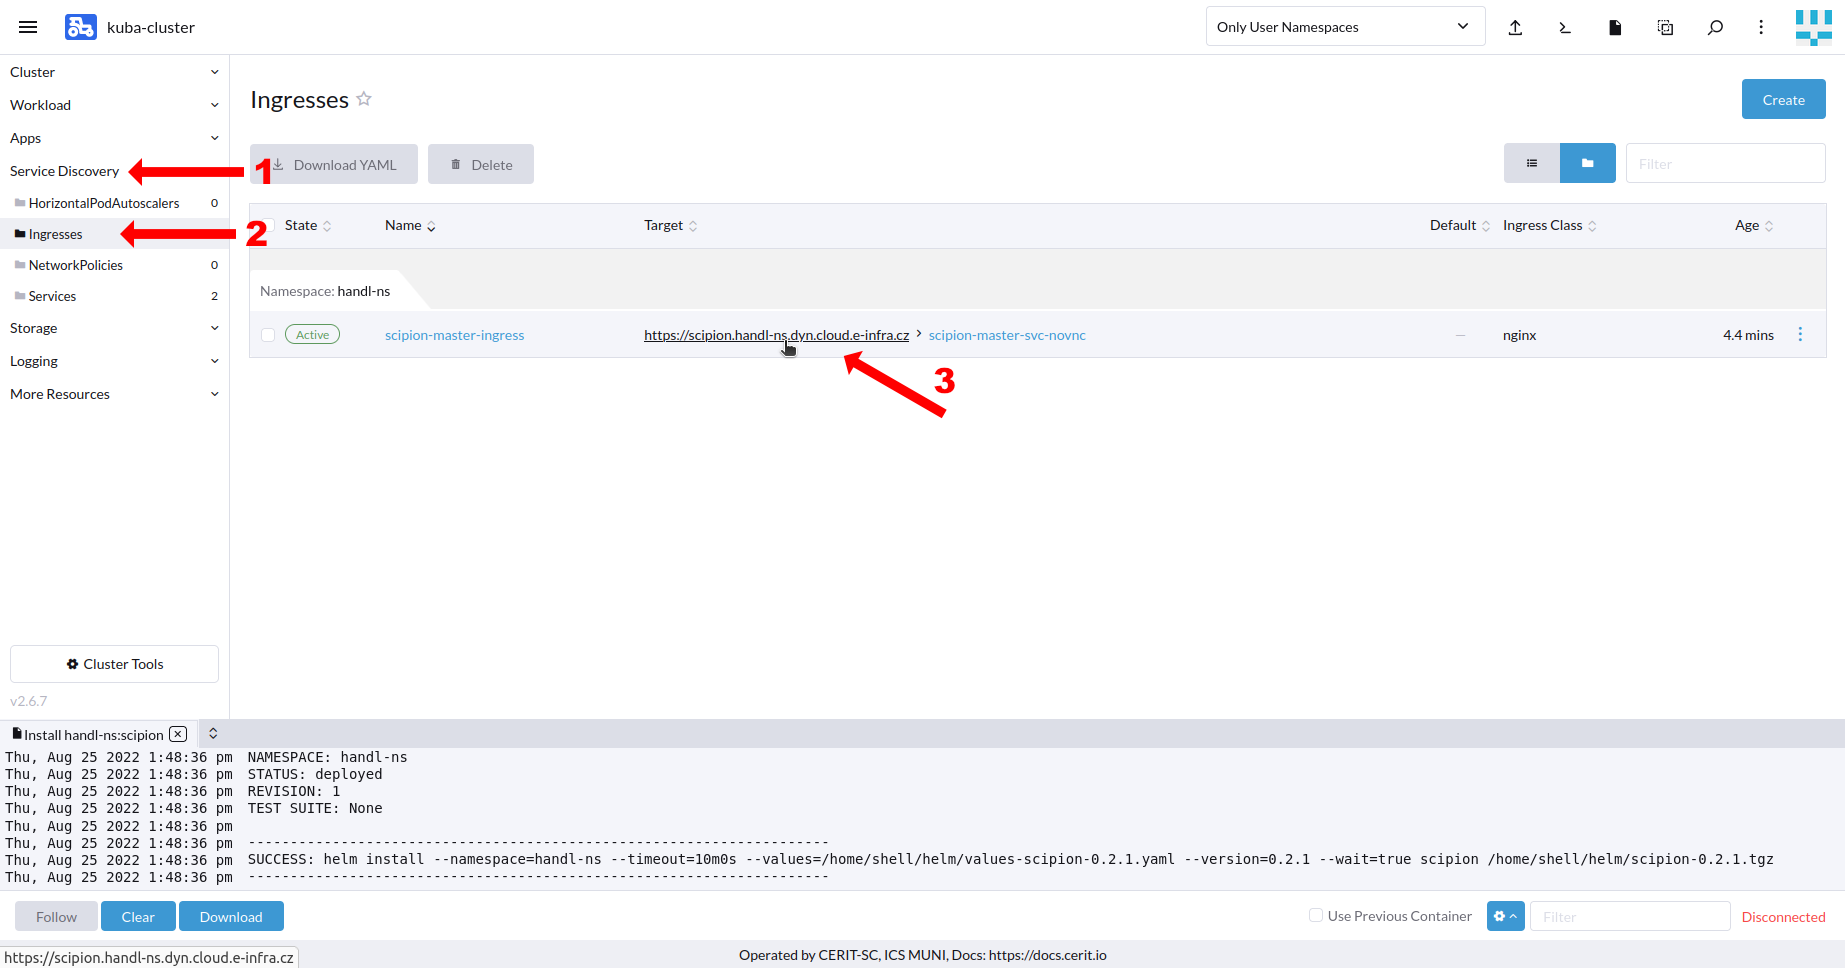
Once the application is running, navigate through Service Discovery (1) and Ingresses (2) and open the Target (3) link.
Since the URL depends only on the namespace you selected in previous step, you can skip finding the URL in Rancher and navigate your browser to the URL with the following format: https://scipion.your-namespace.dyn.cloud.e-infra.cz/. E.g., https://scipion.handl-ns.dyn.cloud.e-infra.cz/.
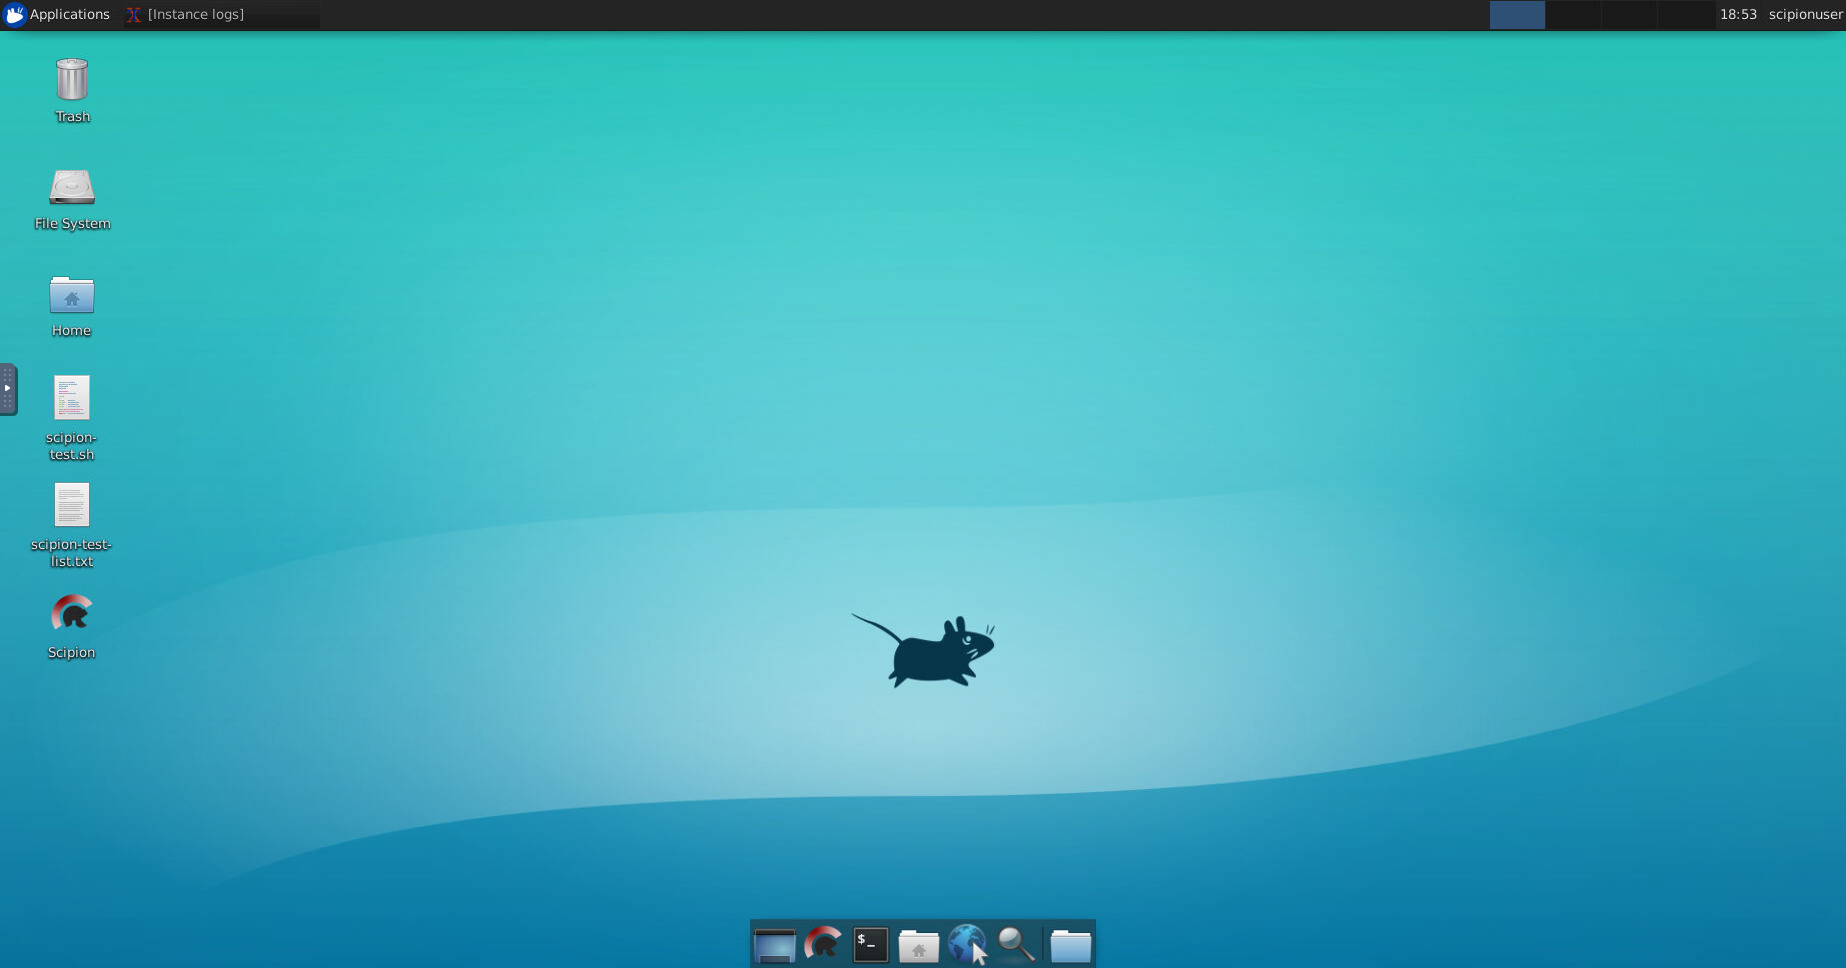
When connecting to the remote desktop of the application, you will be asked to enter the password filled in the form.
Scipion
When the instance is running, you can connect to the remote desktop, but you may still not be able to use the Scipion because the instance synchronizes source and project data. The time depends on the size of the data. For very large source data (terabytes) it can take many hours. If this synchronization phase is still in progress, you will see its progress instead of the desktop environment. The desktop environmet will start after the synchronization stage is complete.
Delete Running Instance
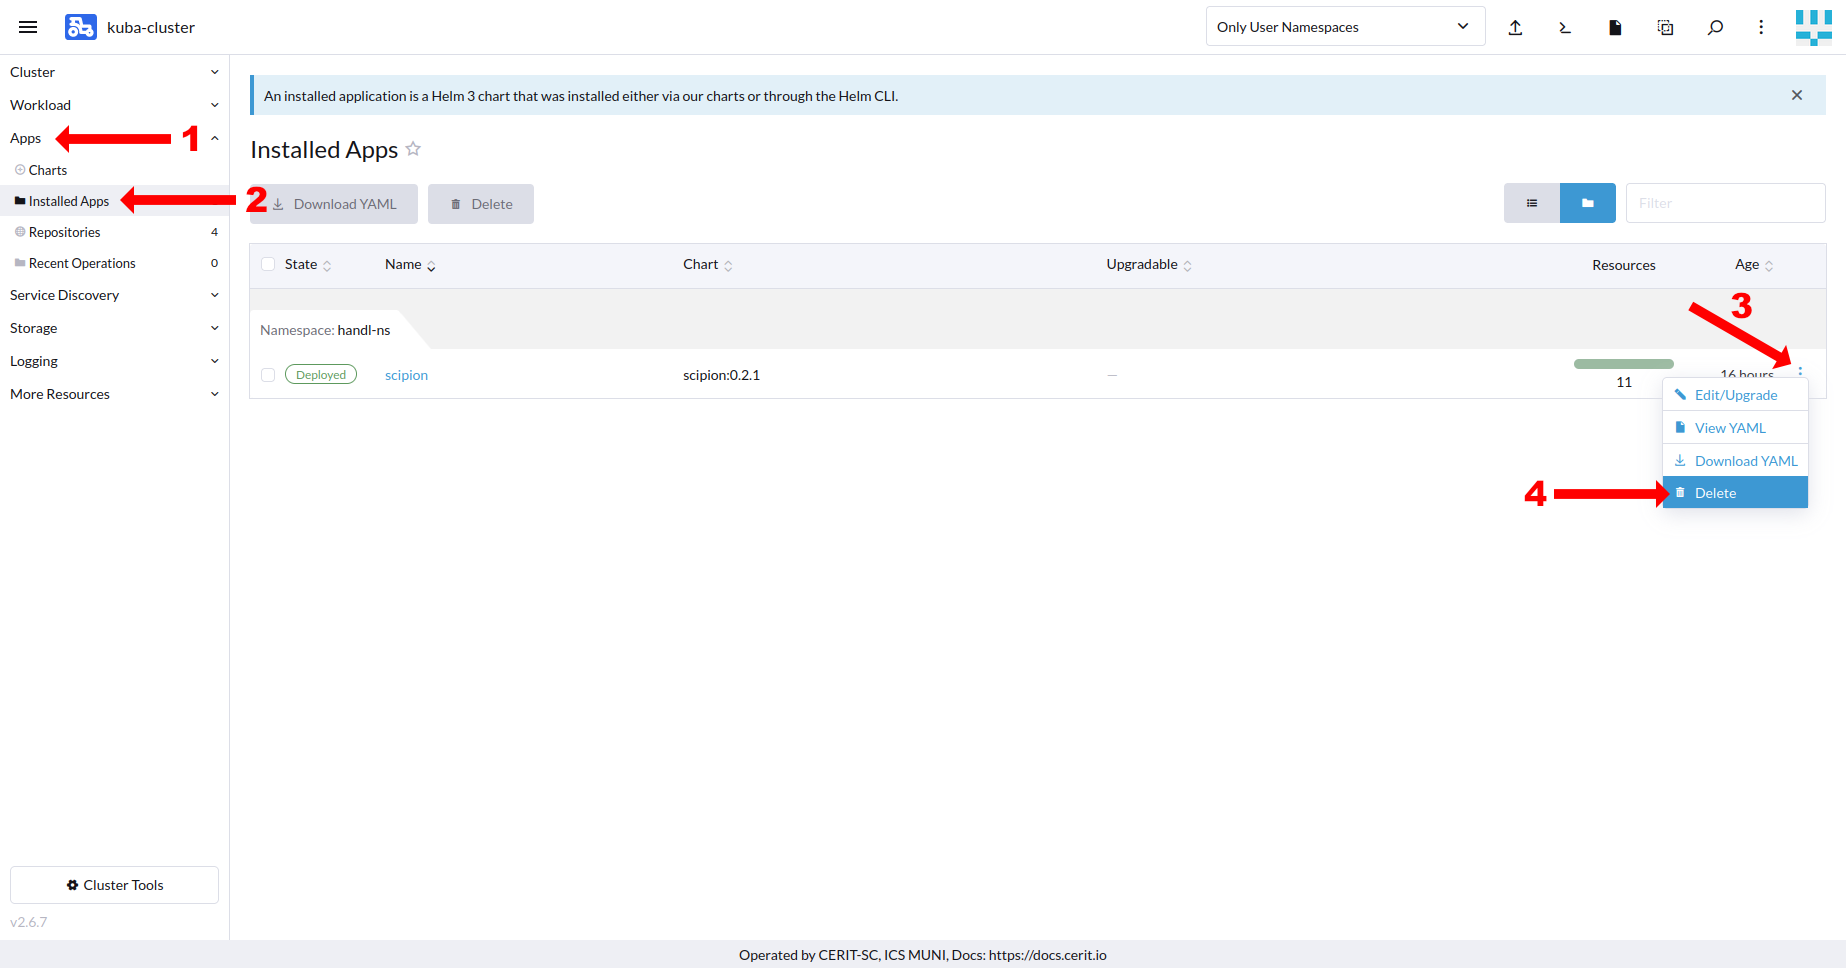
If you feel you do not need the application anymore, you can delete it. Just navigate to App & Marketplace (1), Installed Apps (2), select the application (3) and hit Delete (4). All data saved outside the Onedata storages are deleted.
Technical details about Onedata mounts
This application mounts two onedata spaces - the first is called source, and the second is called project. However, these mounted spaces are not accessible directly from the application. Instead, they are synchronized in the background with kubernetes volumes. The synchronization works with the following logic:
sourcespace–>sourcevolume(one way) - Data is cloned to the volume at startup.projectspace<->projectvolume(both ways) - This synchronization contains 3 steps:- Project (if it exists) is restored at startup (data is cloned from the
spaceto thevolume) - Every few minutes is started automatic save (data is cloned from the
volumeto thespace). - When deleting the application, the sync daemon receives a stop signal and performs a final save of the project (data is cloned from the
volumeto thespace).
- Project (if it exists) is restored at startup (data is cloned from the
These two volumes are mounted in the /mnt directory, but for convenience they are symlinked from ~/ScipionUserData/source and ~/ScipionUserData/projects. Scipion implicitly uses the ~/ScipionUserData/projects directory to store a project data. The ~/ScipionUserData/source directory is designed as read-only.
Please keep in mind that any data stored outside the project volume (synchronized with the project space) will be lost when the application is deleted.