Running ShinySOM
If not already logged, log to rancher.cloud.e-infra.cz, see Rancher section.
Following the steps below, you can install ShinySOM web application. This application has persistent home directory, it means, that if you delete the application and later install the application again preserving its name, content of home directory will be preserved.
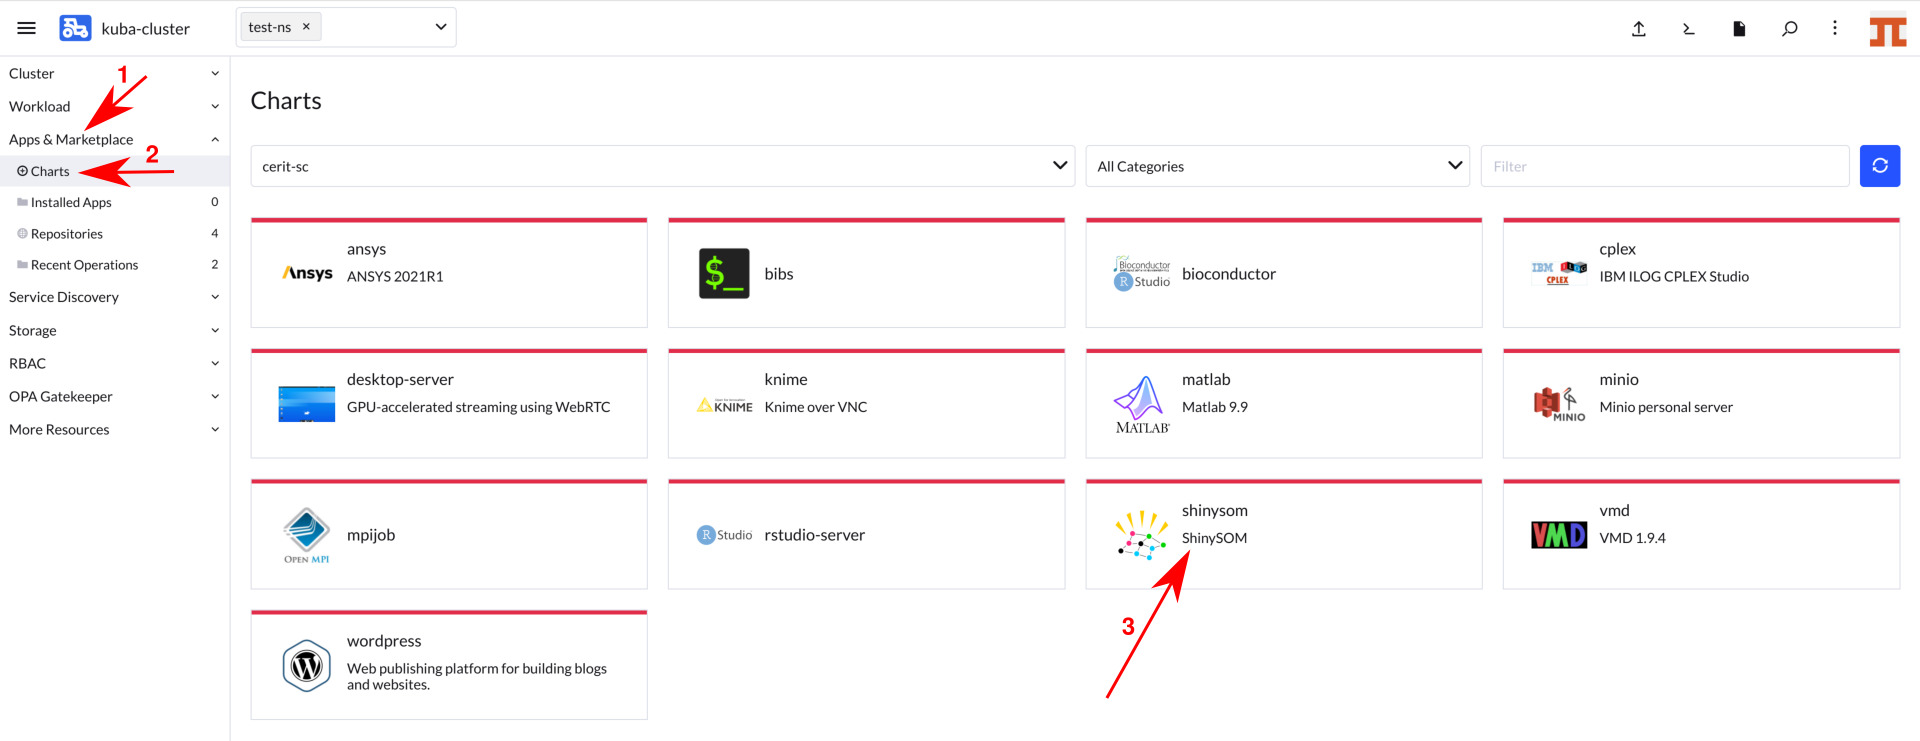
Select Application to Run
Navigate through App & Marketplace (1), Charts (2) and select ShinySOM (3). See screenshot below.
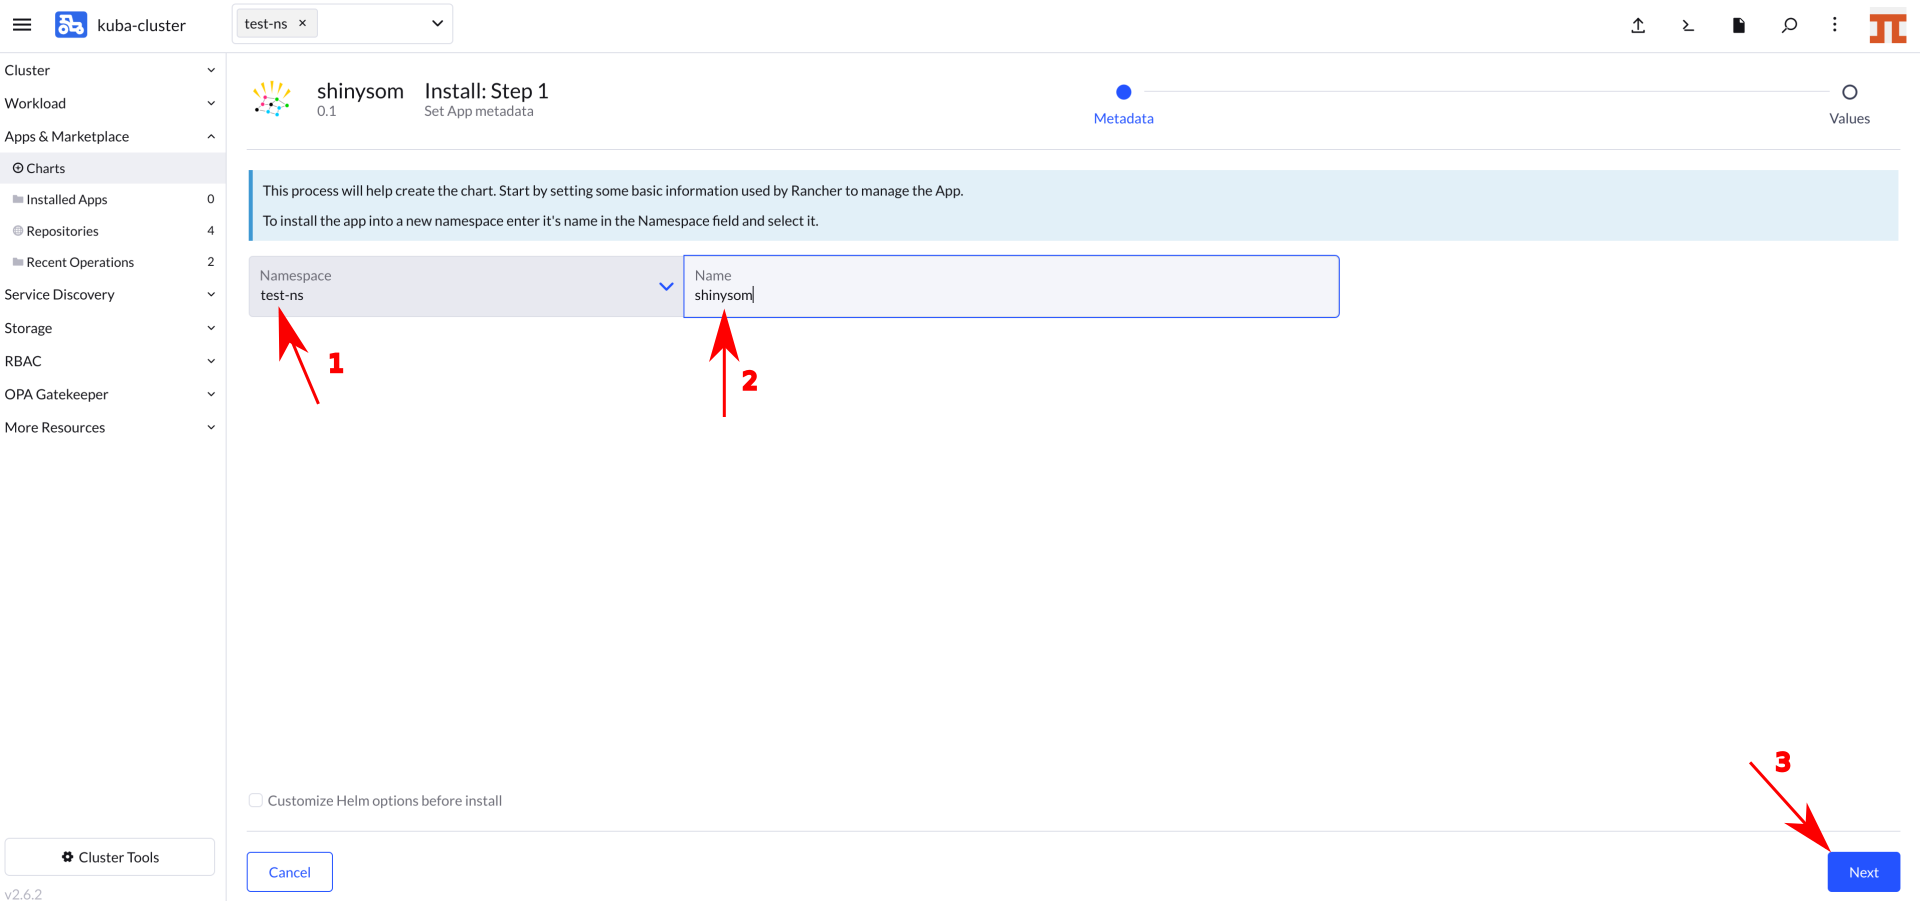
Install the Application
Now you can install the ShinySOM application. In most cases, keep both Namespace (1) and Name (2) intact, however, you can select namespace as desired except default. The default namespace is available but it is not meant to be used. The Name will be in URL to access the application. The Name must be unique in the Namespace, i.e., you cannot run two or more instances with the same Name in the same Namespace. If you delete the application and later install the application again preserving its Name, content of home directory will be preserved.
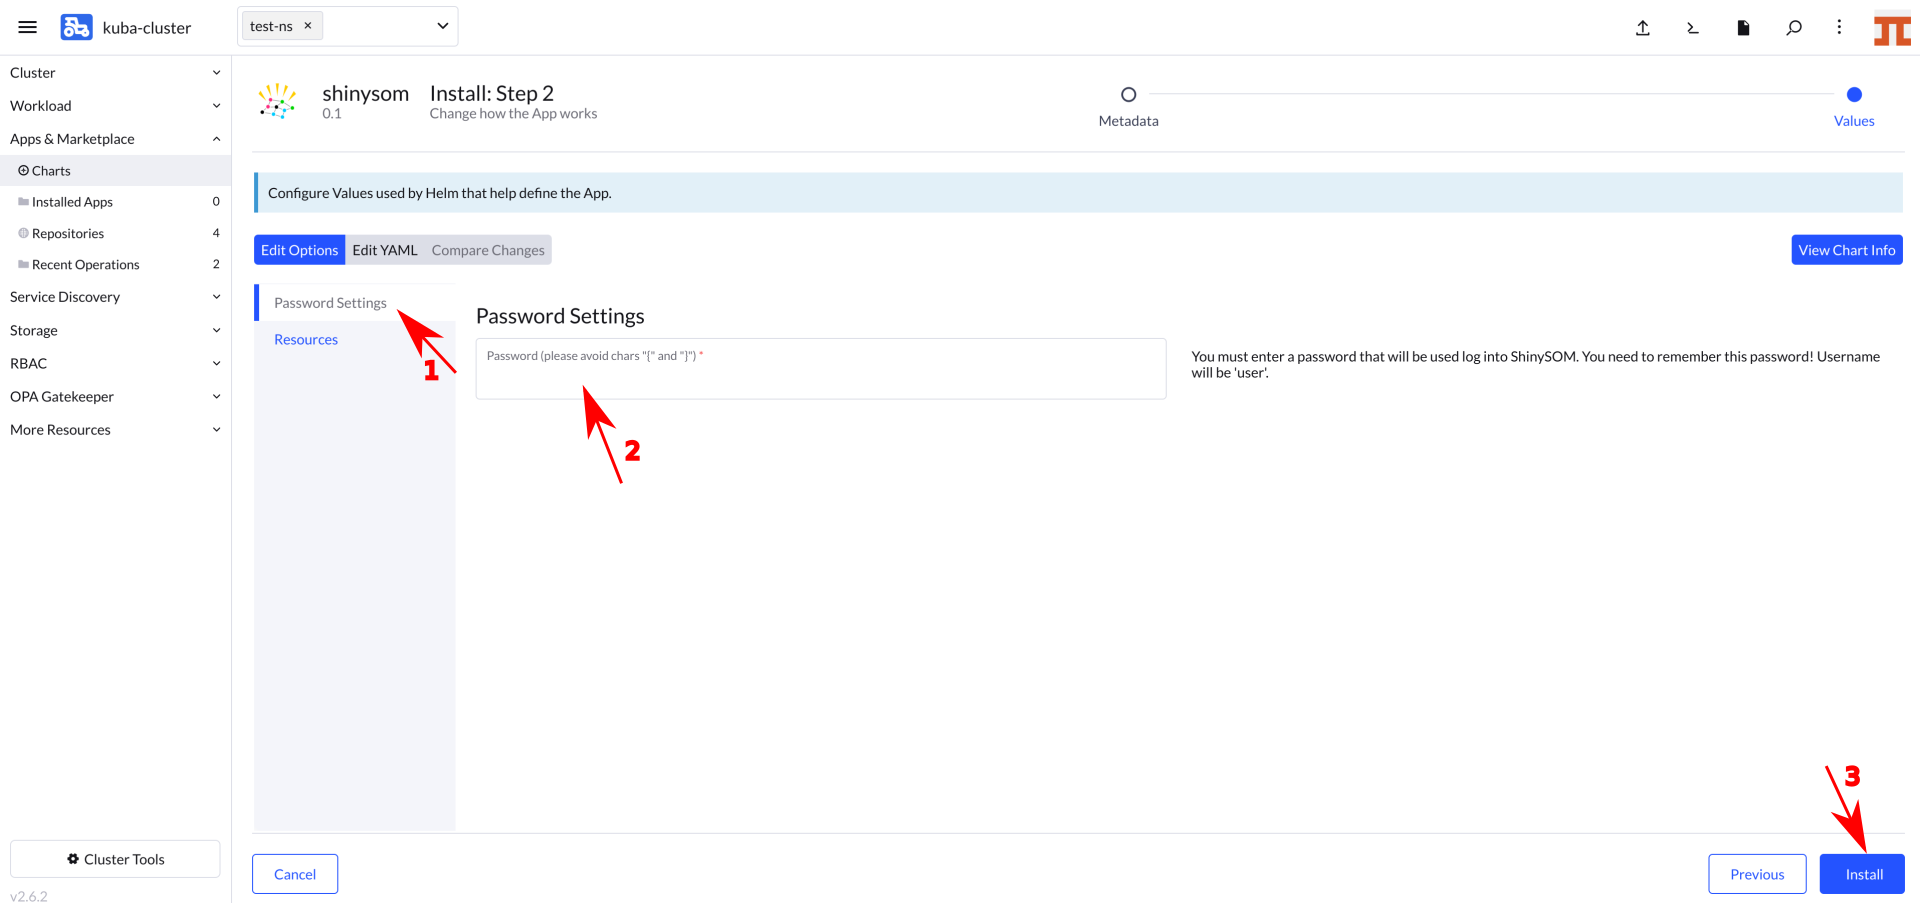
In the first part of the form, you select access password, please avoid chars like {, }, non trivial password is strongly recommended, however, it is also strongly recommended not to use a password you already use somewhere else. Username will be just user.
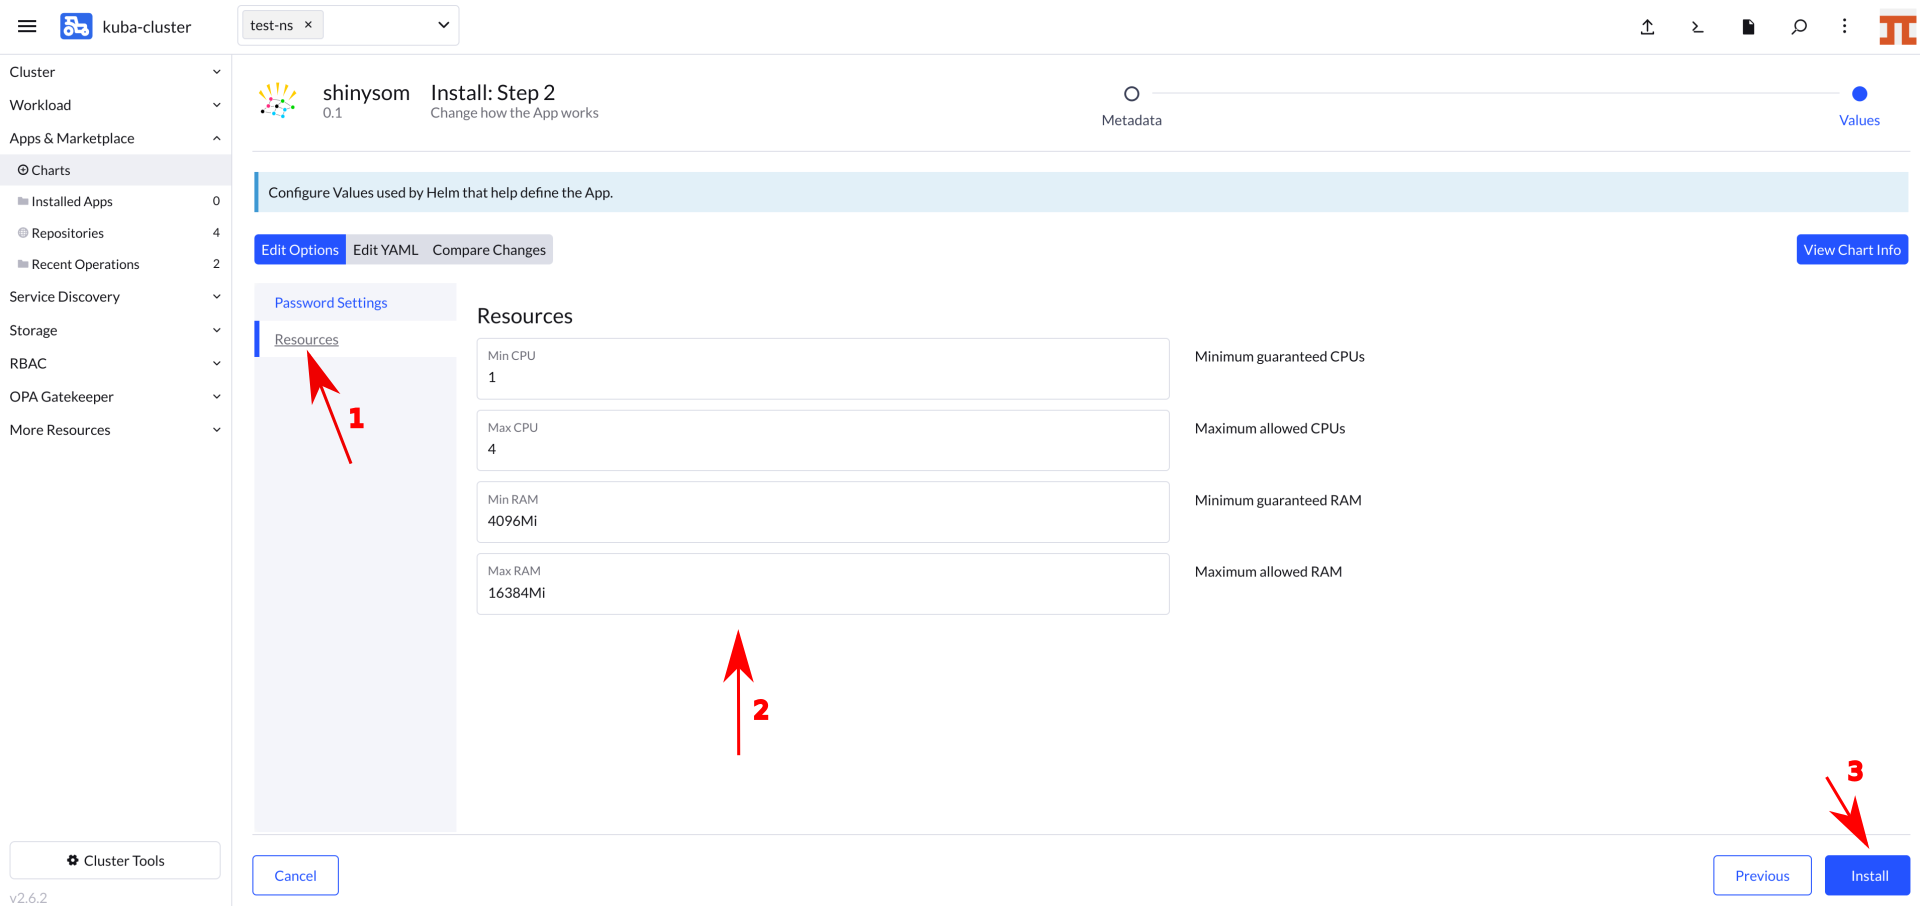
In the second part of the form, you can select requested resources. This step is optional. Minimum CPU or RAM is guaranteed amount of CPU and RAM, system reserves these resources for the application. However, the application can exceed guaranteed resources up to Maximum. However, in this case, resources are not exclusive and can be shared among other applications. If the application exceeds Maximum CPU, it gets limited, if it exceeds Maximum RAM, it gets terminated (you will see OOMKill report) and restarted.
Wait for Application to Start
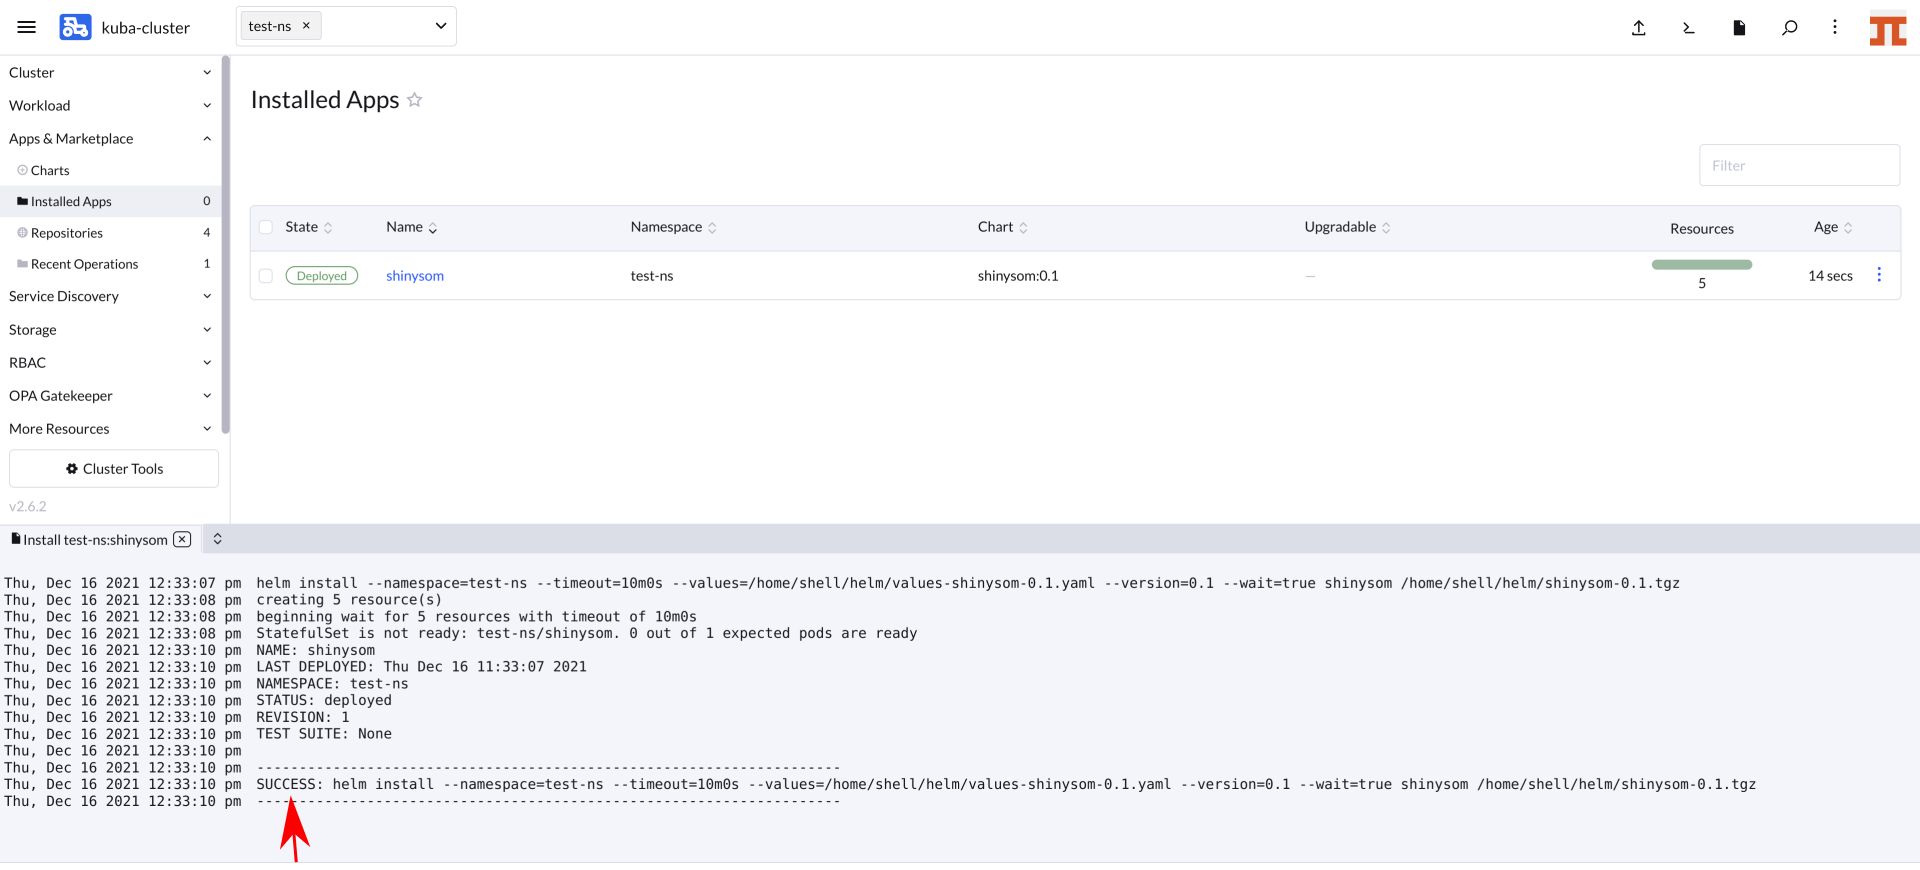
When you hit Install, you will see installation log. Once you see SUCCESS (see screenshot below), the application is running.
Login to the Running Instance
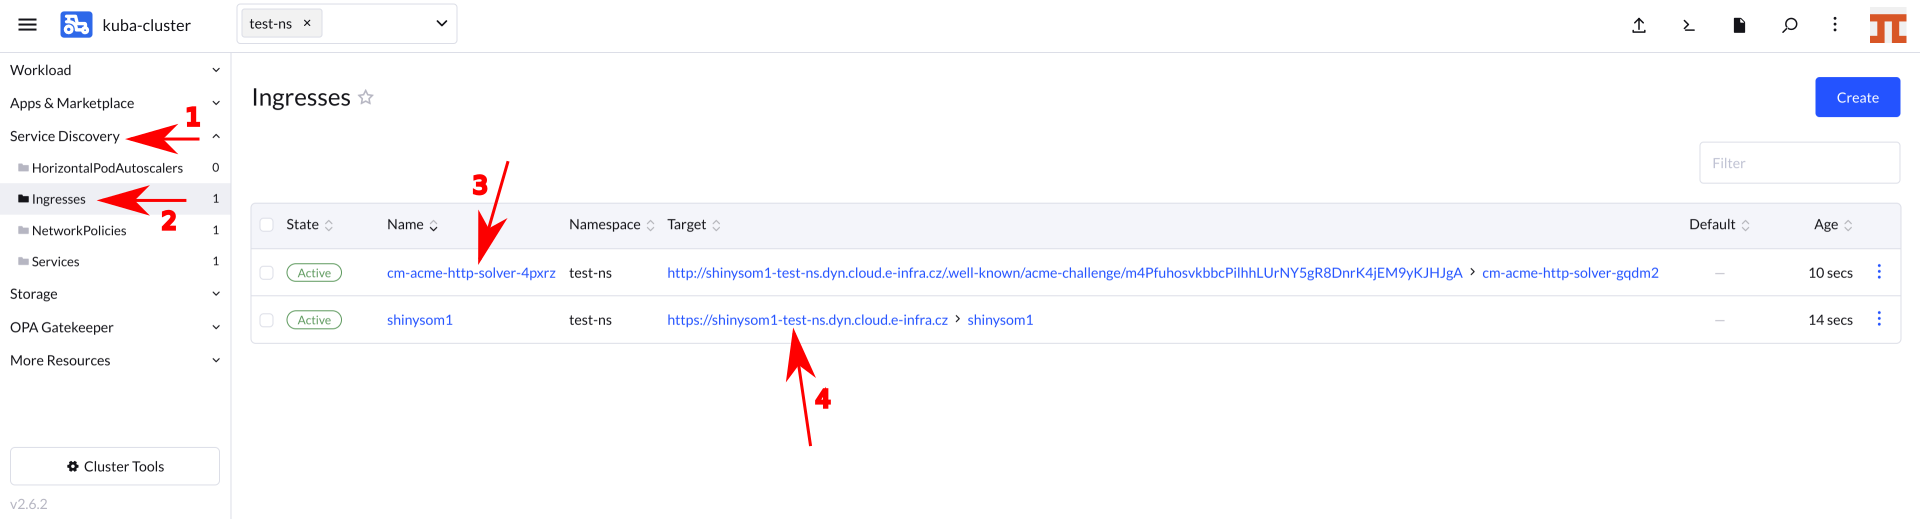
Once the application is running, navigate through Service Discovery (1) and Ingresses (2). You will see Ingresses. If you see cm-acme-http-solver... (3), wait until it disappears. Once you see shinysom or whatever Name you used in the previous steps, you can click on Target (4) to log in to the application.
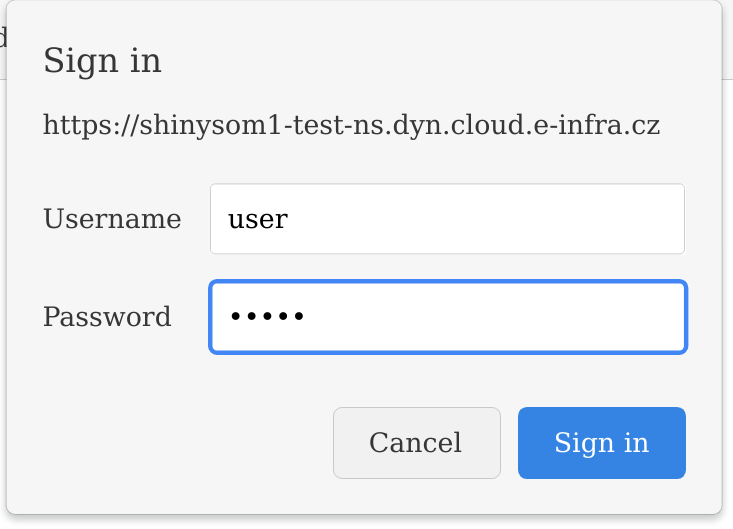
You will see log in window, use user as login name and the selected password from the from.
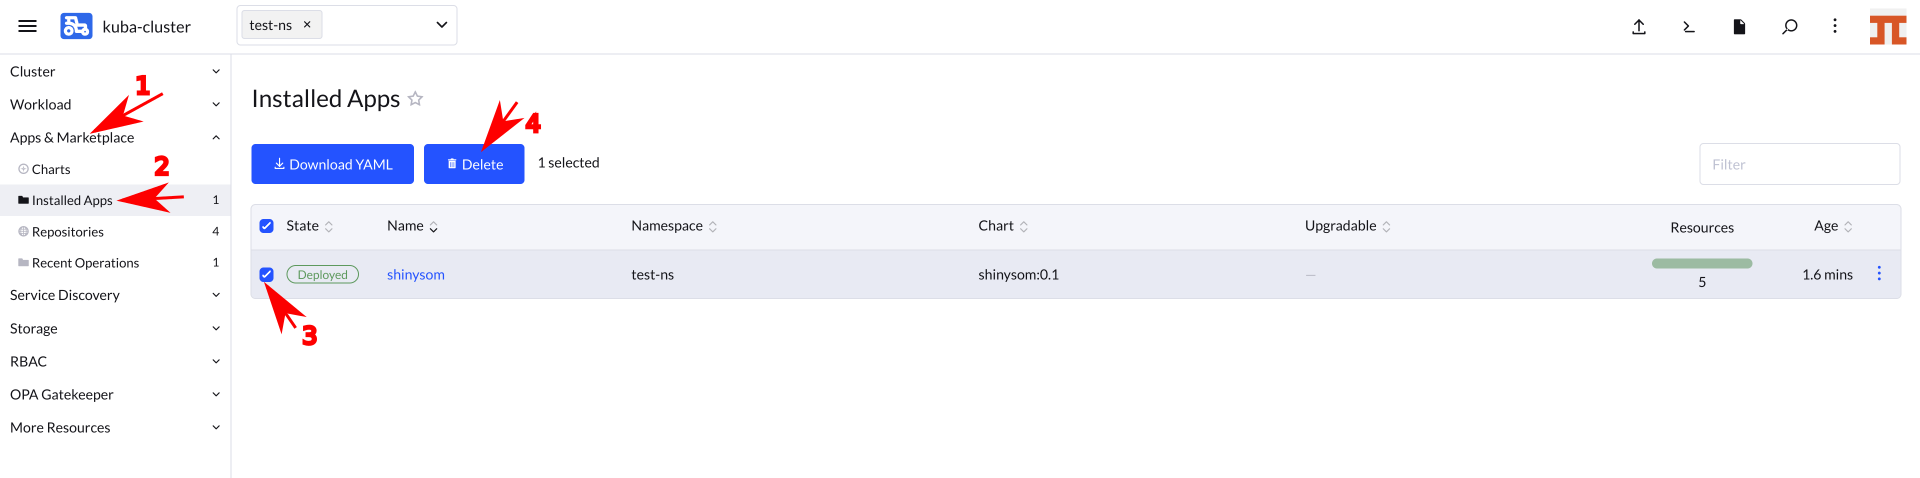
Delete Running Instance
If you feel you do not need the application anymore, you can delete it. Just navigate to App & Marketplace (1), Installed Apps (2), select the application (3) and hit Delete (4). The data in home directory is not deleted. Running the application again with the same Name restores access to the home directory folder.