 Documentation
(Deprecated) VPN Configuration Guide for Sensitive Cloud
A Virtual Private Network (VPN) allows secure access to environments that are isolated from the public internet. At CERIT-SC, we use WireGuard VPN technology. To begin using the VPN, you must first request access and receive the necessary configuration details.
Please refer to the next section for instructions on how to obtain access.
Obtaining VPN Access
To gain access to secure resources via our VPN, contact our support team at:
trusted(at)e-infra.cz
Connecting to the VPN with WireGuard
The following guide explains how to configure your WireGuard VPN client using the configuration files provided upon registration.
Make sure your configuration includes an IPv6 address derived from your IPv4 address.
The IPv4 format is: 10.18.x.y/32
The corresponding IPv6 format is: 2001:718:801:390:10:18:x:y/128
The IPv6 address uses : as a separator. A format like 2001:718:801:390:10.18.x.y might be accepted by the system, but it will not work. It must be exactly: 2001:718:801:390:10:18:x:y
The AllowedIPs field in your configuration should be set to:
AllowedIPs = 10.16.48.0/25, 10.16.62.0/23, 147.251.33.144/28, 147.251.33.160/30, 2001:718:801:42bf:8:4::/96, 2001:718:801:42d8:8:4::/96, 2001:718:801:42d9:8:4::/96Never share your PrivateKey. It must remain confidential. The rest of the configuration is not considered sensitive.
Each WireGuard configuration file is intended for use on a single device only. If you need to connect from multiple devices, please request separate configurations for each one.
-
Install WireGuard
Download the WireGuard installer for Windows here and follow the installation instructions. -
Create Configuration File
- Create a configuration file named
sensitive-vpn.conf. Save this file securely within your personal directory, for example:C:\Users\<username>\Documents\sensitive-vpn.conf - Example configuration file contents (replace placeholders with values provided by our support team):
[Interface]
PrivateKey = DESKTOP_CLIENT_PRIVATE_KEY
Address = 10.0.0.2/24

[Peer]
PublicKey = SERVER_PUBLIC_KEY
Endpoint = SERVER_IP_ADDRESS:PORT
AllowedIPs = 0.0.0.0/0
- Create a configuration file named
-
Launch WireGuard Application
-
Import VPN Configuration
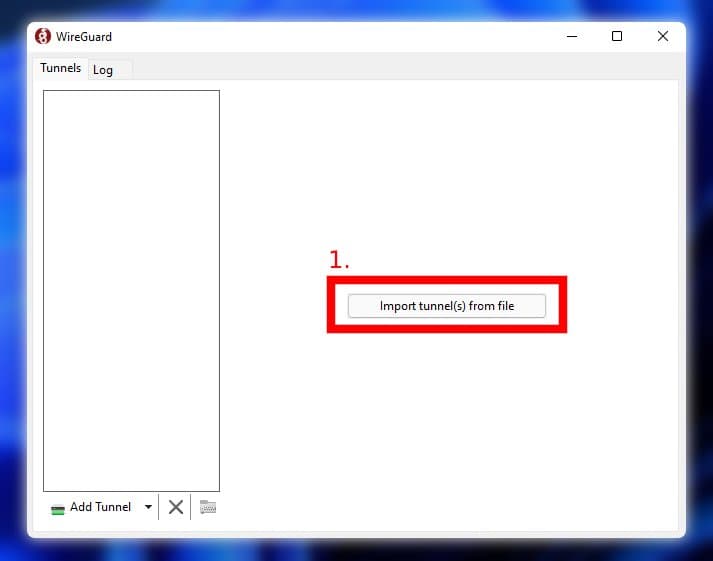
- From the WireGuard interface, click “Import tunnel(s) from file”.
- Select the previously created
sensitive-vpn.conf.
-
Connect to VPN
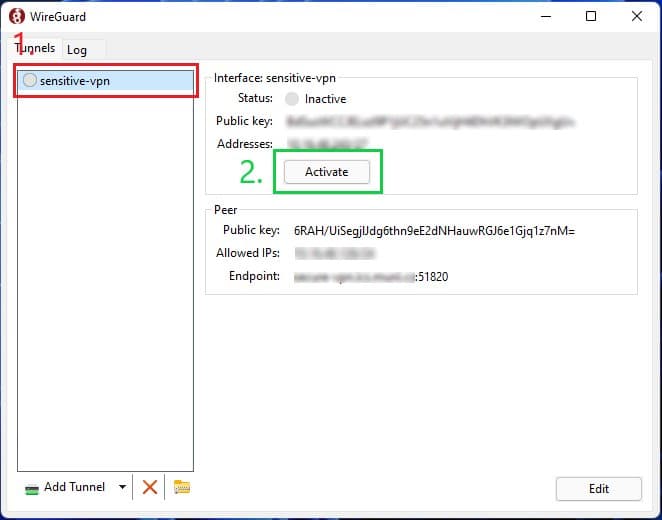
- Select the imported VPN tunnel.
- Click “Activate”.
-
Disconnecting
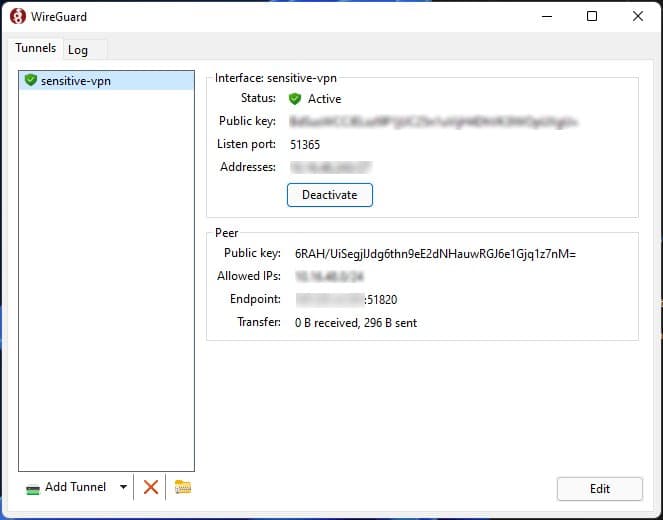
- To deactivate the VPN, select the active tunnel and click “Deactivate”.
Last updated on